
TO FIND A SPECIFIC RECIPE PRESS CONTROL OR COMMAND+F AND ENTER WHAT YOU’RE LOOKING FOR.
Please follow me on Instagram to see what I’ve baked most recently.
My Starters:
Randolph- 100% Dark rye flour @110% hydration / Stored in refrigerator and fed weekly or twice before baking.
Mortimer- 100% Whole wheat flour @100% hydration / Stored in refrigerator and fed weekly or twice before baking.
First Loaves – May 10-11, 2020
Recipe: 20% Levain inoculation (Randolph), 60% bread flour, 30% whole wheat flour, and 10% dark rye flour…73% hydration 2.2% sea salt. Autolyse: 1 hour / Bulk Fermentation: 5.5 hours w/ 3 sets of stretch and folds. Overnight proof/retard ∼ 15 hours. Baked 20 minutes covered and 25 minutes uncovered.
Techniques used: I used the Food Geek’s bread calculator to make the recipe and a combo of his and Joshua Weissman’s shaping methods. To guide myself through the dough production, fermentation, and baking process, I followed the Flex Bake schedule by Sourdough U (aka Pro Home Cooks) (it can be found here 5 Sourdough Bread Checklists).
Results: My first sourdough loaves came out of the oven looking awesome and tasting great (once cooled of course). Really balanced flavor and great texture.


Second Bake – May 17-18, 2020
Recipe: 20% Levain inoculation (Mortimer), 60% bread flour, 25% whole wheat flour, and 15% dark rye flour…76% hydration 2.2% sea salt. Autolyse: 1 hour / Bulk Fermentation: 5.5 hours w/ 4 sets of stretch and folds. Overnight proof/retard ∼ 15 hours. Baked 20 minutes covered and 25 minutes uncovered.
Techniques used: As with my first loaves I used the Food Geek’s bread calculator to make the recipe and a combo of his and Joshua Weissman’s shaping methods. Because I prepped the dough on Sunday and baked on Monday, I was able to once again follow the Flex Bake schedule by Sourdough U (aka Pro Home Cooks) (it can be found here 5 Sourdough Bread Checklists).
Results: Though I didn’t get as much oven spring as I would liked in the boule, both loaves came out looking and tasting great. I preferred the crumb on the batard and surmised that it looked better due to the shaping being gentler on the dough. I tried a couple scoring patterns which came out okay.


Third Bake – May 27-28
Recipe: 20% Levain inoculation (Randolph), 65% bread flour, 20% whole wheat flour, and 15% dark rye flour…75% hydration 2.2% sea salt. Autolyse: 1 hour / Bulk Fermentation: 5.5 hours w/ 3 sets of stretch and folds. Overnight proof/retard ∼ 15 hours. Baked 20 minutes covered and 25 minutes uncovered.
Techniques used: I once again used the Food Geek’s bread calculator to make the recipe and a combo of his and Joshua Weissman’s shaping methods. This time baked in the middle of the week, so I followed the 9 to 5 schedule by Sourdough U (aka Pro Home Cooks) (it can be found here 5 Sourdough Bread Checklists).
Results: Oven spring on both loaves was even and the crust was delicious. Once again I tried a couple new scoring techniques with debatable success. This bake convinced me that my cheap bread lame wasn’t doing the trick and I needed to do some research about which one would be best for me to improve my scoring skills.


Fourth Bake – June 5 – 2 different doughs
Kalamatta olives, black pepper, and lemon zest boule
Recipe: 130g starter (Randolph), 90% bread flour and 10 % dark rye flour…75% hydration 2.2% sea salt. Autolyse: 1 hour / Bulk Fermentation: 5 hours w/ 3 sets of stretch and folds. 125g chopped olives, 1.25 tsp black pepper, and the zest of one lemon during the second set of stretch and folds. Warm kitchen proof. Baked 20 minutes covered and 25 minutes uncovered.
Techniques used: For this loaf I used Food Geek’s (Sune Trudslev) Sourdough Olive Bread recipe as a guide and did further research in order to figure out how much lemon zest and black pepper to add to the dough. As I went through the process I followed along with Sune’s video for this recipe and paid extra close attention while he added the olives and when he shaped the his loaves. In terms of tracking my process, I followed “The One Day Bake” schedule by Sourdough U (aka Pro Home Cooks) (it can be found here 5 Sourdough Bread Checklists).
Results: Flavor and crumb-wise this loaf turned out great. Though at first I felt that the lemon zest was a bit overpowering; the more I ate of this loaf, the more I enjoyed the combination of flavors. When I got a bite with all 3 extra ingredients I was in foodie heaven. In terms of improvements for future bakes…I would like to do an overnight retard/proof instead of proving in a hot kitchen. I believe that this loaf may have over-proved and/or over-fermented which in turn led to less oven spring and an over soft crust.
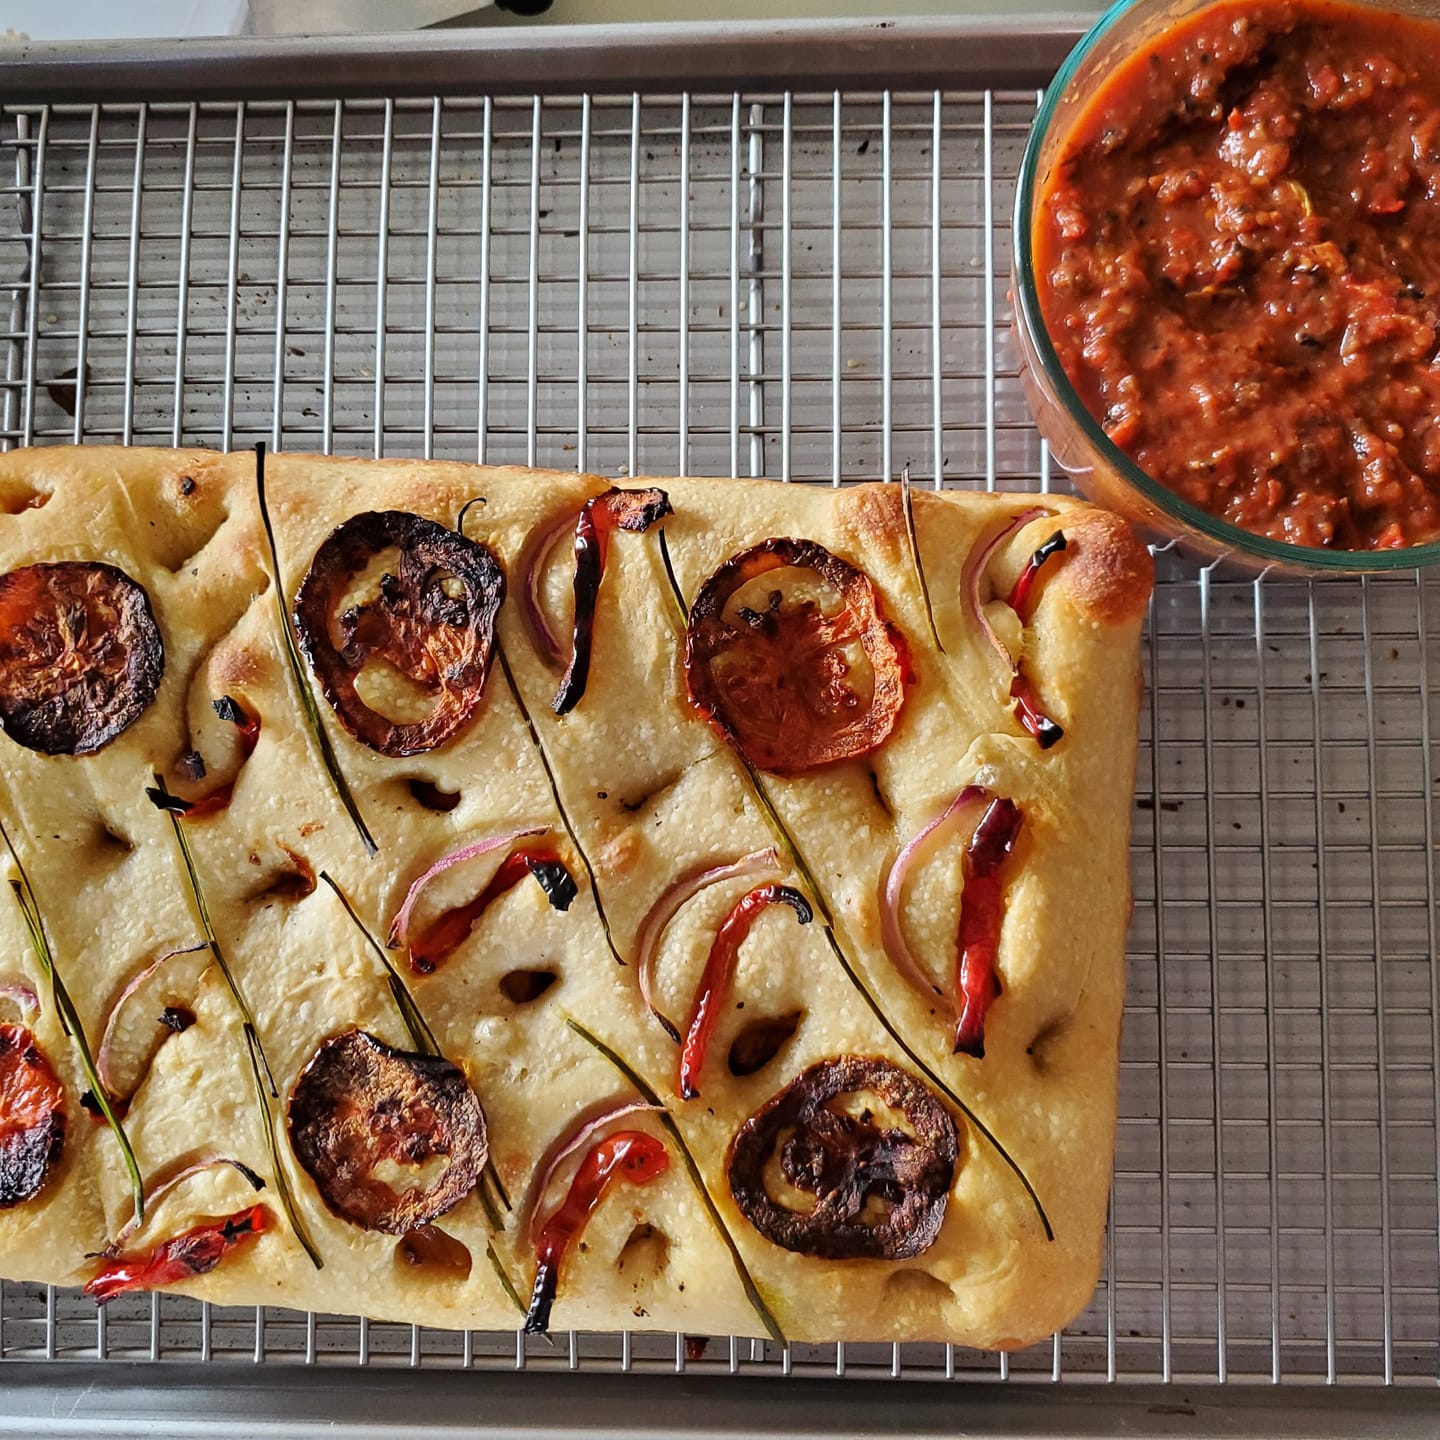
“Mexican” Sourdough Focaccia
Recipe: For my first sourdough focaccia “loaf” I followed yet another Food Geek recipe by entering my pan size on the recipe’s webpage and then tweaking it as desired. The most notable change that I made to the recipe was swapping the all-purpose flour with Tipo “00” flour in order to achieve a chewier/pizza crust like texture. For toppings I used multicolored cherry tomatoes, red onion, green pimento stuffed olives, fresh oregano, ground cumin, and sea salt.
Techniques used: As stated above, I followed Food Geek’s sourdough focaccia recipe for the entirety of this bake. Being that his recipe didn’t include an overnight retard/proof, I prepared and baked my first sourdough focaccia in one day.
Results: I was quite pleased with how it turned out. The Tipo “00” flour did its job and the added ingredients infused the focaccia with great flavor. For future loaves I’ll coat my baking pan with olive oil instead of lining it with parchment paper in order to achieve a crispier crust. In addtion, I’m going to look at other recipes to adapt this recipe to allow for an overnight retard/proof in order to develop additional sourdough derived flavors.


Fifth Bake – June 11-12
Recipe: 22% Starter (6 day unfed discard from both Mortimer and Randolph), 50% bread flour, 30% whole wheat flour, and 20% KA organic AP flour. 78% hydration 2% salt. Autolyse: 1 hour / Bulk Fermentation: 5.25 hours w/ 4 sets of stretch and folds. Overnight proof/retard ∼ 15 hours. Baked 23 minutes covered and 25 minutes uncovered.
Techniques used: After creating my recipe using the Food Geek’s bread calculator I decided to experiment by seeing if I could bake loaves for the weekend with 6 day unfed starter discard. I tried my best to start my process early in order to not interfere with my evening work schedule and loosely followed the Flex Bake schedule by Sourdough U (aka Pro Home Cooks) (it can be found here 5 Sourdough Bread Checklists). Of note, because of the age of the discard I used an extra 20g of starter.
Results: To my surprise both of these loaves turned out quite good. While their crust could have been a bit crisper, both has even crumb and tasting great. While I may not do this exact experiment again in terms of the age of the discard; I’ll definitely use starter discard to bake loaves in the future.


Sixth Bake – June 25-26
Roasted garlic and fresh thyme boules
Recipe: 20% Levain (Mortimer), 60% bread flour, 30% whole wheat flour, and 10% AP flour.75% hydration, 21% levain, 2.2% salt. Extras added during second set of stretch and folds: 1.5 tbsp fresh thyme, 2 medium sized heads of roasted garlic plus some of the leftover EVOO. Autolyse: 1 hour / Bulk Fermentation: 5 hours w/ 4 sets of stretch and folds. Overnight proof/retard ∼ 15 hours. Baked 23 minutes covered and 25 minutes uncovered.
Techniques used: After doing some research about when and how much to add roasted garlic and fresh theme. I created my recipe using the Food Geek’s bread calculator. As with previous loaves I followed the Flex Bake schedule by Sourdough U (aka Pro Home Cooks) (it can be found here 5 Sourdough Bread Checklists). Of note, this was my first time using my new “fermentation station” (thank you Joshua Weissman for the nickname) aka Brod & Taylor’s folding proofer and slow cooker. I used it for my levain and bulk fermentation. I kept the temperature between 78 and 80F.
Results: While at first I was worried about the crumb of the first boule that I cut into. Subsequent slices revealed even and nicely textured crumb. Another point of concern was that both boules seems smaller than usual and did not rise much during their overnight proof/retard. The flavor was akin to pizza seasoned with Italian herbs and garlic i.e. it was quite yummy. Beyond the classic butter on a toasted slice, my favorite way to each slices from this bake was making a grilled cheese sandwich with butter, tomato paste, and mozzarella cheese. When I bake this recipe again I’ll most likely use pre-pealed cloves of garlic and roasted them just long enough that I can add them to the dough as whole cloves. That way I’ll be able to better monitor how much of the roasting olive oil gets inside.


Seventh Bake: July 4-5
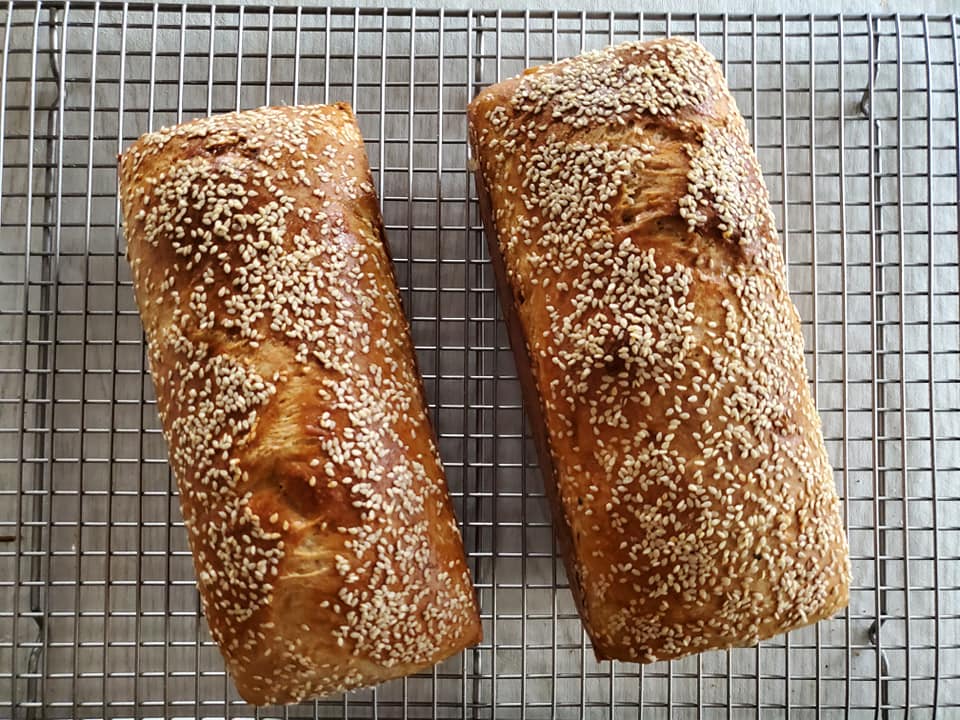
10% Rye Non-Dairy (Pareve) Sandwich Bread
Recipe: At the core of this recipe and its execution is Food Geek’s Sourdough Sandwich Bread Recipe scaled to the size of my loaf pans. However, I made the following changes…Because I used my dark rye/AP starter (Randolph) I chose to add 10% dark rye flour. Then because rye is low in gluten I decided to add 13.8% bread flour. This left AP flour as 76.2% of the 1000g of flour (not including the flour in my starter). Rather than the 100% in the original recipe. Next, in terms of hydration I ended up increasing it to 72.7% as I went by feel during the initial mixing of the dough (autolyse) and had already assumed that rye is “thirstier” than AP and bread flour. Coupled with this change was my choice to keep this bread non-dairy (pareve). This meant that I replaced the milk with more water and the butter with a non-dairy “buttery spread (Earth Balance). Otherwise, my innoculation percentage (16.7%), fat content (10.5%) and salt content (2%) remained consistent with the original recipe, plus or minus a gram or two.
Autolyse: 40 minutes / Bulk Fermentation: 5 hours w/ 3 sets of stretch and folds. Proof/retard 2.25 hours @ room temperature. Baked 35 minutes uncovered @ 425F then 1-2 minutes @ 375F (See final results).
Click here for a printable version of this recipe.
Techniques Used: I followed the steps of Food Geek’s from beggining to end. This meant that I went back and forth between watching the Youtube video and reading his typed out steps. Next, I used my Brod & Taylor proofer for the second time and after completing 3 sets of S&Fs I put my mixing bowl of dough into my proof set at 82F.
Results: The instructions in the original called for baking at 425F for 35 minutes and then 375F for 10-15 minutes. Because I chose to baked these loaves towards the bottom of my oven like I’ve done all of my other loaves, their tops were pretty dark at the end of the initial 35 minutes. So after turning the oven temp down to 375F I checked their internal temperatures and both were at 210F and therefore decided to take them out. Upon cutting into larger of the 2 loaves (100g difference) I saw an immediate sign of over-proofing i.e. large open bubbles on the top. Secondly, the edges looked a bit gummy or underbaked. While I’m not completely sure why this happened, I suspect that baking so close to the bottom of my oven (albeit with a baking sheet in place for deflecting heat) caused some uneven baking. Now for the good news…The overall texture and flavor were exactly what I was looking for. So next time I bake this recipe I’ll bake closer to the top of the oven, monitor proofing more closely, and possibly bulk ferment a bit cooler.


Eighth Bake: July 9-10
Semolina/Bread Flour Batard Loaves
Recipe: After seeing a lot of posts about using semolina flour in sourdough bread in the two sourdough focused Facebook groups that I’m a member of I did some research and landed on the following recipe…For these loaves I used 67% bread flour and 33% semolina along with 20% levain (Mortimer), 2.2% salt, and 75% hydration. Because I made my levain the night before and wanted to get the loaves shaped and in the refrigerator as early as possible. I decided to forgo an autolyse and mixed all of the ingredients together at once.
Bulk Fermentation: 5.25 hours w/ 3 sets of stretch and folds. Followed by preshaping, a 30 minute rest and final shaping into batards. Overnight Retard/Proof: 18 hours Baked 25 minutes covered and 25 minutes uncovered @ 450F.
Techniques Used: Being that this was my “eighth bake” I found it quite easy to follow basic recipe parameters once I decided to use 33% semolina flour. Because I had my air conditioner on and my Brod & Taylor proofer as an option for controlling bulk fermentation temperature, I was not worried about baking on a hot/humid day. In turn, after my 3 sets of stretch and folds I put my mixing bowl of dough in my proofer for the remainder of bulk fermentation which was set to 80F. Lastly, in an effort to only change one variable at a time in terms of avoiding a overly caramelized and tough bottom crust. I decide to add an extra cookie sheet/roasting try to on the oven rack below my bread pans (Lodge combo cooker and Challenger bread pan for heat deflection and to preheat at 500F and bake at 450F (rather than starting covered at 500F)…
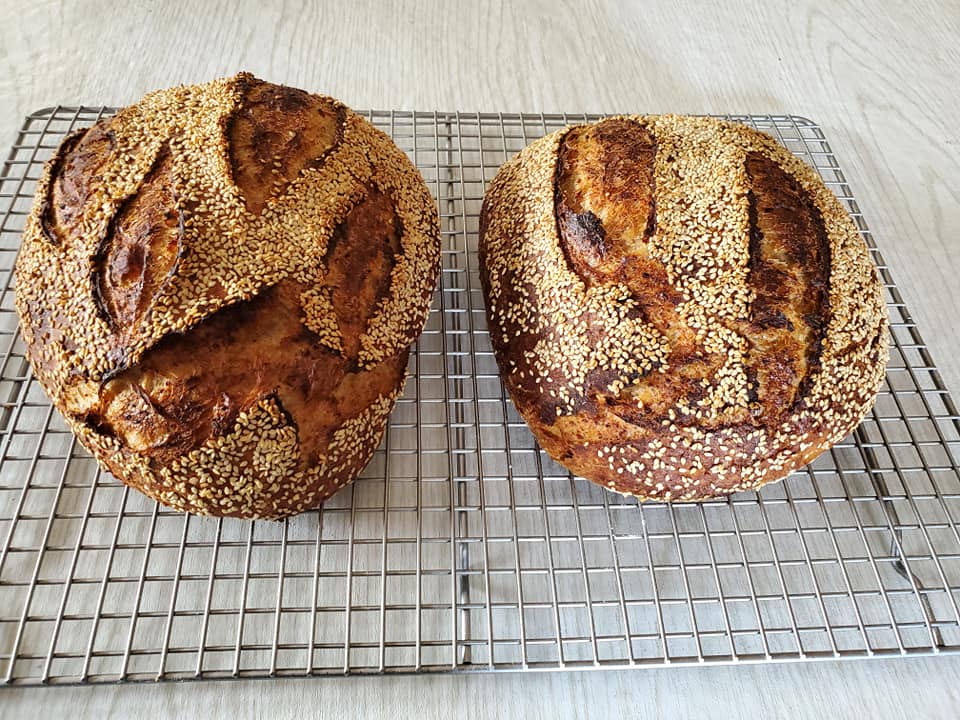
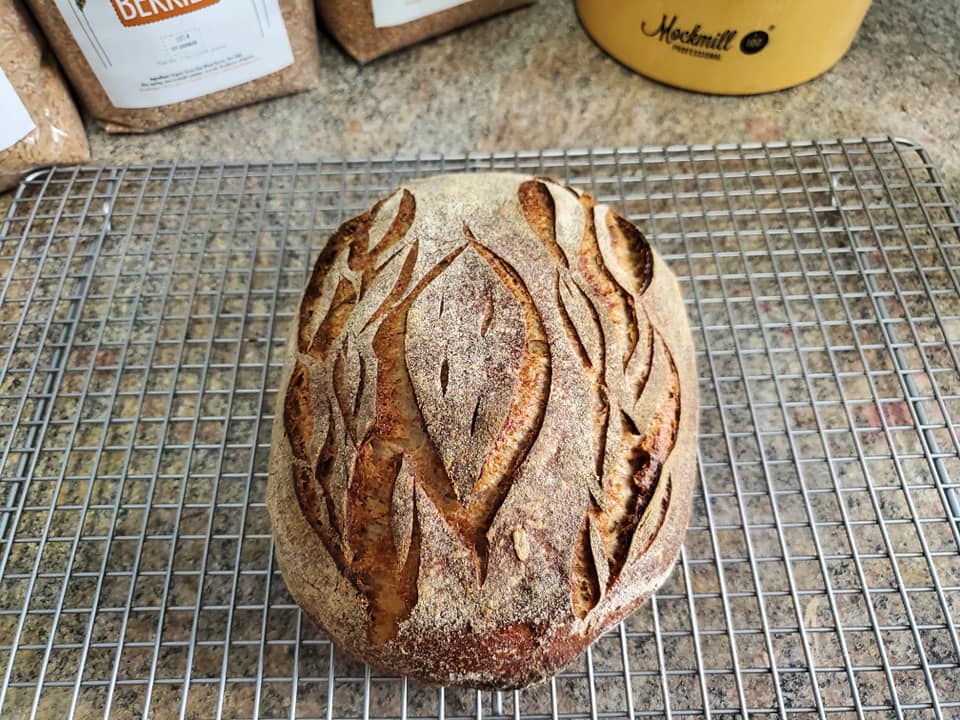
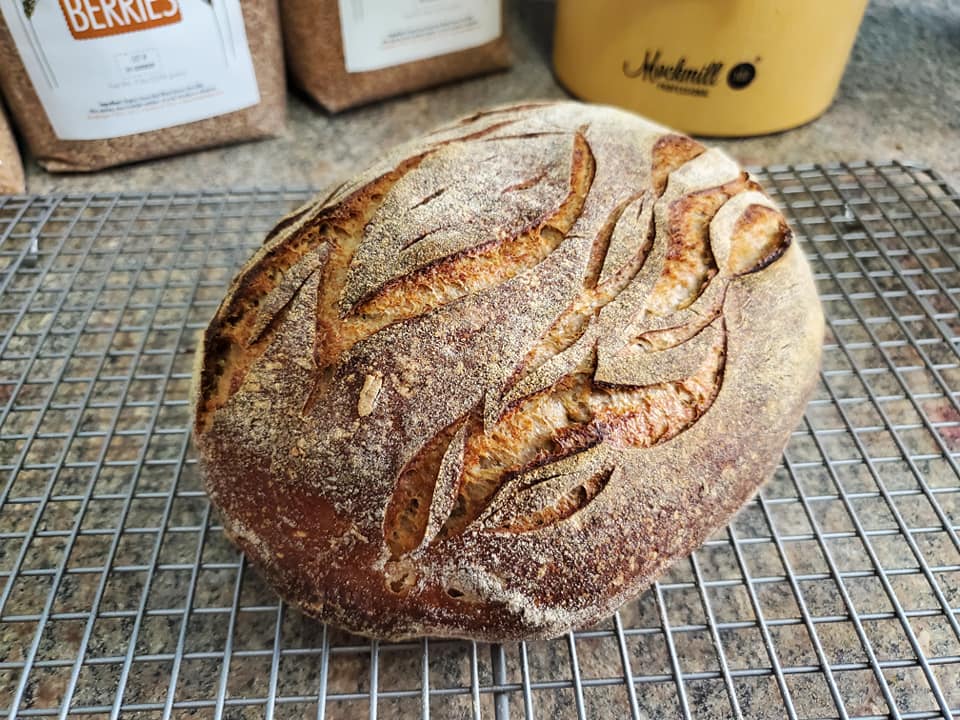
Results: Overall, I felt that the bottom crust was not any tougher than my previous loaves and the changes that I did make were effective (see pictures below). Next time I’ll rotate the loaves earlier and follow some advice that I got from Jim Challenger and do the following. I’ll completely remove my baking vessels, invert their lids, put them in the oven, and then put their bottoms on top in order to deflect even more heat during the uncovered portion of baking. In terms of appearance, I scored my first ever wheat stalks and am quite happy with how they turned out. The semolina gave the out of the loaves an attractive blonde/yellow hue, but the crumb was pale due to 2/3 of the flour being white bread flour. Flavorwise, both the crust and interior were balanced. I think I’ll have to use more semolina next time to really taste how much it can contribute to a sourdough loaf’s flavor profile.


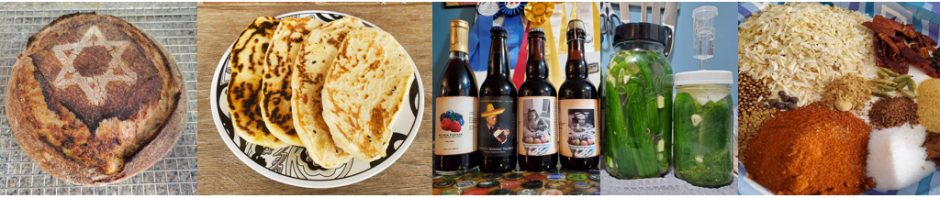
Cinnamon Raisin Boules
Recipe: The inspiration behind this recipe came from my middle and high schools years when I would often eat cinnamon raisin bread and cream cheese sandwiches for breakfast on my way to school. To get started on my sourdough version of this nostalgic bread I searched for a recipe to base mine off of and found this Baked – the blog recipe. Because the blog post for this recipe gave a lot of suggestion for customization I took stock of ingredients that I had on hand and landed with the following recipe. 70% bread flour, 20% whole wheat flour, and 10% dark rye flour. Followed by 21% levain (Mortimer), 2.2% salt, 16g cinnamon (added during mixing of dough), and 250g raisins. As with the previous recipe, I decided to forgo autolysing the flour for this recipe.
Bulk Fermentation: 5.25 hours at room temperature with 3 sets of stretch and folds. Raisins added during second set of stretch and folds after 35 minutes of soaking in water w/ 1.5 caps of pure vanilla extract added. Followed by preshaping, a 30 minute rest and final shaping into boules. Overnight Retard/Proof: 18 hours Baked 25 minutes covered and 25 minutes uncovered @ 450F.
Techniques Used: While the recipe that I was loosely following called for adding the salt, cinnamon, and raisins after a 40 minute autolyse and before the first set of stretch and folds. I decided to add the raisins during the second set of stretch and folds like I did for my olive/black pepper/lemon zest boule (see above).
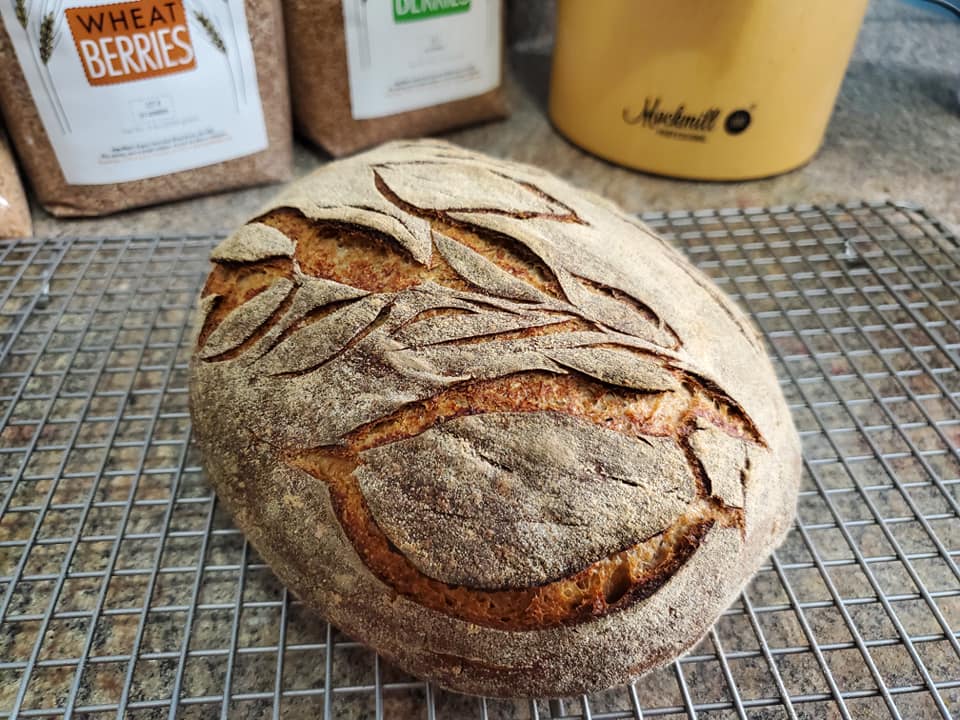
Results: Flavorwise both boules came out tasting great. However, due of the added sugar from the raisins and my not significantly changing my heat deflection technique (see previous recipe). The more well caramelized portions of the bottom crust at times added a somewhat bitter quality to the taste. Next time that I bake this recipe I will definitely add the raisins and cinnamon as instructed by the recipe that I was following. Firstly, because the loaf that I baked in my challenger bread pan had a considerable amount more raisins in it. Secondly, some slices (from both loaves) had the majority of their raisins towards the bottom rather scattered throughout. Lastly, appearance-wise my scoring didn’t turn out as planned, but turned out attractive nonetheless.


Nineth Bake: July 19-20
50% Spelt Poolish loaf
Recipe: The inspiration behind this recipe came from Ken Forkish’s popular book entitled Flour Water Salt Yeast. Because I was getting my starters ready for bakes later in the week I decided to follow Ken’s ‘white bread with poolish’ recipe. Then after finding some Bob’s Red Mill organic spelt berries in my pantry, I decided to try making my own flour using my trusty vintage Krups coffee/spice grinder and a wire mesh sieve. However, after weighing out the flour that I had made I realized that I only had enough for one loaf i.e. 200g of sifted flour and 50g of ground bran. Yes, I know I could have use 25% spelt per loaf if I had chosen to make the full recipe, but I was in an experimenting mood. So why not 50% in one loaf? The night before baking day I made the poolish with 250g bread flour, 250g water, and 1/16 tsp of instant yeast. Then the next morning I mixed my final dough which was comprised of the whole poolish, the 250g of spelt flour, 11g of salt, 1.5g of instant yeast, and 140g of spring water.
 Bulk Fermentation: 3 hours including 3 sets of coil folds. Proof: 1.25 hours @ warm room temp (see below). Baked 30 minutes covered and 25 minutes uncovered @ 475F.
Techniques Used: Overall I followed the aforementioned recipe (beyond the using 50% home ground spelt instead of 100% bread flour). Though I should note that this was my first time using coil folds instead of stretch and folds and a poolish instead of a levain.
 Results: After proofing for a probably unnecessary 15 extra minutes in my warm kitchen (due to oven preheating) I was ready tobake my loaf. Unfortunatley, it spread upon being transferred to my preheated Challenger Bread Pan . Next, I suspect that due to the 475F baking temp for 55 minutes I lost some shape and oven spring during the second half of the bake (see pictures in journal). Once I cut into the loaf and posted pictures in the sourdough Facebook groups that I’m a member of, the feedback that recieved left me pretty happy with the overall even crumb and flavor of the bread. Lastly, a fellow baker provided me with this link and commented that spelt doesn’t absorb at much water as wheat and therefore one should lower their hydration percentage a bit when baking with spelt.


Tenth Bake: July 21-22
Sourdough Pretzels
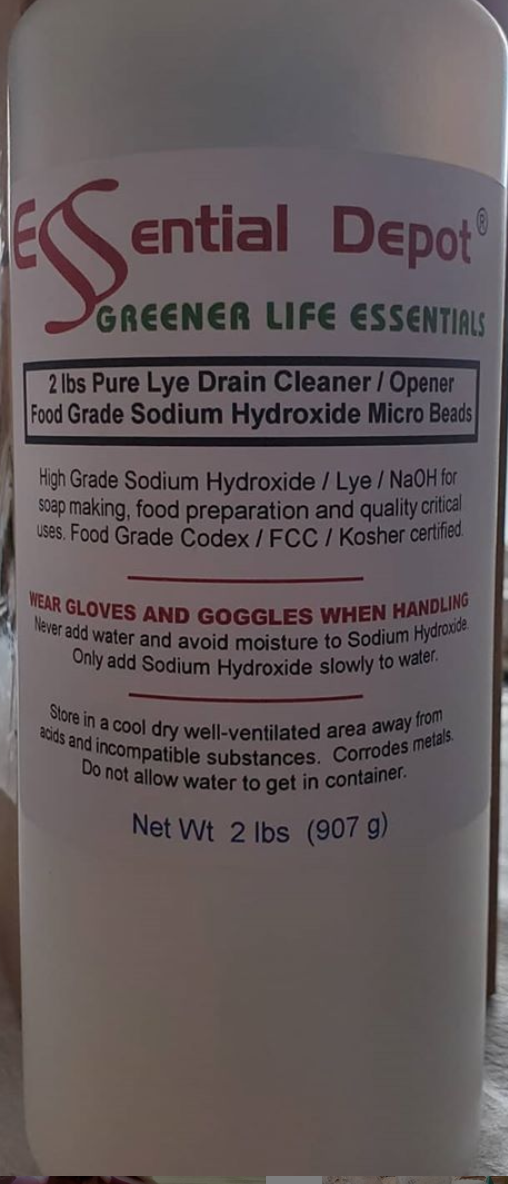
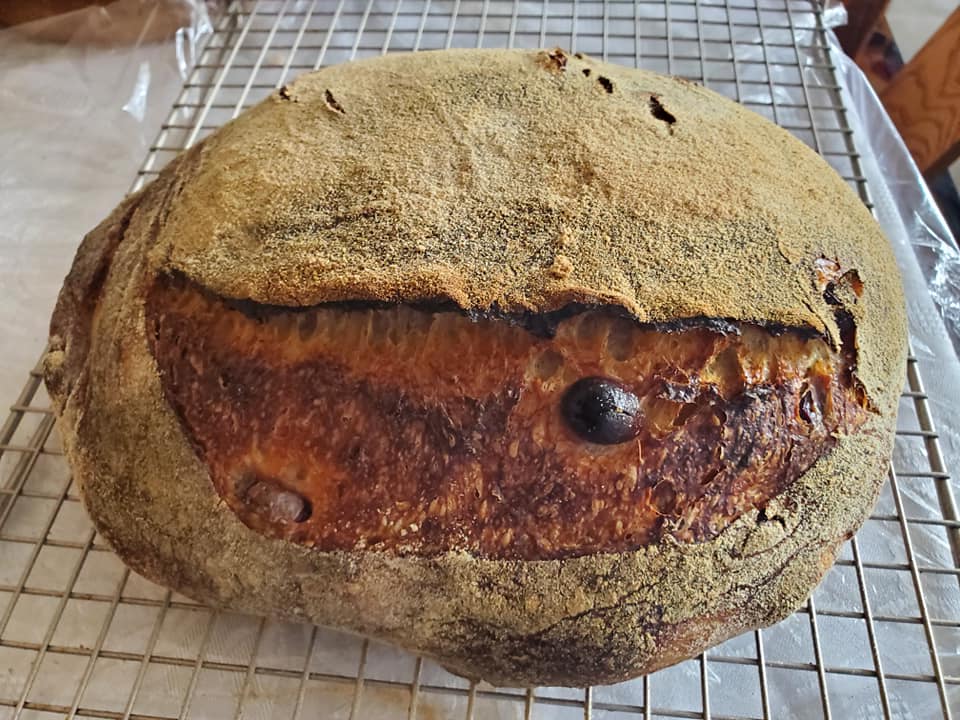
Techniques used: One reason that I chose to follow Food Geek’s recipe was that he used food grade lye instead of baking soda and/or sugar. In general I prefer to make my recipes as authentic as possible and lye is traditionally used for pretzels in Germany and a number of other European countries. Next, at some point’s where this recipe said to wait 30 minutes in between steps, I waited closer to 45, but I doubt it made a difference. Lastly, I didn’t have enough room in my freezer for the 2 sheet trays of pretzels so I put them in my fridge for 45 minutes to firm up before dipping them in the lye bath, adding salt, and baking them.
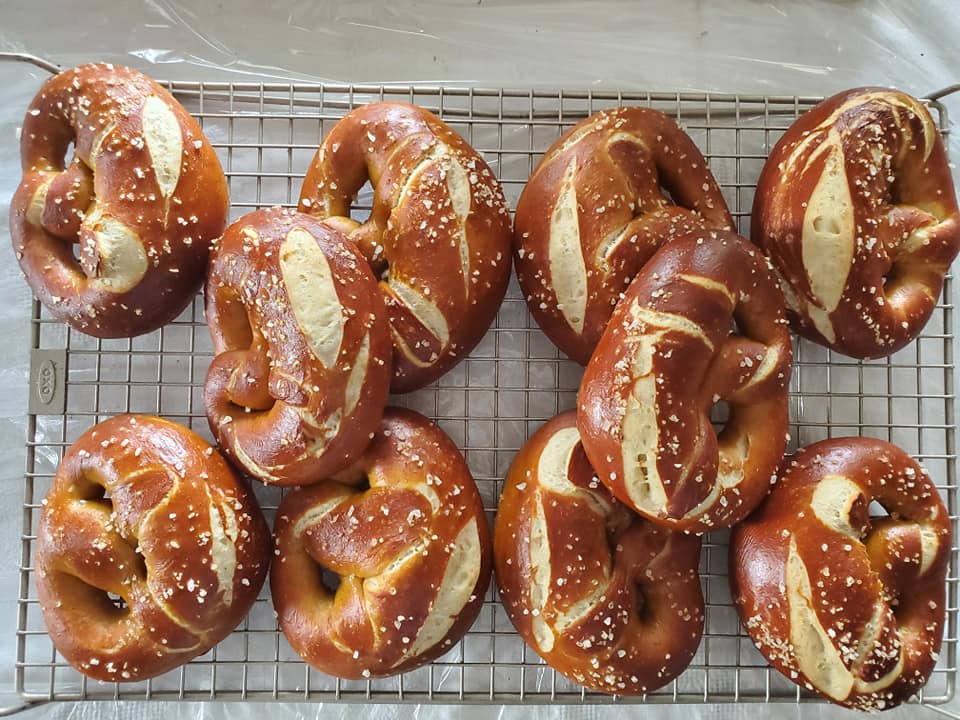
Results: For my first attempt at soft pretzels these pretzels came out great (I baked 10 instead of the 12 set by the recipe I followed). Their exterior was nice and caramelized which made for a toothsome and slightly crispy crust and the malted Central Milling flour lent a fluffiness to their interior crumb. One caveat of lower hydration breads such as pretzels and bagels is that they go dry quite quickly. Within 1 day after baking them, my pretzels were noticably dry and more chewy. In terms of changes for the next time I make this recipe: I’ll make sure to add the salt during the initials mix of the final dough rather than remembering to do so an hour afterwards. Secondly, I may incorporate a bit of bread flour to see if the higher protein level contributes to added moisture retention…Though I could bake a batch when circumstances would allow for all 10 pretzels to be eaten day of.


Eleventh Bake: July 23-24
Base Recipe Boules
Recipe: 20% Levain inoculation (Randolph), 70% bread flour, 15% whole wheat flour, and 15% dark rye flour…80% hydration 2.2% sea salt. Autolyse: 1 hour / Bulk Fermentation: 5.25 hours w/ 4 sets of coil folds. Overnight proof/retard ∼ 15 hours. Baked 25 minutes covered and 20-25 minutes uncovered @450F.
Techniques used: Luckily I pulled off the techniques that were new to me before the unforeseen 6.25 hour power outage that occured during my overnight proof/retard. Following a suggestion from Kristen of Full Proof Baking, I divided my dough into 3 separate bowls following the addition of my levain and salt. I then proceeded to do coil folds, rather than the stretch an folds which I’ve become accustom to using. I will note that doing coil folds on 1 loaf worth of dough was at times a bit frustrating. Kristen also related that she sometimes skips preshaping her loaves because of how much structure coil folds give the dough. In turn, I too skipped preshaping and final shaped at the end of bulk fermentation. In terms of baking I tried baking one of the loaves covered for the 50 minutes. It ended up lighter in color than I’d like. Then for the next 2 loaves of inverted the lid of my Challenger bread pan and put the bottom section on top of it, this prevented the bottom of the loaves from getting too dark and tough.
Results: Overall all 3 loaves maintained their shape despite overproofing due to the power outage. I’m convinced that their crumb would have been more open (along with more oven-spring) if all had gone to plan. However, it was even and the texture of all three was moist (almost custardy soft). Taste-wise my go-to combination of bread, whole wheat, and dark rye made the crust really yummy and the balanced sourness sealed the deal. Unfortunately, I didn’t get to take crumb shots of these loaves. I’ll definitely be baking this recipe again in order to experience its full potential.


Twelveth Bake: July 29-30
Sourdough Bagels
Recipe: After looking over a bunch of sourdough bagel recipes I chose to yet another Food Geek recipe. I made the following four relatively minor changes to his original recipe: I used Central Milling’s Organic Artisan Bakers Craft Plus flour and Janie’s Mill High Protein flour instead of 100& bread flour, 30g of brewer’s golden light dry malt extract, I added 50g to the overall dough weight(using Food Geek’s baker’s calculator), and 5g of food-grade lye instead of 3g. In terms of toppings I went with homemade everything bagel seasoning, Trader Joe’s onion salt, and caraway seeds.
Techniques used: Because I was following a recipe and making bagels for the first time, I did not try that many “new” techniques this time around. When it comes to sourdough bagels I’ve found that the primary differences in technique between recipes revolve around shaping i.e. when and how it is done. I chose to shape most of my bagels with the traditional rolling out and then twisting closed method and the rest with the “lazy man’s method” of poking a hole in the middle and then stretching out the dough.
Results: While the bagels turned out smaller than I’d like (prior to baking they were 106g each), they were crispy on the outside and soft and moist on the inside. While I know that some bakers put sugar in their bagel dough to help create a crispy crust, I felt that when my wife and I ate our first bagels from this batch. The crust was more crispy than I had envisioned or would prefer. However, once the bagels were in a Ziploc bag overnight, the crust was soft and easier to cut through. Next, time I’ll still use the malted Central Milling flour, but I’ll either omit the dry malt extract or lower the amount that I use. Lastly, in order to make the bagels a bit larger I’ll either increase the dough weight or make 8-10 bagels instead of a dozen.


Thirteenth Bake: July 30-31
Roasted Garlic and Chive Foccacia w/ Roasted Tomato-Balsamic sauce
 Recipe: For my second go at sourdough focaccia. I followed Maurizio of The Perfect Loaf’s ‘A Simple Focaccia’ recipe. As with my first focaccia (see above), I swapped the all-purpose flour with Tipo “00” flour in order to achieve a chewier/pizza crust like texture. For toppings I used roasted garlic, chives, roasted plum tomatoes, and sliced red onion.
Techniques used: As stated above, I followed Maurizio’s sourdough focaccia recipe for the entirety of this bake. However, I did utilize the overnight option described in his recipe i.e. “Instead of proofing the dough at room temperature for 2 hours, cover the rectangular pan with an airtight cover and transfer to the fridge. The next day, take out the dough and let it come to room temperature and finish proofing.” Upon taking mine out of the fridge I left it out at room temperature for 2 hours to proof and then baked it.
Results: First glance I was not satisfied with how this focaccia turned out. Meaning I felt that it didn’t have enough surfact bubbles and while the bottom browned more than my first focaccia, the top didn’t brown enough. Also, it didn’t seem like it rose enough. However, upon cutting into it and seeing it’s nice look crumb I realized that despite entering my pan size on the Food Geek’s focaccia recipe page, I probably used his original recipe instead of clicking off the page to an adjusted recipe. Therefore, this focaccia could not have risen as much as its predecessor. Secondly, I probably should have used my starter earlier i.e. 6-8 hours post feeding rather then 10.5. Future planning aside, my family and I deeply enjoyed pairing it with the sauce. I’ll definitely make an accompaniment or two next time I bake a sourdough focaccia…
Roasted Tomato-Balsamic sauce: This off the cuff recipe was put together after speaking about focaccia pairings with my cousin, Chef Seth Warshaw of Etc Steakhouse (Teaneck, NJ) – While I eye-balled the ingredients, I’ve estimated them here in order to share a cohesive recipe.
Roasted Veggies:
4 plum tomatoes
4 scallions
5 garlic cloves
1 medium-sized red bell pepper
1/2 a large portobello mushroom cap
Additional ingredients:
About an 1/8 of a large red onion
2 tbsp olive oil
3 tbsp balsamic vinegar
S&P to taste
Instructions:
Roast the veggies and then blend/puree them in a food processor with the remaining ingredients until you reach the texture of your liking.
Fourteenth Bake: August 6-7
35% Rye Batard Loaves w/ Caraway seeds
Recipe: After acquiring some new flours and deciding on how much rye I wanted to use for these loaves I settled on the following recipe. 50% Central Milling malted type 85 flour , 15% Janie’s Mill high protein flour, 17.5% Baker’s Authority dark rye flour, and 17.5% Castle Valley bolted rye flour…75% hydration, 2.2% salt, 2% soaked caraway seeds, 1.8% raw cane sugar (turbinado). With 35% rye I chose to add the high protein flour instead of buying vital wheat gluten. Lastly, while I could have relied on the malted base flour for extra ensymatic activity, I chose to add sugar to keep the recipe in line with similar rye bread recipes.
Methods: Autolyse (w/ salt): 30 minutes -> Bulk Fermentation: 5.25 hours w/ 3 sets of stretch and folds and 1 set of coil folds. Overnight proof/retard ∼ 18 hours. Baked 25 minutes covered @475F and 20 minutes uncovered @450F.
Techniques used: Because I knew that this dough would be denser and longer to become extensible; I made my stretch and fold intervals 40 minutes instead of 30. I began adding in my caraway seeds during the second set of folds and finished doing so during my final set (coil fold) i.e. once I decided to add all of 20g that had been soaking in water overnight. For shaping into batards I dusted the top of each loaf (post-bench rest), flipped it, stretched it into a rectangle, folded each side to the center and then rolled it up before transferring it to its awaiting banneton and stitching the seam. Lastly, for the first time I added 2 small ice cubes to my Challenger bread pan prior to putting into into the oven to begin baking.
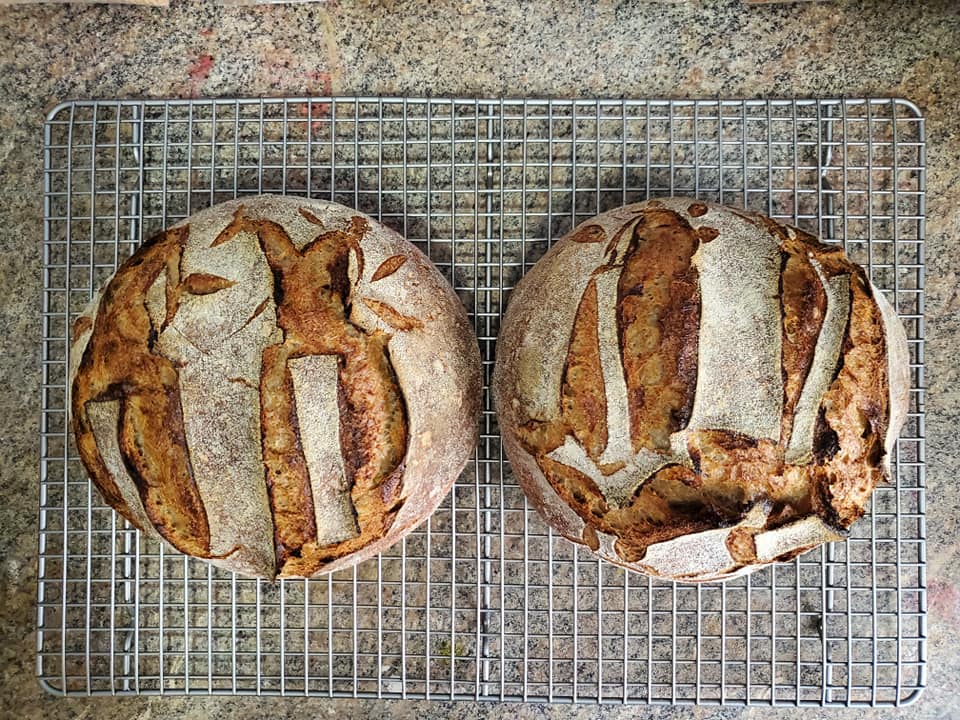
Results: Aside from some gummy edges, these loaves turned out great. They held their shape whilst baking, got nice and caramelized on the outside, and had an even crumb on the inside. Flavorwise, the sourdough tang complimented the aromatic caraway seeds quite well. Though next time I may use less caraway in order to bring out more rye flavor. I’m also curious at to whether I could have achieved a similar result without the sugar and/or the high gluten flour.


Einkorn & Turkey Red Boules
Recipe: Being that I’ve recently acquired quite a few flours that I haven’t baked with before; I chose to include Janie’s Mill Turkey Red, and Castle Valley’s einkorn flour in this recipe at 25% with the remainder of the flour being high gluten bread flour. To keep the dough manageable for my first time with the two new flours, I kept the hydration percentage for this dough at 75%. As per most of my previous recipes, I kept 20% innoculation and 2.2% salt as constants.
Methods: Autolyse (w/ salt): 40 minutes -> Bulk Fermentation: 5.25 hours w/ 4 sets of stretch and folds and 1 set of coil folds. Overnight proof/retard ∼ 18 hours. Baked 25 minutes covered @475F and 20 minutes uncovered @450F.
Techniques Used: After watching some Trevor Wilson Youtube videos about achieving open crumb when baking loaves with higher percentages of whole grain and still achieving open crumb. I made sure to only do folds per set after doing some extra during the first set in order to avoid overworking the dough and in turn causing it to deflate. Subsquently, I made sure to be as gentle as possible when removing the dough from its bowl and the when shaping it. Of note, Trevor did a set of stretch and folds to help release the dough from the bowl, but I wasn’t confident or mentally ready to do some this time around.
Result: Despite one loaf spreading because I was having trouble getting my stencil to work and scoring a different pattern than originally planned. These loaved turned out great. They has great open yet even crumb and tasted great. Next time I’ll probably bake loaves just one of the 2 “non-base” flours to bring out more of their unique flavors and adjust the texture or amount of my starter (levain) in order to tone down the tang a bit for the same reason.


Fifteenth Bake: August 12-13
75% Whole wheat / 25% Kasha Boule (discard loaf)
Recipe: After finding a 5 pound bag of supermarket brand whole wheat flour that was less than a month away from its best by date, I decided to make a 100% whole wheat loaf. However, when I couldn’t find my Bob’s Red Mill 8-grain cereal which would soften the loaf, I decided to use my spice grinder to freshly mill (grind) 250g of kasha (roasted buckwheat).
Methods: Ferment-olyse (everything mixed-in): 45 minutes -> Bulk Fermentation: 5.25 hours w/ 4 sets of stretch and folds. Overnight proof/retard ∼ 18 hours. Baked 25 minutes covered @475F and 20 minutes uncovered @450F.
Techniques Used: I did my best to be gentle with this dough in order to prevent it from turning out too dense.
Result: The kasha flavor was the star of of the show for this loaf, which made it great for food pairings. Just like when it’s cooked with pasta in the classic Jewish dish, Kasha Varnishkes. As suspected the crumb and overall texture was on the closed/denser side and admittedly took detracted from the enjoyment of this loaf. When I bake with kasha again I’ll use a bread flour base and use less than 25% of it in order to make its flavor less dominant.


Sixteenth Bake: August 13-14
35% Rye Batard Loaves 2.0
Recipe: The recipe for these loaves was nearly identical to my previous two rye batards in that they contained 50% Central Milling malted type 85 flour , 15% Janie’s Mill high protein flour, 17.5% Baker’s Authority dark rye flour, and 17.5% Castle Valley bolted rye flour…75% hydration, and 2.2% salt. However, I chose to remove the sugar and caraway seeds in order to be able to taste the flavors created by the flour and sourdough starter more clearly. I also chose to fermented this dough cooler and use 20 less grams of starter (18% innoculation) in order to prevent what I assumed were signs of overproofing in the first loaves i.e. gummy edges.
Methods: Autolyse (w/ salt): 30 minutes -> Bulk Fermentation: 5.25 hours w/ 3 sets of stretch and folds and 1 set of coil folds. Overnight proof/retard ∼ 18 hours. Baked 25 minutes covered @475F and 20 minutes uncovered @450F.
Techniques Used: The only noteworthy difference in technique between these loaves and their predecessors was their shaping. Following dusting, flipping, and stretching the dough into a rectangle; I folded the first loaf’s sides to the center (mid-line fold) and overlapped the sides of the second loaf (full tri-fold).
Result: These loaves came out a bit smaller and denser than I had hoped for. However, the crumb was pretty even, the edges were less gummy, and the crust was delicious and well caramelized. Since baking these loaves I’ve converted my rye starter to 100% rye and 130% hydration as the suggestion of a fellow baker. Next time I bake this recipe I’ll go back up to 20% innoculation, ferment warmer, be a bit gentler with the dough (a chunk broke off as I dumped the dough onto my cutting board), and of course use my now 100% rye starter.


Base Recipe Boules
Recipe: In order to continue to test the potential of my “base recipe”, I decided to test out of the combination use fresher/local flours instead of the supermarket whole wheat flours that I’ve used in the past and the two dark rye flours that I had been using since I started baking sourdough bread. Stats: 65% KA organic bread flour, 20% Castle Valley Whole Hard Wheat, and 15% Castle Valley Bolted Rye. 18% Levain inoculation, 77% hydration 2.2% salt, 18% inoculation (Mortimer).
Methods: Autolyse: 1 hour / Bulk Fermentation: 5.5 hours w/ 4 sets of coil folds. Overnight proof/retard ∼ 18 hours. Baked 25 minutes covered and 20 minutes uncovered @450F in my Lodge combo cooker.
Techniques Used: In order to encourage an open final crumb I decided to do coil folds instead of stretch and folds and made sure to be as gentle as possible during pre-shaping and final shaping.
Results: These boules turned out quite beautiful looking. So much so that one of the photos that I took of them ended up as the cover photo of the ‘Sourdough Bakers’ Facebook group for a week. The Castle Valley whole hard wheat flour gave the crust an attactive reddish hue and the oven spring was “happy dance worthy.” While the crumb wasn’t as open as I thought it would be, it’s texture has a fluffy quality which made up for any unmet expectations. I’ll definitely be baking my base recipe with these flours and techniques again soon.


Seventeenth Bake: August 17-18
9-grain Porridge Batard Loaves
Recipe: 16% Central Milling Organic Steel Cut Cracked 9-grain, 54% Artisan Bakers Craft Plus flour, 18% Janie’s Mill Turkey Red, and 12% Castle Valley Einkorn. 15% inoculation. 83% hydration (starter, autolyse, porridge). With inspiration from Full Proof Baking … I toasted the grains with 45g of Earth Balance spread and then simmered then in 300 water for 8 minutes after which I stirred in 65g of honey. Once cooled I added the porridge to my dough.
Methods: I did a 6.5 hour bulk fermentation with 5 sets of coil folds. The last of which was done 45 minutes before final shaping.
Techniques Used: Being that I was following Full Proof Baking’s (Kristen) process my only additional technical task for this bake was to be extra careful with the dough due to my use of double the amount of cracked grains than she did.
Results: This was the first time that I gave a full loaf away to a friend. However, that’s not what this section is for LOL. The loaf that I kept for myself came out with great oven spring and really soft even crumb. However, the loaf that I gave away did not have as good oven spring due to it seemingly containing more of the cracked grain porridge and having a crack in it when I transferred it out of its banneton. Next time I bake this recipe I’ll likely use 10-12% cracked grains in order to make dough handling easier and less risky.


Eighteenth Bake: August 20-21
Danish Rugbrød
Recipe: For my first 100% rye loaf I chose to bake Danish Rugbrød. A I followed Foodgeek’s recipe, but used molasses instead of malt syrup and a mix of pumpkin and sunflower seeds instead of just pumpkin seeds. I also increased the total weight of the dough in order to fit my large pullman loaf pan. Having recently made my rye starter (aka Randolph) 100% rye, I made a levain for this loaf at the 166% hydration as per the recipe (final hydration: 83%). At 3% this recipe’s salt content was higher than I’m used, but didn’t effect the loaf’s ability to rise.
Methods: Once my levain had doubled and was ready to bake with I proceeded with following the steps of Foodgeek’s recipe. Due to my lack of experience with breads of this type and the pumpkin seeds on the surface of the dough; it was a bit hard to know when it was ready to be baked. In the end with the 2-6 hour time given in the recipe, gave my dough just over 4 hours to proof in its pan before baking uncovered for 85 minutes.
Techniques Used: Due to the low gluten and protein levels of the rye flour my levain weighed in at 458g. Next, I soaked the seeds and cracked rye overnight so they’d soften and not soak up water from the dough. Lastly, I let the dough rest in a large ziploc bag for 24 hours before cutting into it in order to let the crust soften and the moisture re-distribute through the crumb.
Results: Once finished baking there was “crown of crust” around the top of the loaf, which according to Foodgeek’s instructions for this could mean that I slightly over-proved the dough i.e. it collapsed a little bit. In the end I was happy with how my first Rugbrød turned out and enjoyed pairing it with meats and pickled veggies. However, when I do bake it again, I’ll most likely try a different recipe (for comparison) and use a different combination of seeds. For me the pumpkin seeds in this recipe made it harder to gauge when the loaf was ready to make, were too large, and over-shadowed the sunflower seeds. Lastly, I’ve read recipes where the loaf if baked covered for at least part of the baking and feel that I’d like to do so with future loaves in order to achieve a more even overall texture.


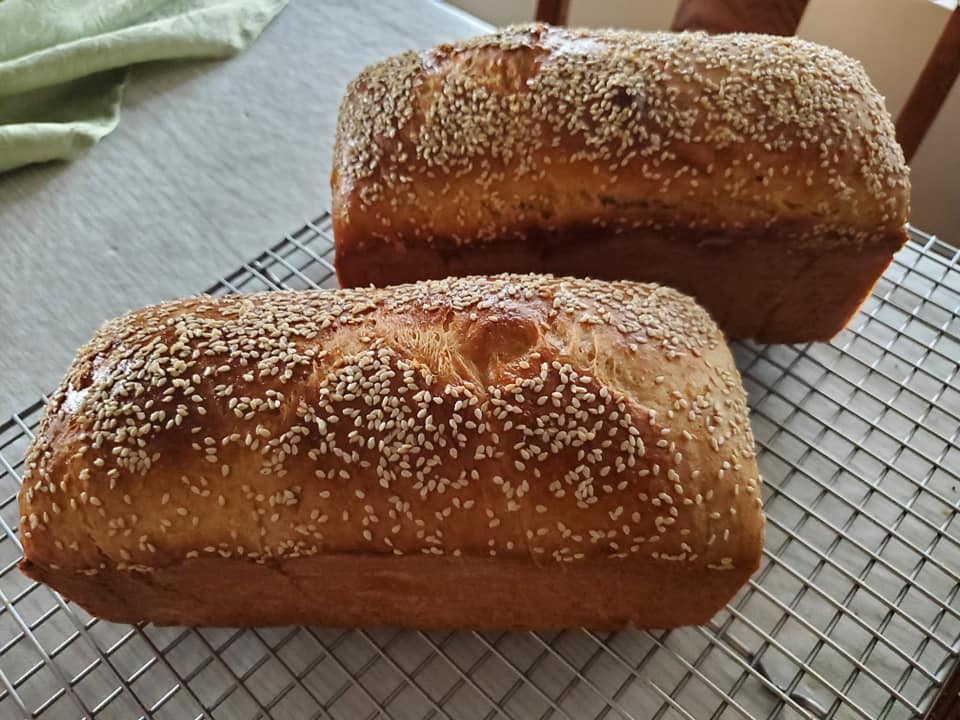
Black sesame/semolina loaves
Recipe: Following my Meet the Baker Behind the loaves interview of Chiew See of Autumn Baking, I was inspired to come up with my first “swirl bread” recipe. My idea was to combine the yellow color that semolina flour can contribute to breads with the striking dark color of black sesame seeds. Unfortunately I don’t have exact weight measurements of black sesame seeds and honey that I used to make the paste for this recipe, but I did use about 1.7 cups of seeds between the two loaves. Full recipe (excluding the sesame paste).
Methods: In order to make sure that I was going about the preparation and baking of these loaves in a practical manner I followed Foodgeek’s sandwich bread recipe (see sandwish loaves above). Next, I added the sesame paste while final shaping the loaves. However, I wouldn’t recommend using a combination of a spice grinder and food processor to make the black sesame paste like I did. Instead a high powered blender would do a better job.
Techniques Used: As with cinnamon rolls or other “swirl breads,” I spread the sesame paste on top of the stretched out dough before rolling it up. Due to either the paste or recipe flaws, the dough took longer to rise and than expected.
Results: While I didn’t quite achieve the swirl effect that I was looking for, I definitely enjoyed the flavor and appearance of these loaves. During proofing I surmized that I may have accidently used 100g less flour than my recipe called for and therefore ended up with smaller loaves than expected. Next time I bake this recipe I’ll likely borrow a high powered blender in order to make a smoother paste and of course double check my flour weight/s.


Living Bread Drescherlaib boule
Recipe: After reading through most of Daniel Leader’s Living Bread book, I decided to try out one of his 100% whole grain recipes (spelt and rye in this case). However, because I was already working prepping 3 other loaves and not experienced with this type of loaf, I halved the recipe. Click here for the full formula.
Methods: I carefully followed the instructions from the book with one caveate. All of the recipes in the book call for a standmixer and I don’t own one. Therefore, I mixed the dough by hand and added an extra fold (recipe called for one) to add structure to the dough.
Techniques Used: This was my first time using a stiff starter so I followed the recipe’s directions and luckily their were obvious signs of fermentation activity. While I found out about it after the fact, I decided to retard this dough in my fridge because I was working on 2 other new recipes that day. However, while watching a video on baking 100% rye loaves, I found out that compared to loaves with less whole grain, 100% whole grain (especially rye) loaves proof best at room temp.
Results: While this loaf turned out looking good and smelling great due to the whole grains and added spices, it was too dense for me to want to eat more of. Next time I’ll mix more by hand, do only one fold during bulk fermentation, and do a room temperature proof instead of an overnight cold retard.
Nineteenth Bake: August 27-28
35% Rye Batards 3.0
Recipe: The recipe for these loaves was nearly identical to version 2.0 of these rye batards in that they contained 50% Central Milling malted type 85 flour , 15% Janie’s Mill high protein flour, 17.5% Baker’s Authority dark rye flour, and 17.5% Castle Valley bolted rye flour, and 2.2% salt. However, I made the followed changes… I chose to add back the sugar in order to encourage fermentation activity, used my now 166% hydration 100% rye starter to bring out even more rye flavor, and raised the hydration to 83% to decrease the chance of density being an issue in the finished loaves.
Methods: I decided raised my innoculation percentage to 21% and ferment warmer in order make sure that my usual 5.5 hour bulk fermentation would mean that I fermented my dough to its optimal amount of growth. In terms of folds, I did 3 sets of stretch and folds.
Techniques Used: Beyond the higher fermentation temperature, I didn’t change my techniques when preparing and baking these loaves. However, I did choose to use a spray bottle to add moisture/steam into my Challenger bread pan. I baked these loaves at 475F for 23 minutes and 450F for 20 minutes.
Results: The flavor of these loaves came out awesome. The well caramelized crust and rich rye notes in the crumb were great. However, they still had gummy edges as in previous batches. Before baking this recipe again I’m going to consult some fellow bakers about my recipe and processes and also use the aliquot jar method to track the progress of fermentation.

Sourdough Challah 1.0
Recipe: After seeing so many pictures of beautiful sourdough challah bread on Instagram, Facebook, and YouTube. I decided to utilize FoodGeek’s challah recipe as a guide whilst making my first attempt at converting my yeasted challah recipe to sourdough and from cups to grams. Having enjoyed baking 100% challah in the past for a friend’s daughter who is sensitive to wheat. I decided to use both spelt and bread flour in this recipe (full formula). After weighing out 3 cups of bread flour, I knew what percentage of my target flour weight it was and could proceed with decided how much eggs, sugar, oil, and water to add. The one key ingredient that stooped me was converting the 2 packets of dry instant yeast from my yeasted recipe into sourdough starter. For some reason I decided to use 180g, an amount close to my sourdough sandwich bread recipe rather than the 207g used in Foodgeek’s recipe.
Methods: While I was prepared for the proofing stage to take 4.5-6 hours, I was hoping that it wouldn’t take the full 6 hours, but it did.
Techniques Used: I decided to braid (3 strand) and then proof (in my B&T proofer at 78F) and bake these loaves in my pullman pans (no lid) in order to achieve the shape that I was aiming for.
Results: These loaves came out looking and tasting great. However, next time I’ll definitely use more starter and possibly raise the total dough weight by 100g.
Based Recipe Porridge Boules:
These loaves ended up being my first sourdough “pancakes” due to high hydration, over fermentation, and possibly over proofing. So despite them being pleasantly tangy and tasty; I’ve chosen not to share a full journal entry on them. Click here for their formula. Next, time I’ll use a different whole grain flour, lower the hydration percentage if needed for the new flour, and shorten the length of bulk fermentation.


Twentieth Bake: September 2-4
Sourdough baguettes – see this article and these Instagram posts (Batch 1, Batch 2, Challenger Bread pan photos) for photos and recipe details.
Twenty-First Bake: September 10-11
Pickle Brine Rye Batards
Recipe: While I’ll admit that at I first I questioned a fellow sourdough baking friend’s recommendation that I replace some of my water with pickle brine. The more batches of lacto-fermented pickles that I made, the more I was tempted to set some brine aside for baking. On September 10th I finally did so and after calculating the approximate salt content of the brine, I was able to finalize my formula (recipe). -> Please note that your brine may have a different salt content and that the amount listed in my formula is for the total amount of salt in the dough i.e. brine salt plus added salt. For rye flour I used 25% Castle Valley Mill whole rye flour. Also, my hydration percentage was closer to 77% once I mixed the dough.
Methods: Autolyse: 1 hour / Bulk Fermentation: 18% inoculation with my 160% hydration dark rye starter aka Randolph -> 5.5 hours in my B&T proofer set @ 78F / 16 hour retard/proof / Baked @ 475F for 23 minutes and 450F for 20 minutes.
Techniques Used: I used the aliquot method for the first time by taking a small amount of dough, putting it in a jam jar, marking its top with a rubber band and putting it in the bowl with the main dough.
Results: These loaves came out of the oven smelling like rye and pickle brine. However, while the first slices tasted predominantly of pickle brine; the rye came out more over time. The crumb was nice and soft and not as sour as I assumed it would be from the brine and starter. I was also quite pleased that the salt level was just right, but I’ll still have to be cautious next time I bake pickle rye loaves because each brine’s pH is different and could still effect fermentation and in turn the final product. In terms of additional tweaks that I’d make…I’d incorporate some dark rye flour, increase the amount of rye flour to 30%, and possibly include some of the spices that were used for the pickle brine.


Oat Porridge Boules
Recipe: With inspiration from @fullproofbaking. I present you my first oat porridge boules.When attempting to scale up Kristen’s original recipe, I opted to formulate the weight of my usual 1000g of flour as 690g of flour and 310g of porridge. However, with the porridge water included in my hydration calculations, I ended up with 91.8% hydration. Full formula: https://fgbc.dk/pou. For flour I used King Arthur bread flour and whole wheat flour (amounts in formula).
Methods: Bulk Fermentation: 20% inoculation with my 100% hydration AP/WW starter -> 6 hours @ room temp. Baked @ 475F for 23 minutes and 450F for 20 minutes. Two sets each of stretch and folds and coil folds, spaced 40 minutes apart, with the porridge being added during the 2nd set of stretch and folds.
Techniques Used: I also used the aliquot method for the first time by taking a small amount of dough, putting it in a jam jar, marking its top with a rubber band and putting it in the bowl with the main dough. This helped me track the progress of bulk fermentation.
Results: Despite being 91.8% hydration these loaves weren’t that hard to shape and score. However, my bannetons lines were damp when I transferred the loaves onto the awaiting parchment paper. Luckily, upon DMing Kristen (FPB), she confirmed that this has happened to her when proofing high hydration loaves. My next concern was that my crust turned out surprisingly thin and wasn’t sure why. Especially because I didn’t alter my baking schedule at all from previous loaves. Once again, Kristen came to my rescue and shared that some porridge loaves have a softer and thinner crust. As with previous porridge loaves these loaves came out quite fluffy, sweet, and with an even crumb. I’ll definitely be baking more oat porridge loaves!

Twenty-Second Bake: September 17-18
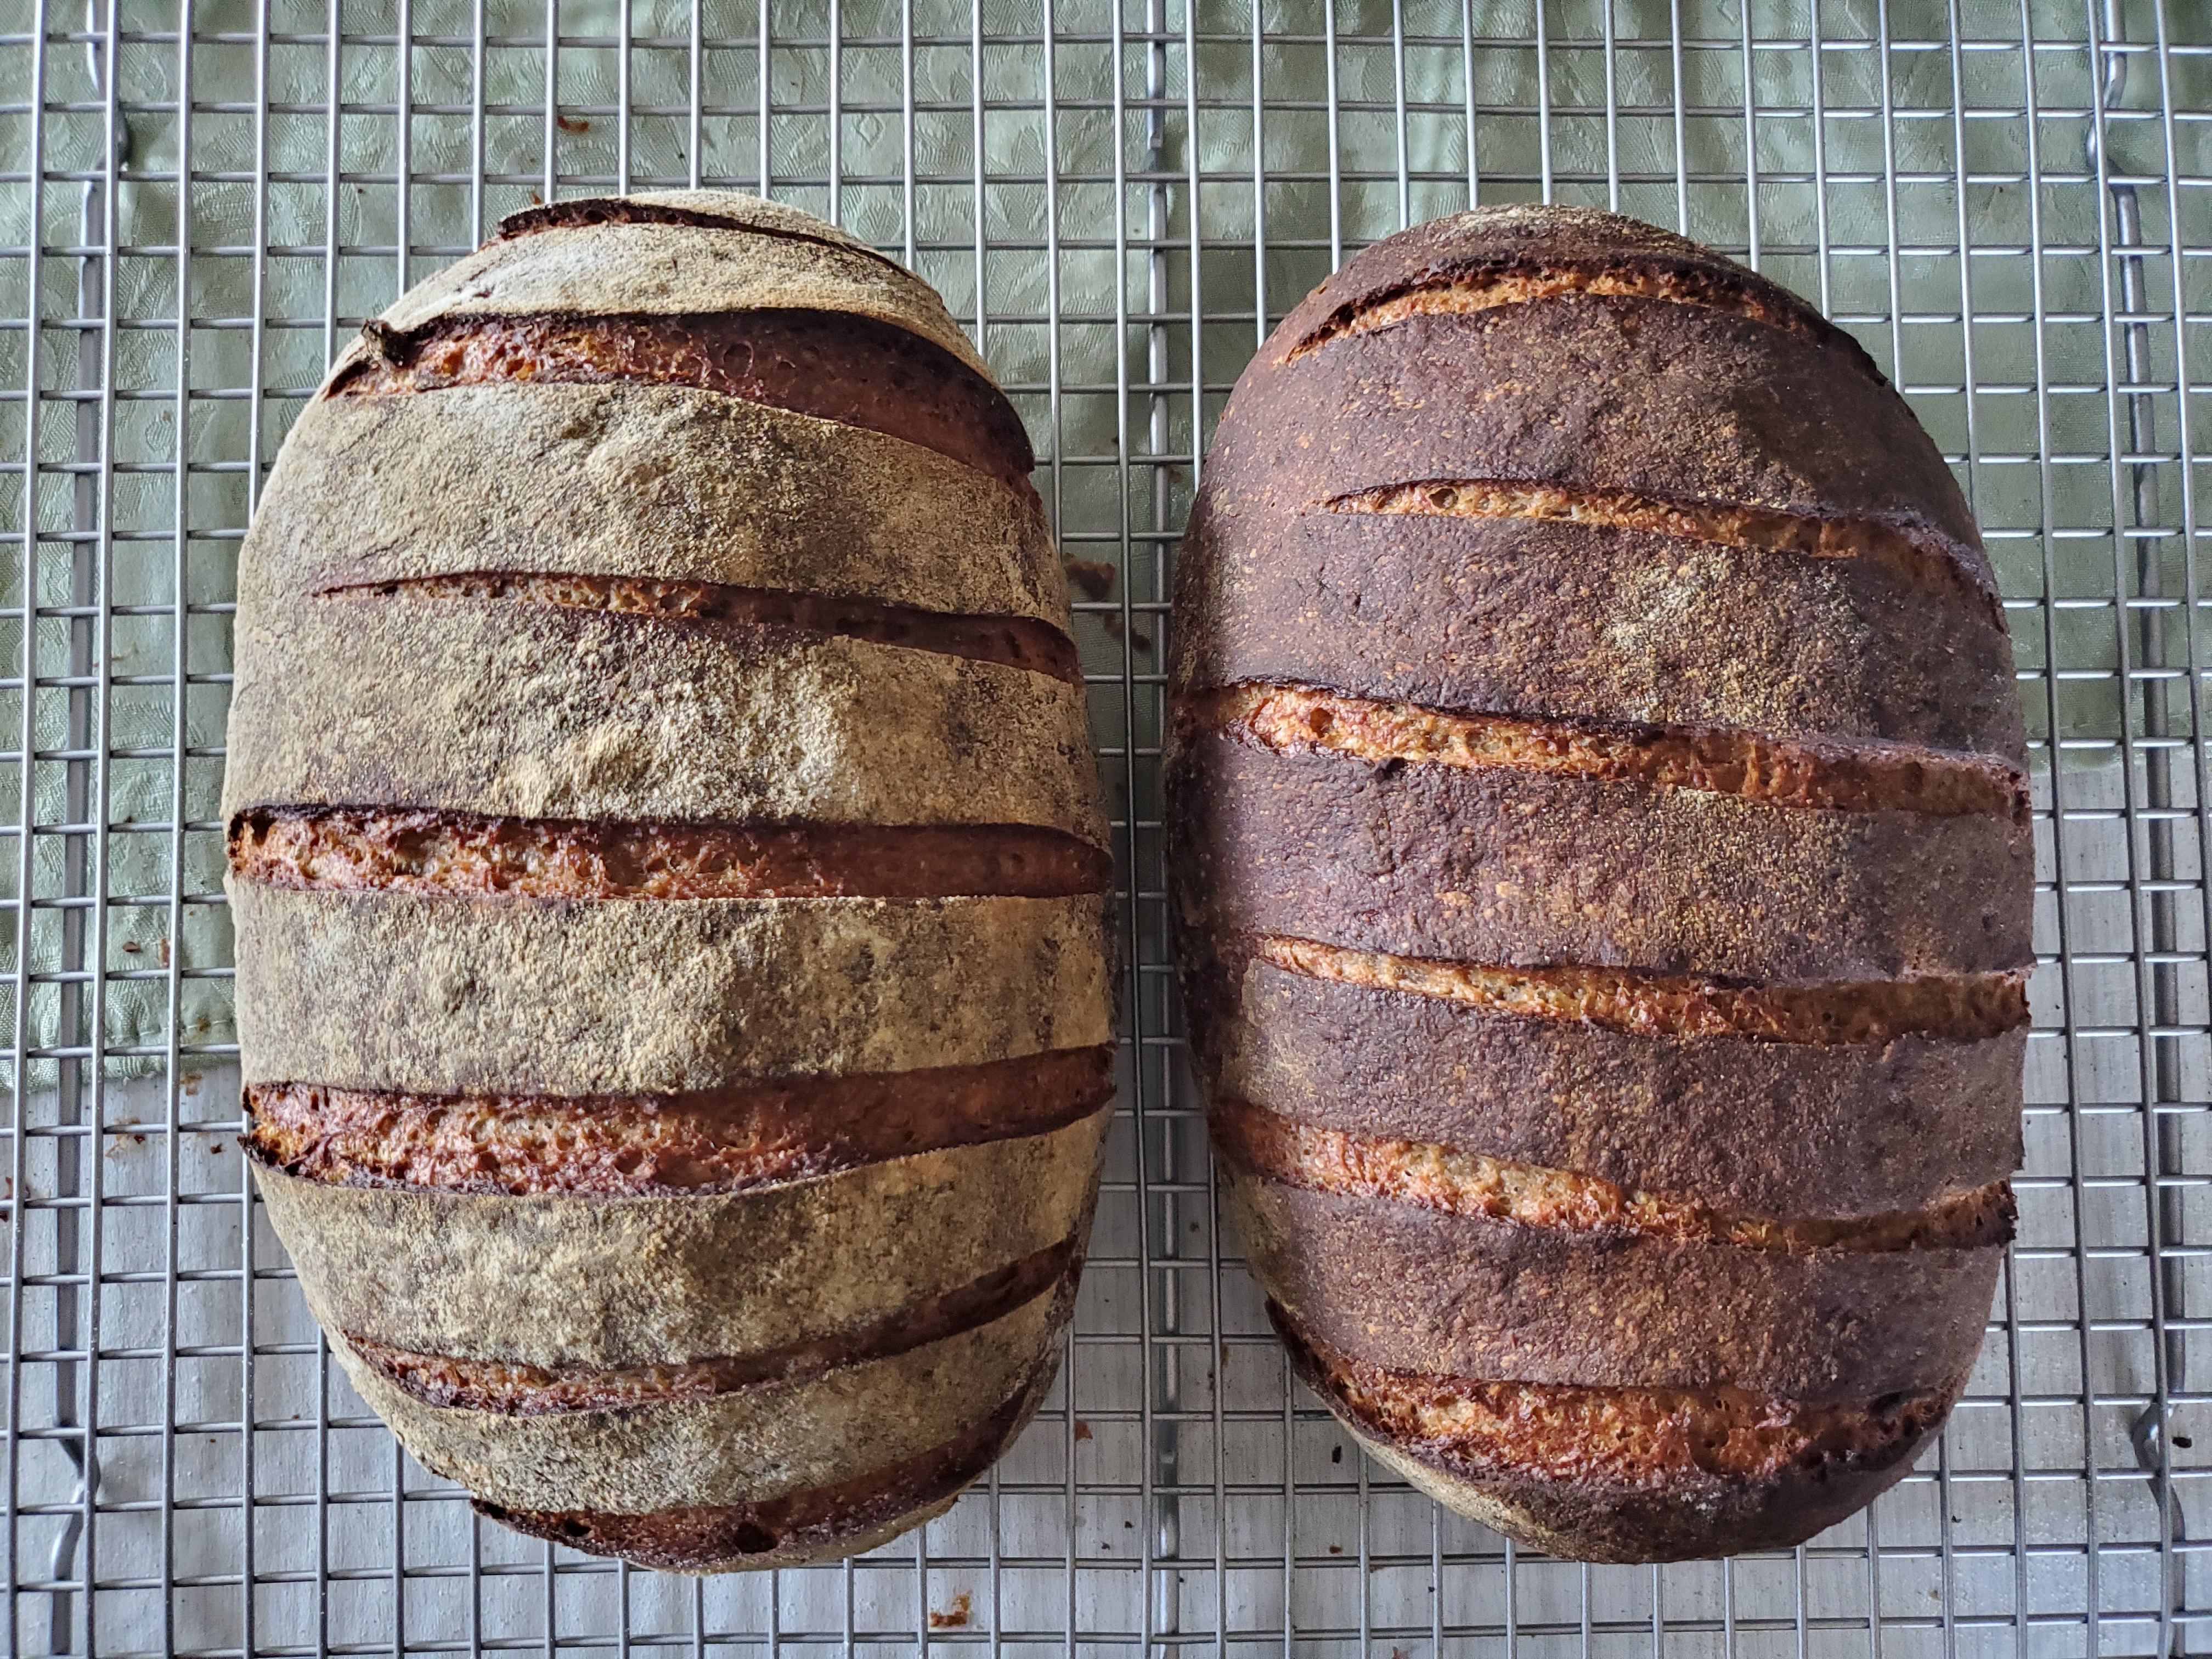
Freshly milled Farro (emmer) and cracked grain porridge batards
Recipe: On my last day of sourdough loaf prep prior to recieving my Mockmill 100-Profressional mill, I decided to mill some Farro (emmer) using my vintage electric spice grinder. After sifting it, I combined some of the bran with Central Milling’s cracked 9-grain mix (ground to match the bran), toasted it in vegan butter (I keep my SD baking non-dairy), added water, and made a porridge. Next, I stirred in some honey before chilling the porridge so I could fold it into the dough during my one and only set of stretch and folds. Full formula: https://fgbc.dk/qir
Methods: 6 hour bulk at room temperature, which included 1 set of stretch and folds followed by 3 sets of coil folds. Then an 18 hour cold proof and bake for 23 minutes covered @480F and 20 minutes uncovered @450F.
Techniques Used: As per advice from fellow bakers I used my food scale to make sure these loaves were of as even in weight as possible. In order to help the sesame seeds adhere to the top of these loaves, I brushed them with a egg white prior to sprinkling on the seeds.
Results: Despite some difficulty with shaping both baked well. Notably, the loaf that I baked in my @challengerbreadware bread pan (left) came out with better oven spring than expected than other one which was baked in my @lodgecastironrd Combo cooker. Between the fluffiness added by the porridge and the complexity added by the sesame seeds, these loaves were a home run. Now that I have my own mill, I’ll definitely be baking this recipe again with one change. I’ll be making the porridge out of only emmer due to my ability to mill whole grain emmer flour to evenly fine and coarse levels.


Cinnamon Raisin boules 2.0
Recipe: Aiming to find a more effective way to add the raisins I followed @thetravelmuse‘s recipe (spelt and bread flours). Beyond the change in flours from my first cinnamon-raisin recipe, I used a bit less cinnamon-sugar mix and more raisins than her recipe. Full formula: https://fgbc.dk/qiq
Methods: 5.75 hour bulk at room temperature, which included 2 set of stretch and folds followed (first to incorporate starter) by lamination to incorporate the sugar, cinnamon, and raisins, and a 20 minute bench rest at the end of bulk fermentation. Then an 17 hour cold proof and bake for 23 minutes covered @ 480F and 20 minutes uncovered @ 450F.
Techniques Used: This was my first time utilizing lamination to both incorporate mix-ins and add strength to the dough. With the spelt adding extensibility to the dough I carefully stretched out the dough and added the cinnamon-sugar mixture and pre-soaked raisins (deviation from Travel Muse’s recipe). I should note that because I chose to use 250g of raisins, I did a quasi-second lamination (also shown in recipe video) to add the remaining mix-ins.
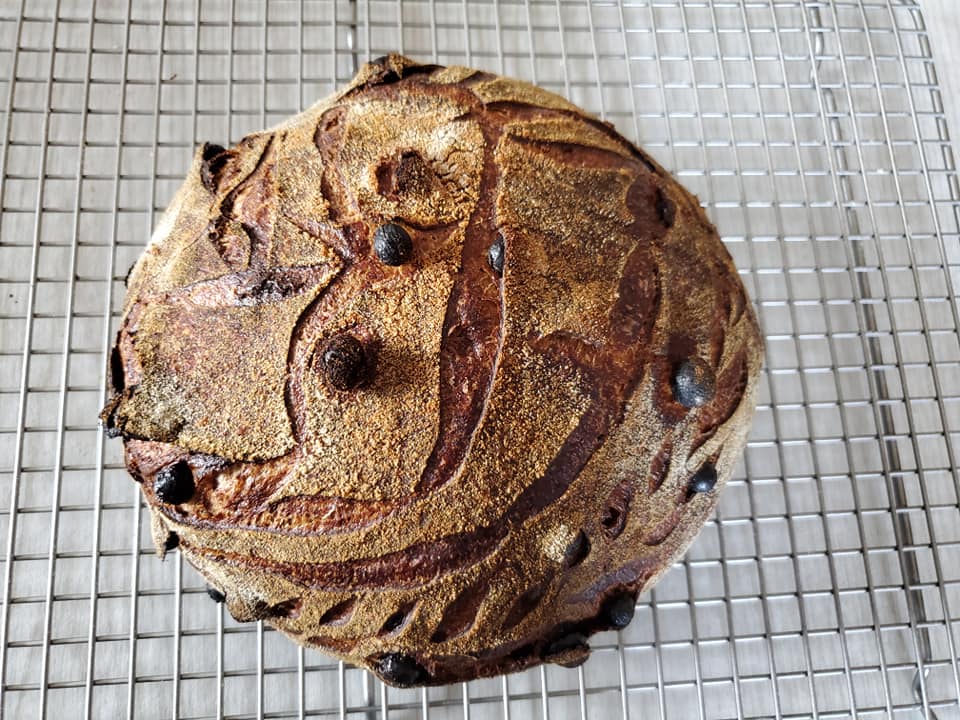
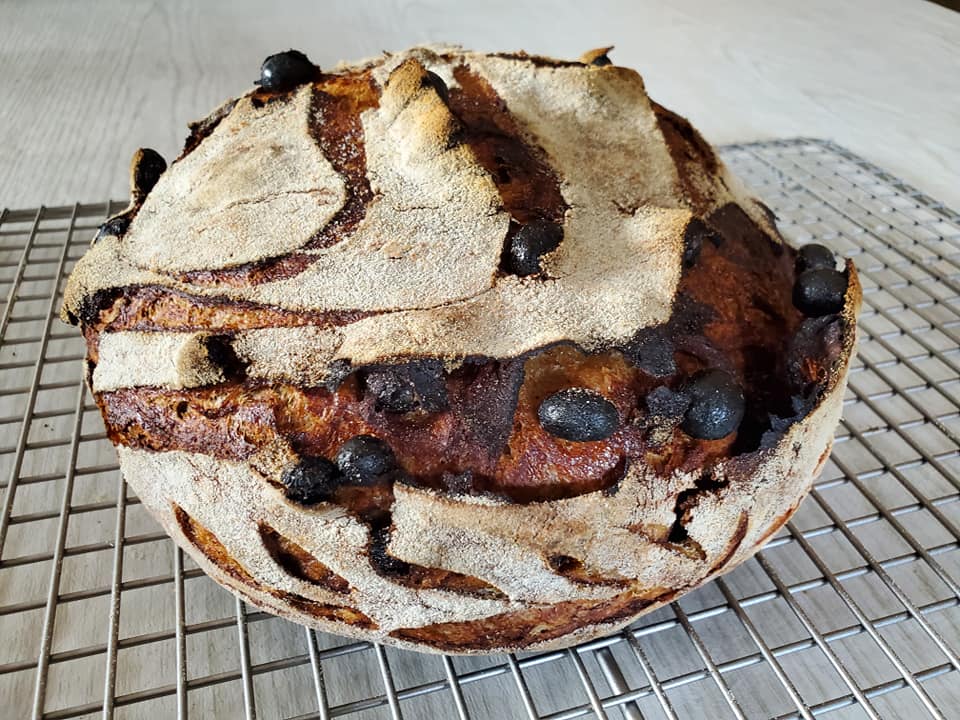
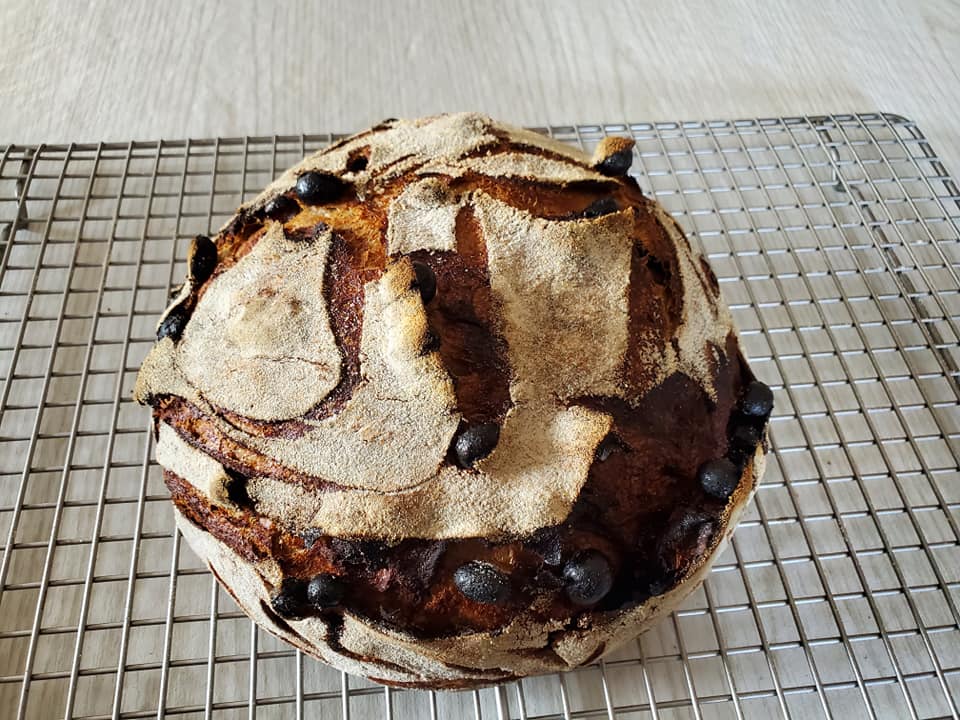
Decorative scoring: These loaves were baked for Rosh Hashanah. First loaf (darker boule) – Shofar, honey jar, apple, and wheat stalk (baked in my Lodge combo cooker). Second loaf (white rice floured) – Shofar, pomegranate, and wheat stalk (baked in my Challenger Breadware bread pan.
Results: The loaves came out tasting and looking great. The raisins were distributed more evenly than the first time I made this type of bread and the spelt added sweetness and allowed the mix-ins to shine a bit more than when I used whole wheat and rye flour. Next time I bake this recipe I’ll likely use a bit less raisins to make the lamination step easier and more efficient.

Twenty-Second Bake: October 1-2
35% Rye Batards 4.0
Recipe: For my first loaves with my new Mockmill 100 professional I decided to swap out the majority of dark rye flour from this recipe with freshly milled spouted rye berries and the Castle Valley Mill’s bolted rye flour with their whole rye flour that I milled finer. For color I ended up adding 25g of Bob’s Red Mill dark rye flour. Next, I chose to remove the high protein flour from this recipe entirely. Lastly, I kept the hydration and salt percentages the same. Full formula
Methods: 1 hour autolyse / 4 sets of stretch and folds / 5.75 hour bulk fermentation / 25 minute bench rest / 18 hour cold proof (retard in fridge) / baked 24 minutes covered @ 480F and 20 minutes uncovered @ 450F
Techniques Used: While a shorter cold proof is often recommended when using sprouted flours due to their higher ensymatic content, I chose not to due to the fact that I was only using 17% sprouted flour. Scoring: For the sukkot holiday I scored willow branches (aravot) and citrons (etrog)
Results: Despite containing 35% rye these loaves came out with a fluffy, soft, and even crumb. Flavorwise they were a bit more sour than when I’ve used a higher percentage of dark rye and didn’t have as deeply caramelized of a crust. However, my family and friends enjoy them and I’d definitely bake this iteration again. This bake left me curious about a 5th iteration (version) with a combination of dark and sprouted rye flours.
“Fresh” base boules
Recipe: While I had used Janie’s Mill Turkey Red flour in this recipe before, I chose to beef up it’s flavor by the milling some newly acquired Turkey Red berries (also from Janie’s Mill) as more of this recipe’s 20% whole wheat component. Then for the rye component I used 15% freshly milled sprouted rye berries (see link above). Full formula
Methods: 1 hour autolyse w/ salt (forgot to reserve water to dissolve it later) / 1 set of stretch and folds followed by 3 sets of coil boils / 6 hour bulk fermentation / 25 minute bench rest / 18 hour cold proof (retard in fridge) / baked 23 minutes covered @ 480F and 20 minutes uncovered @ 450F
Techniques Used: Beyond using freshly milled flour I did not change any of new techniques for this bake. Scoring: I tried to score lit Sabbath candles, but some of my cuts were too deep and everything spread out.
Results: The use of the freshly milled Turkey Red berries definitely amplified this wheat variety’s flavor. The crust was comparable to past bakes, but the crumb was definitely softer. I’d like to try baking loaves with 30-35% Turkey Red flour to experience how it tastes without rye flour.


Twenty Third Bake: October 8-9
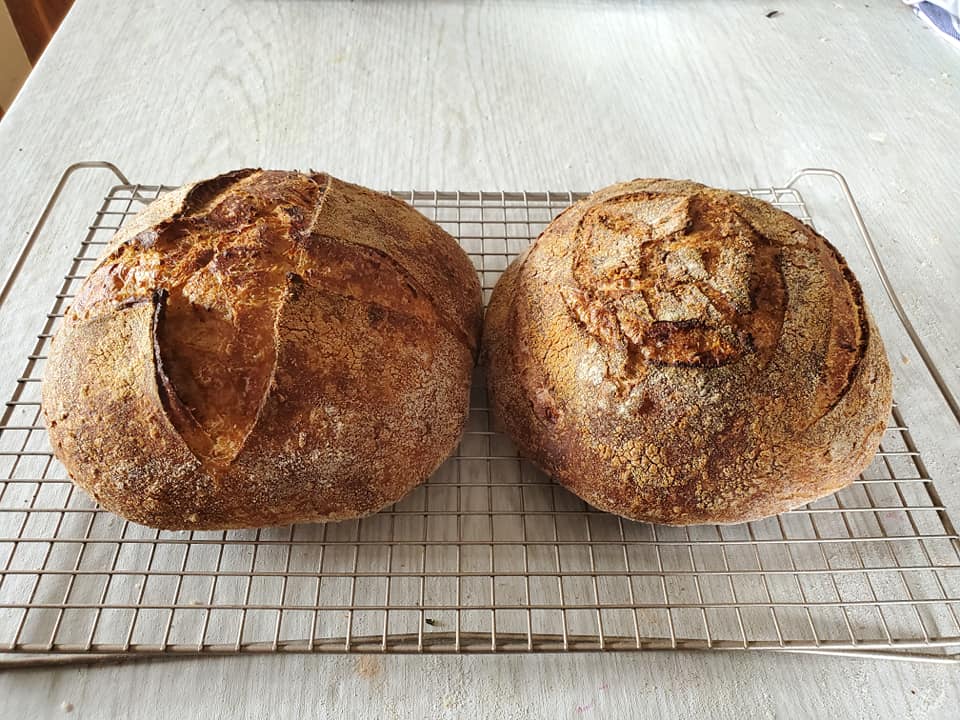
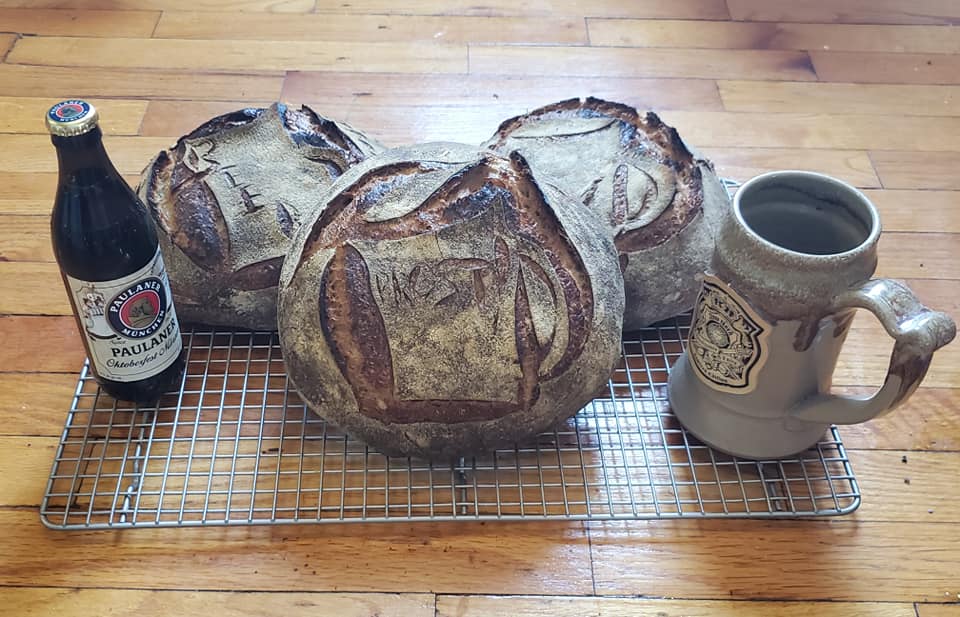
30% Warthog Wheat Okotoberfest Boules
Recipe: In celebration of oktoberfest I baked my first 3 loaf batch and scored beer mugs on them. Formula: 60% bread flour, 30% Janie’s Mill Warthog berries, 9% Central Milling dark rye, 1% malted rye, 2% salt, 78% hydration, 20% inoculation with my 160% hydration dark rye starter. I chose to use Warthog wheat berries because of this Breadtopia description: “This wheat tends to mill with bigger flakes. It has a delicious beer-y flavor that’s not bitter, and as a winter wheat, the gluten strength is a bit weaker than the spring reds.”
Method: 1 hour autolyse followed by addition of starter and salt 30 minutes later / 1 set of stretch and folds followed by 3 sets of coil boils / 5.75 hour bulk fermentation / 25 minute bench rest / 17 hour cold proof (retard in fridge) / baked 23 minutes covered @ 480F and 20 minutes uncovered @ 450F
Techniques Used: In an effort to be as gentle with this dough as possible I chose to do primarly coil folds and be extra careful while shaping the divided dough into boules.
Results: These loaves turned out great! The crumb was open and even and the flavor was hearty without being heavy and had a custard-like texture. While I didn’t necessarily pick up on the “beer-y” flavor, I enjoyed the whole grain flavors and so this my family and friends whom I shared these loaves with. Next time I bake with recipe I’ll likely hold back some water to dissolve the salt so that it can be more evenly distributed throughout the dough.


Test loaves – bakes testing new fermentation techniques and methods
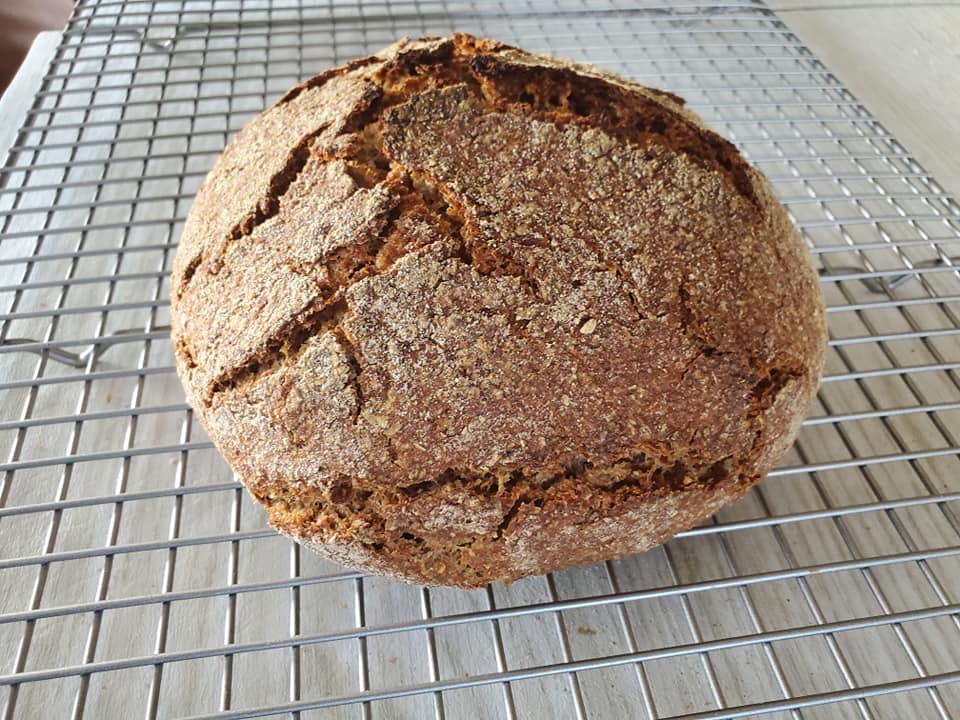
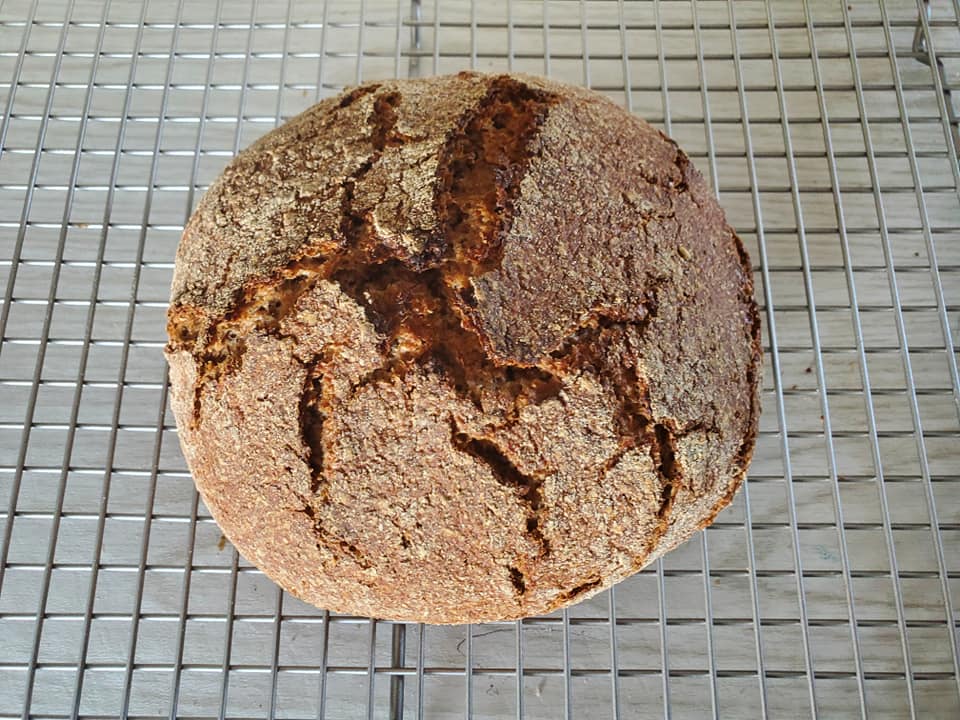
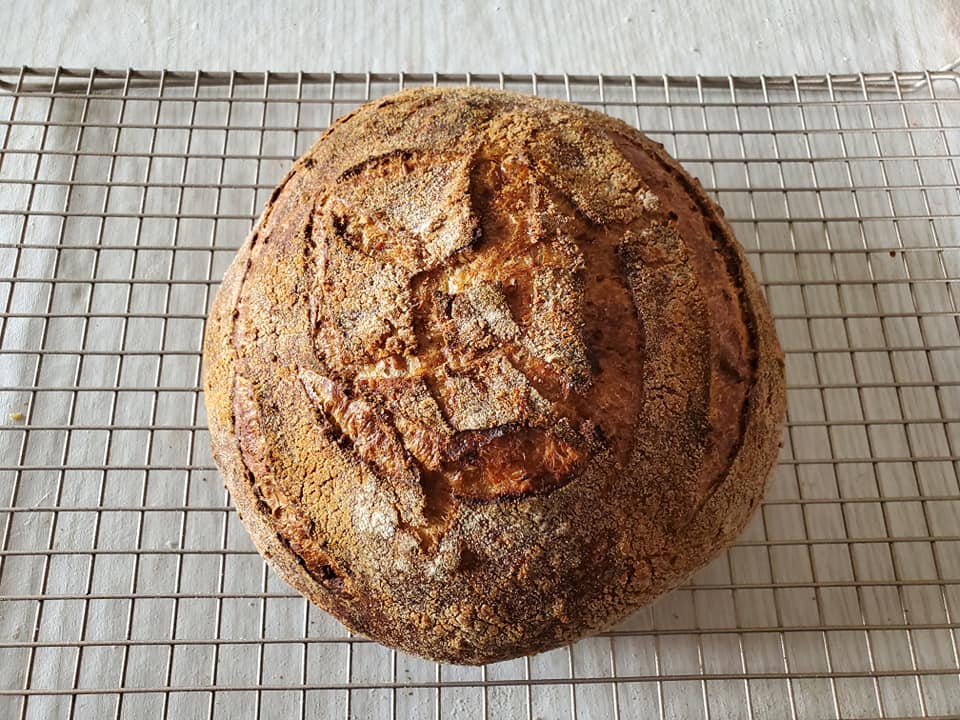
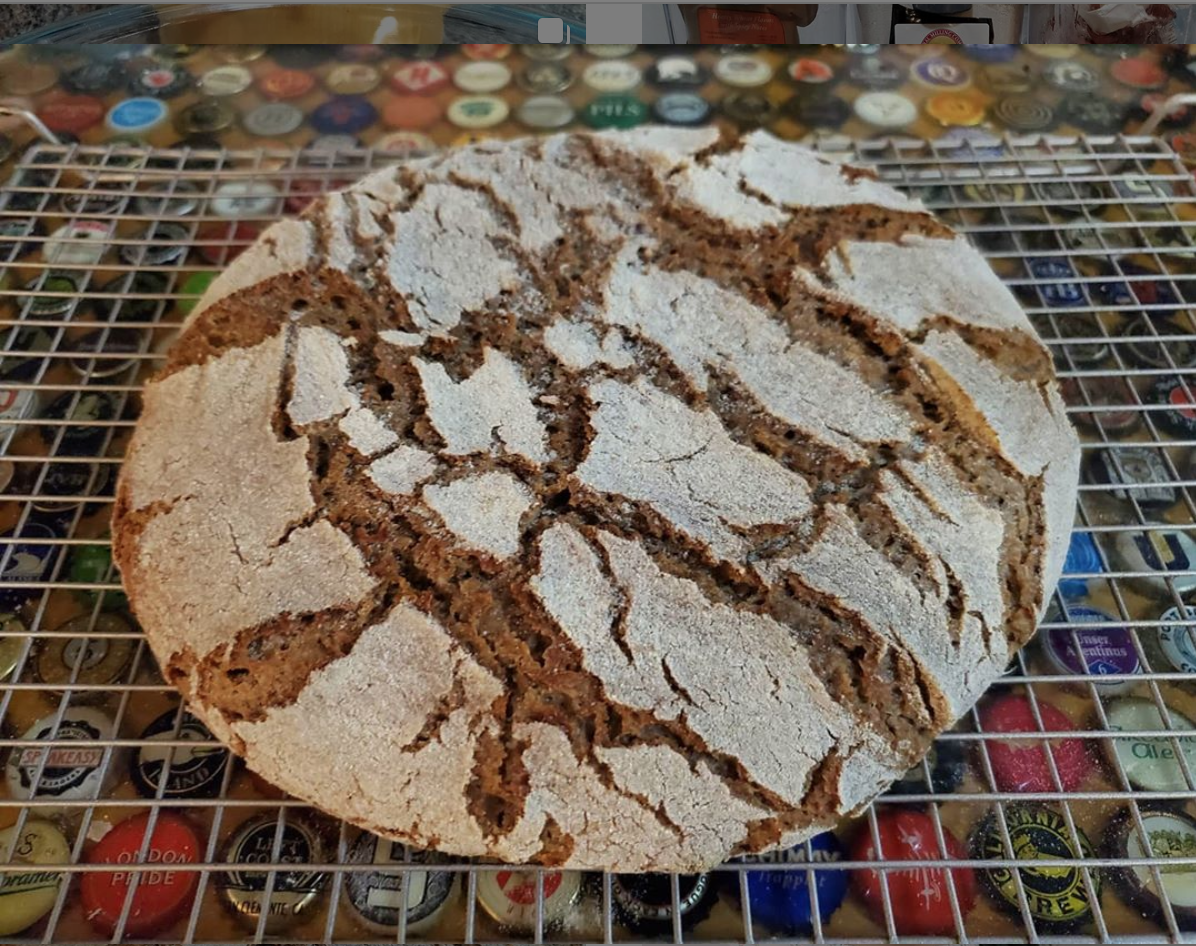
October 6 – 100% Rye Boule
Recipe: Following I Love Cooking Ireland’s (Patrick Ryan) Rye Masterclass 100% rye recipe, I decided to take my chances and use starter discard instead of recently fed starter for leavening this loaf.
My adapted recipe:
525g @bobsredmill dark rye flour
375g rye starter discard
375g water
10g salt
8g caraway seeds
Results: After following the steps described in Patrick’s recipe video, I think that I still may have overproofed this loaf by 15-20. However, while it spread out doing baking it came out looking really cool and the crumb showed signs of a good fermentation. Taste-wise, I definitely enjoyed the bold dark rye flavors present in this loaf. I’ll definitely bake this recipe again, but use recently fed starter instead of discard.

Granipains – October 9th – full formula minus the 3g of sourdough starter that I added to the granipain levain. I’ll definitely be using more next time.
Color-coded corn porridge loaf series – “yellow” and “red” – see this article
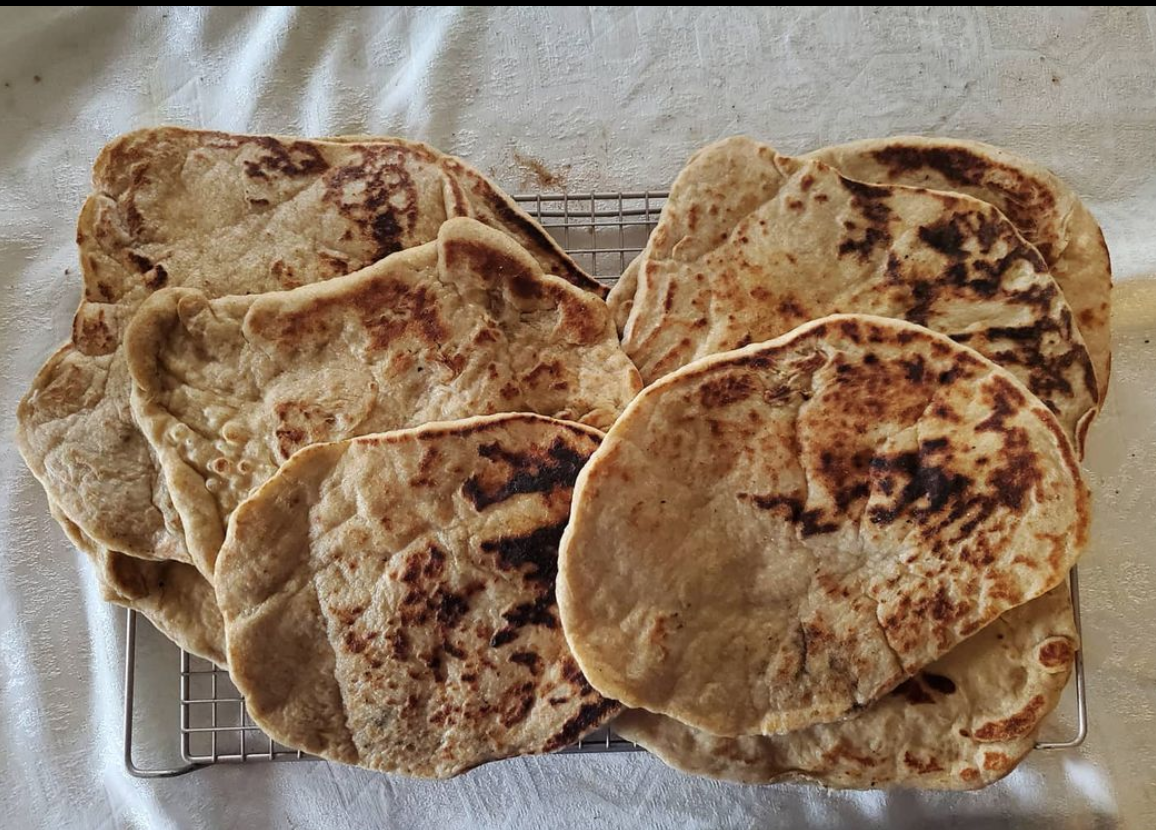
Emmer laffa flatbreads – Adapted from my go to naan bread recipe. I used 33% Castle Valley Mill emmer flour along with both active dry yeast and sourdough discard in these delicious flatbreads. Going from naan to laffa meant doubling the recipe and rolling out circular flatbreads rather than oblong ones.
Upcoming Updates / Most Recent Bakes:
CVM gift loaves – Two 100% rye loafs and 2 seeded base recipe loaves
Mini loaf #1 – 25% spelt / 25% white whole wheat / 50% bread flour
Miche loaves – see this article
40% einkorn loaves – Einkorn flour from River Valley Community Grains
White corn loaves – Silver King white cornmeal and spelt
Seeded loaves – white and black sesame seeds into and seed mix on top
35% rye loaves 120L – 5th iteration of my 35% rye loaves – article coming soon
CVM Bolted Mini Loaves – 100% Castle Valley Mill Bolted Hard Wheat Flour
Blue Corn loaves – Buck’s County blue cornmeal and purple barley.
Wapsie Valley mini loaves – Wapsie Valley Cornmeal and semolina flour.
Morrocan Olive Raisin Mini loaves- Emmer, spelt, and bread flour with green olives, raisins, and spices
Muesli porridge loaves – Bob’s Red Mill Old Country muesli porridge
Everything Bagel loaves – homemade everything bagel season atop loaves with 25% Turkey Red flour, 10% whole rye flour, and 65% bread flour.
Thanksgiving loaves – 30% Turkey Red loaves with a turkey scoring pattern.
Cranberry Nut loaves- Whole grain batards with dried cranberries, walnuts, pecans, and orange zest.
Sourdough Pizza – 3 variations on Breadtopia’s sourdough pizza recipe
Tehina Inspired “mini” Loaves – 300g flour / loaf instead of 500g – Bread flour and freshly milled emmer with roasted garlic, dried parsley, ground cumin, and lemon juice.
Latke Inspired Focaccia- Tipo 00 flour, bread flour, freshly milled spelt flour, and potato flour topped with thinly sliced Yukon Gold potatoes that were tossed in dried herbs and spices.
Whole grain loaves w/ 30% freshly milled white senora flour
Crusty sourdough discard rolls 1.0, 2.0, and 3.0 – see this article
Cairnspring low protein loaves – a blend of 3 heritage wheat varieties from Washington state.
Melange de Rouge loaves – miche loaves comprised of 5 different varieties of hard Spring and Winter wheat.
New Years 2021 loaves – 40% einkorn, 10% freshly milled spelt, and 50% bread flour.
Mexican Hot Chocolate loaf – from Make it Dough’s new book Sourdough Every Day
Turkish Apricot, Pistachio, and Cocoa loaf – 300g bread flour, 60g spelt, 8g salt, 75g 100% hydration starter, 270g water, 65g apricots, 35g pistachios.
Swirled Corn Porridge Loaves – My first “Corn Porridge Swirl: – separate doughs containing @cvmllc yellow corn / @jovialfoods einkorn berries & @cvmllc bloody butcher corn / @janiesmill Warthog berries that were laminated after receiving one set of stretch and folds. For the recipe follow this link: https://fgbc.dk/1747
For Information on the loaves and recipe listed above please check out my Instagram Page.
New Recipes Coming ASAP


Barry, you are one beer drinking foo. I appreciate the serious work you are putting into your blog. Thanks for the entertainment. Your twitter stream @bitzybrew is retweeting bogus tweets from a site called Craft Brew Advocate. Your retweeting engine must be picking up on “craft brew”. Check them out at craftbrewadvocate.com. Kill their content.
Amazing breads! My “Ginny Junior” is a little jealous!