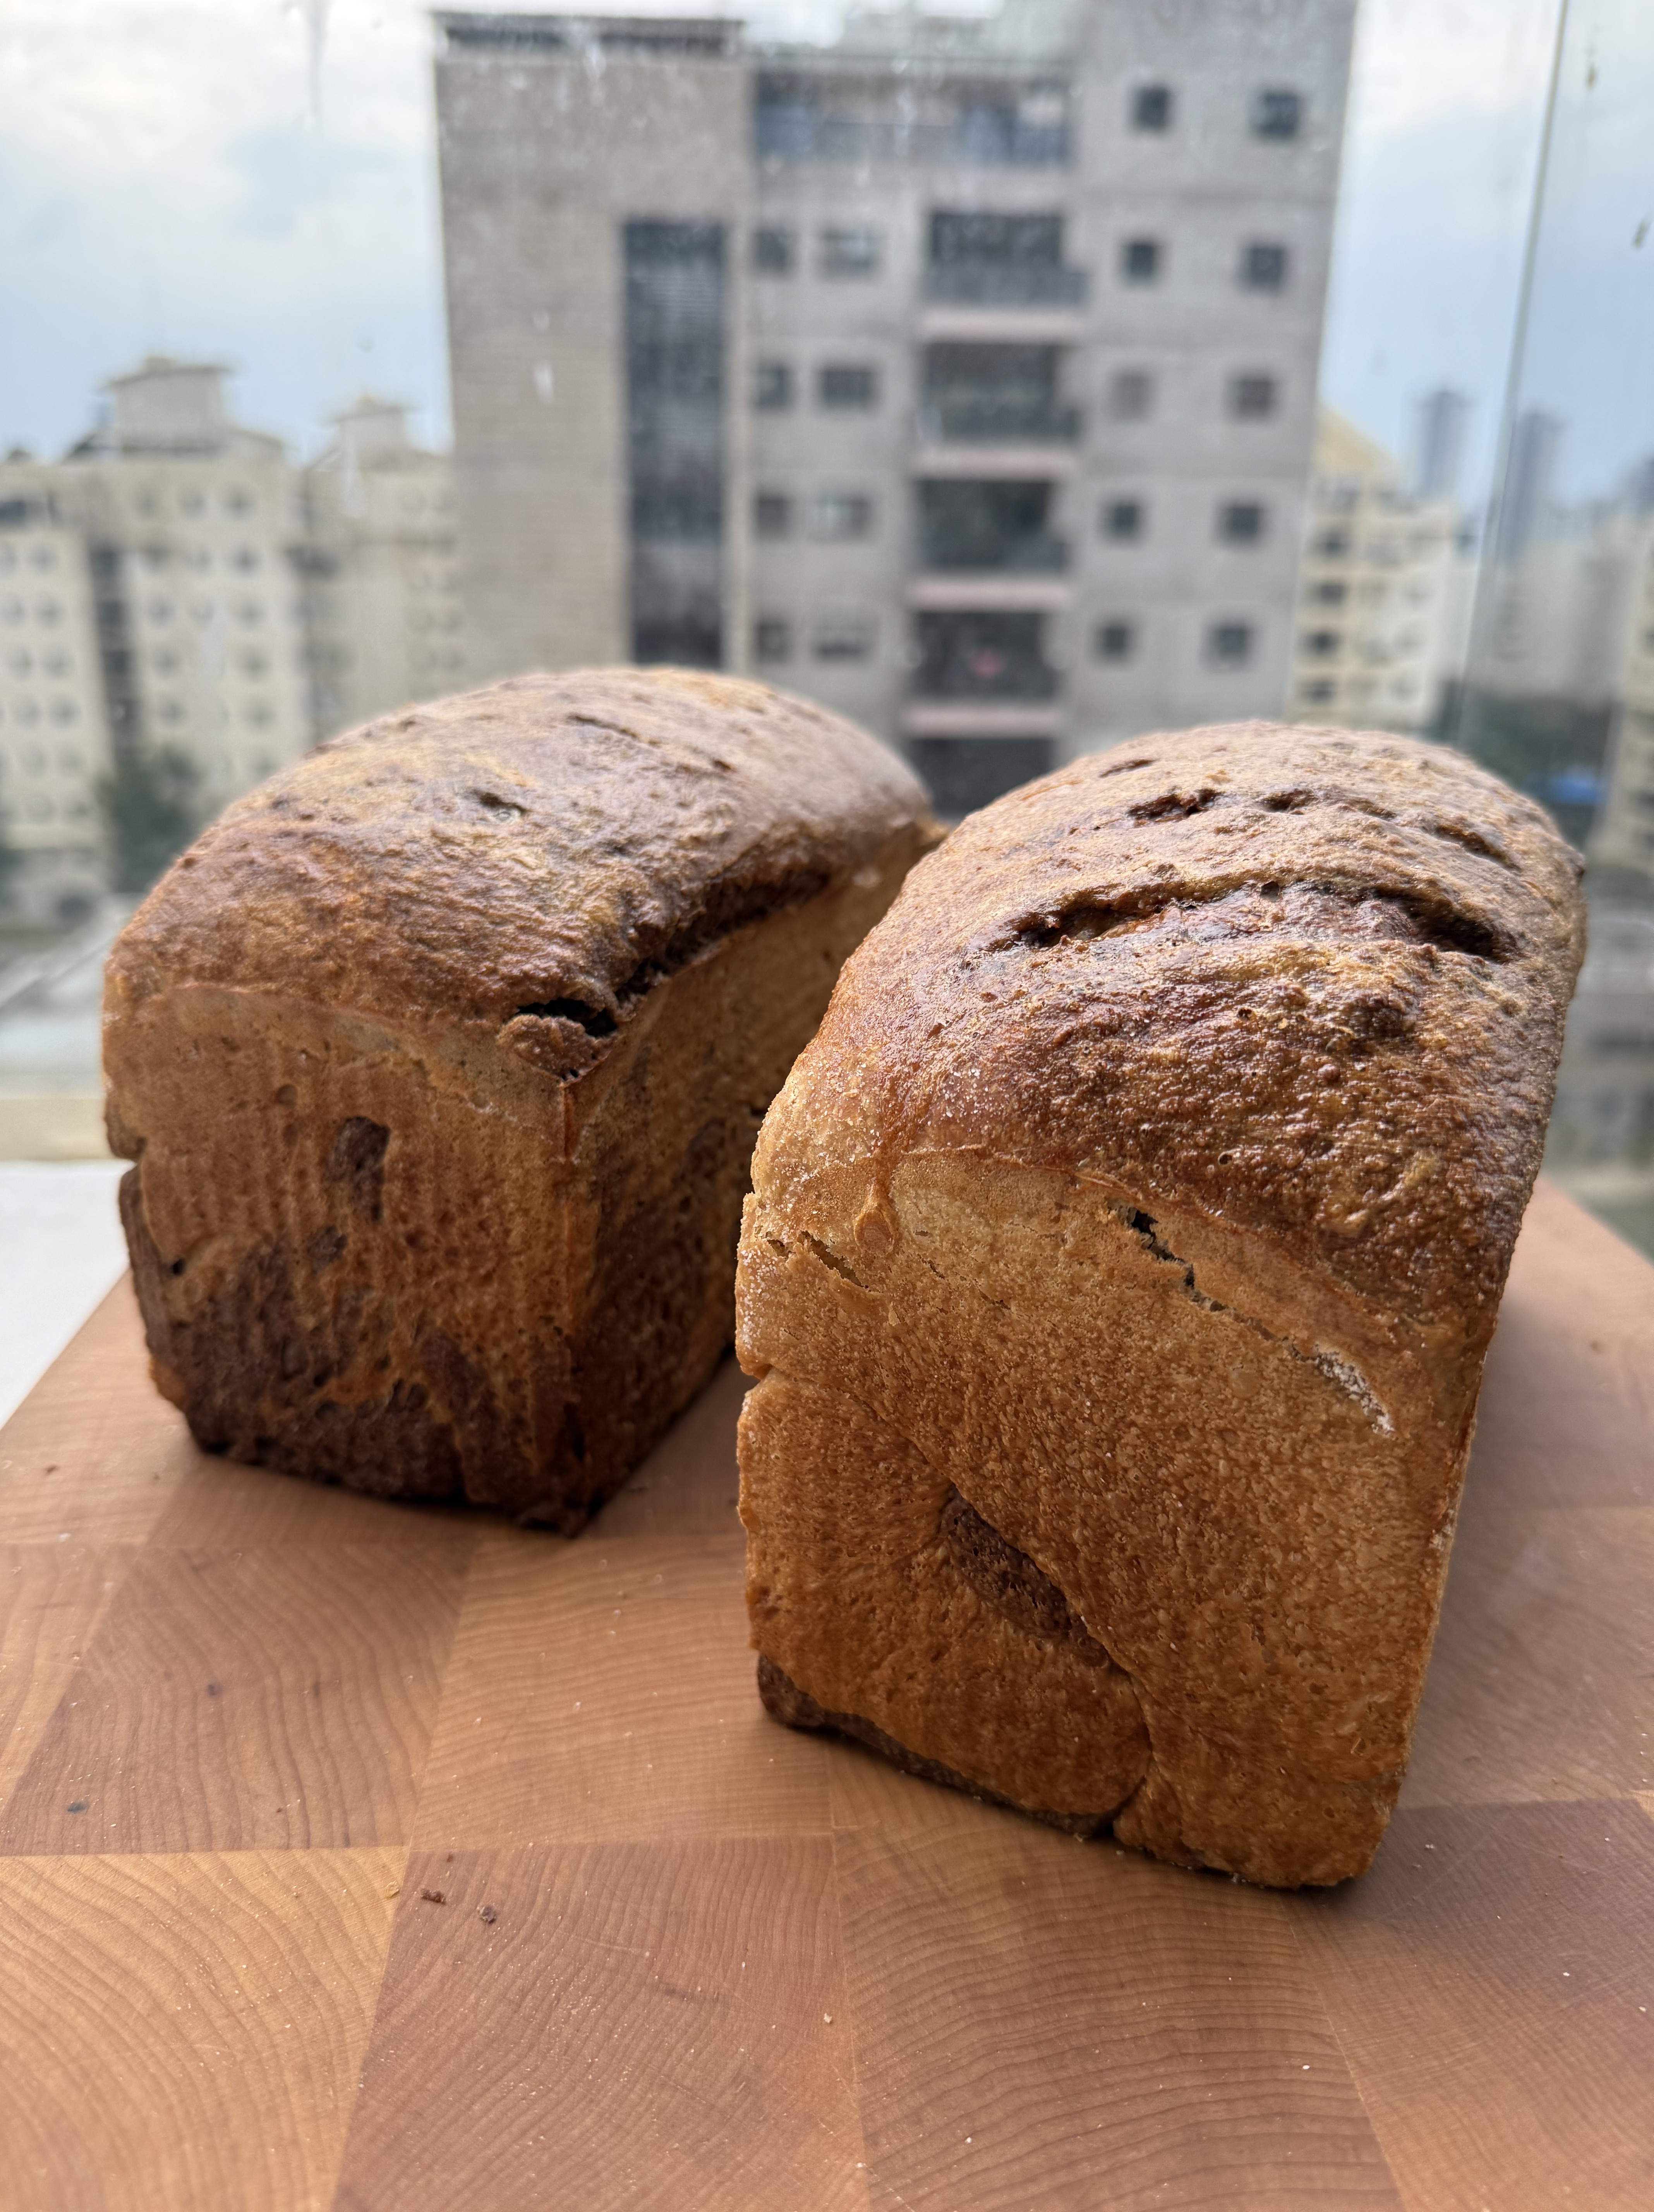
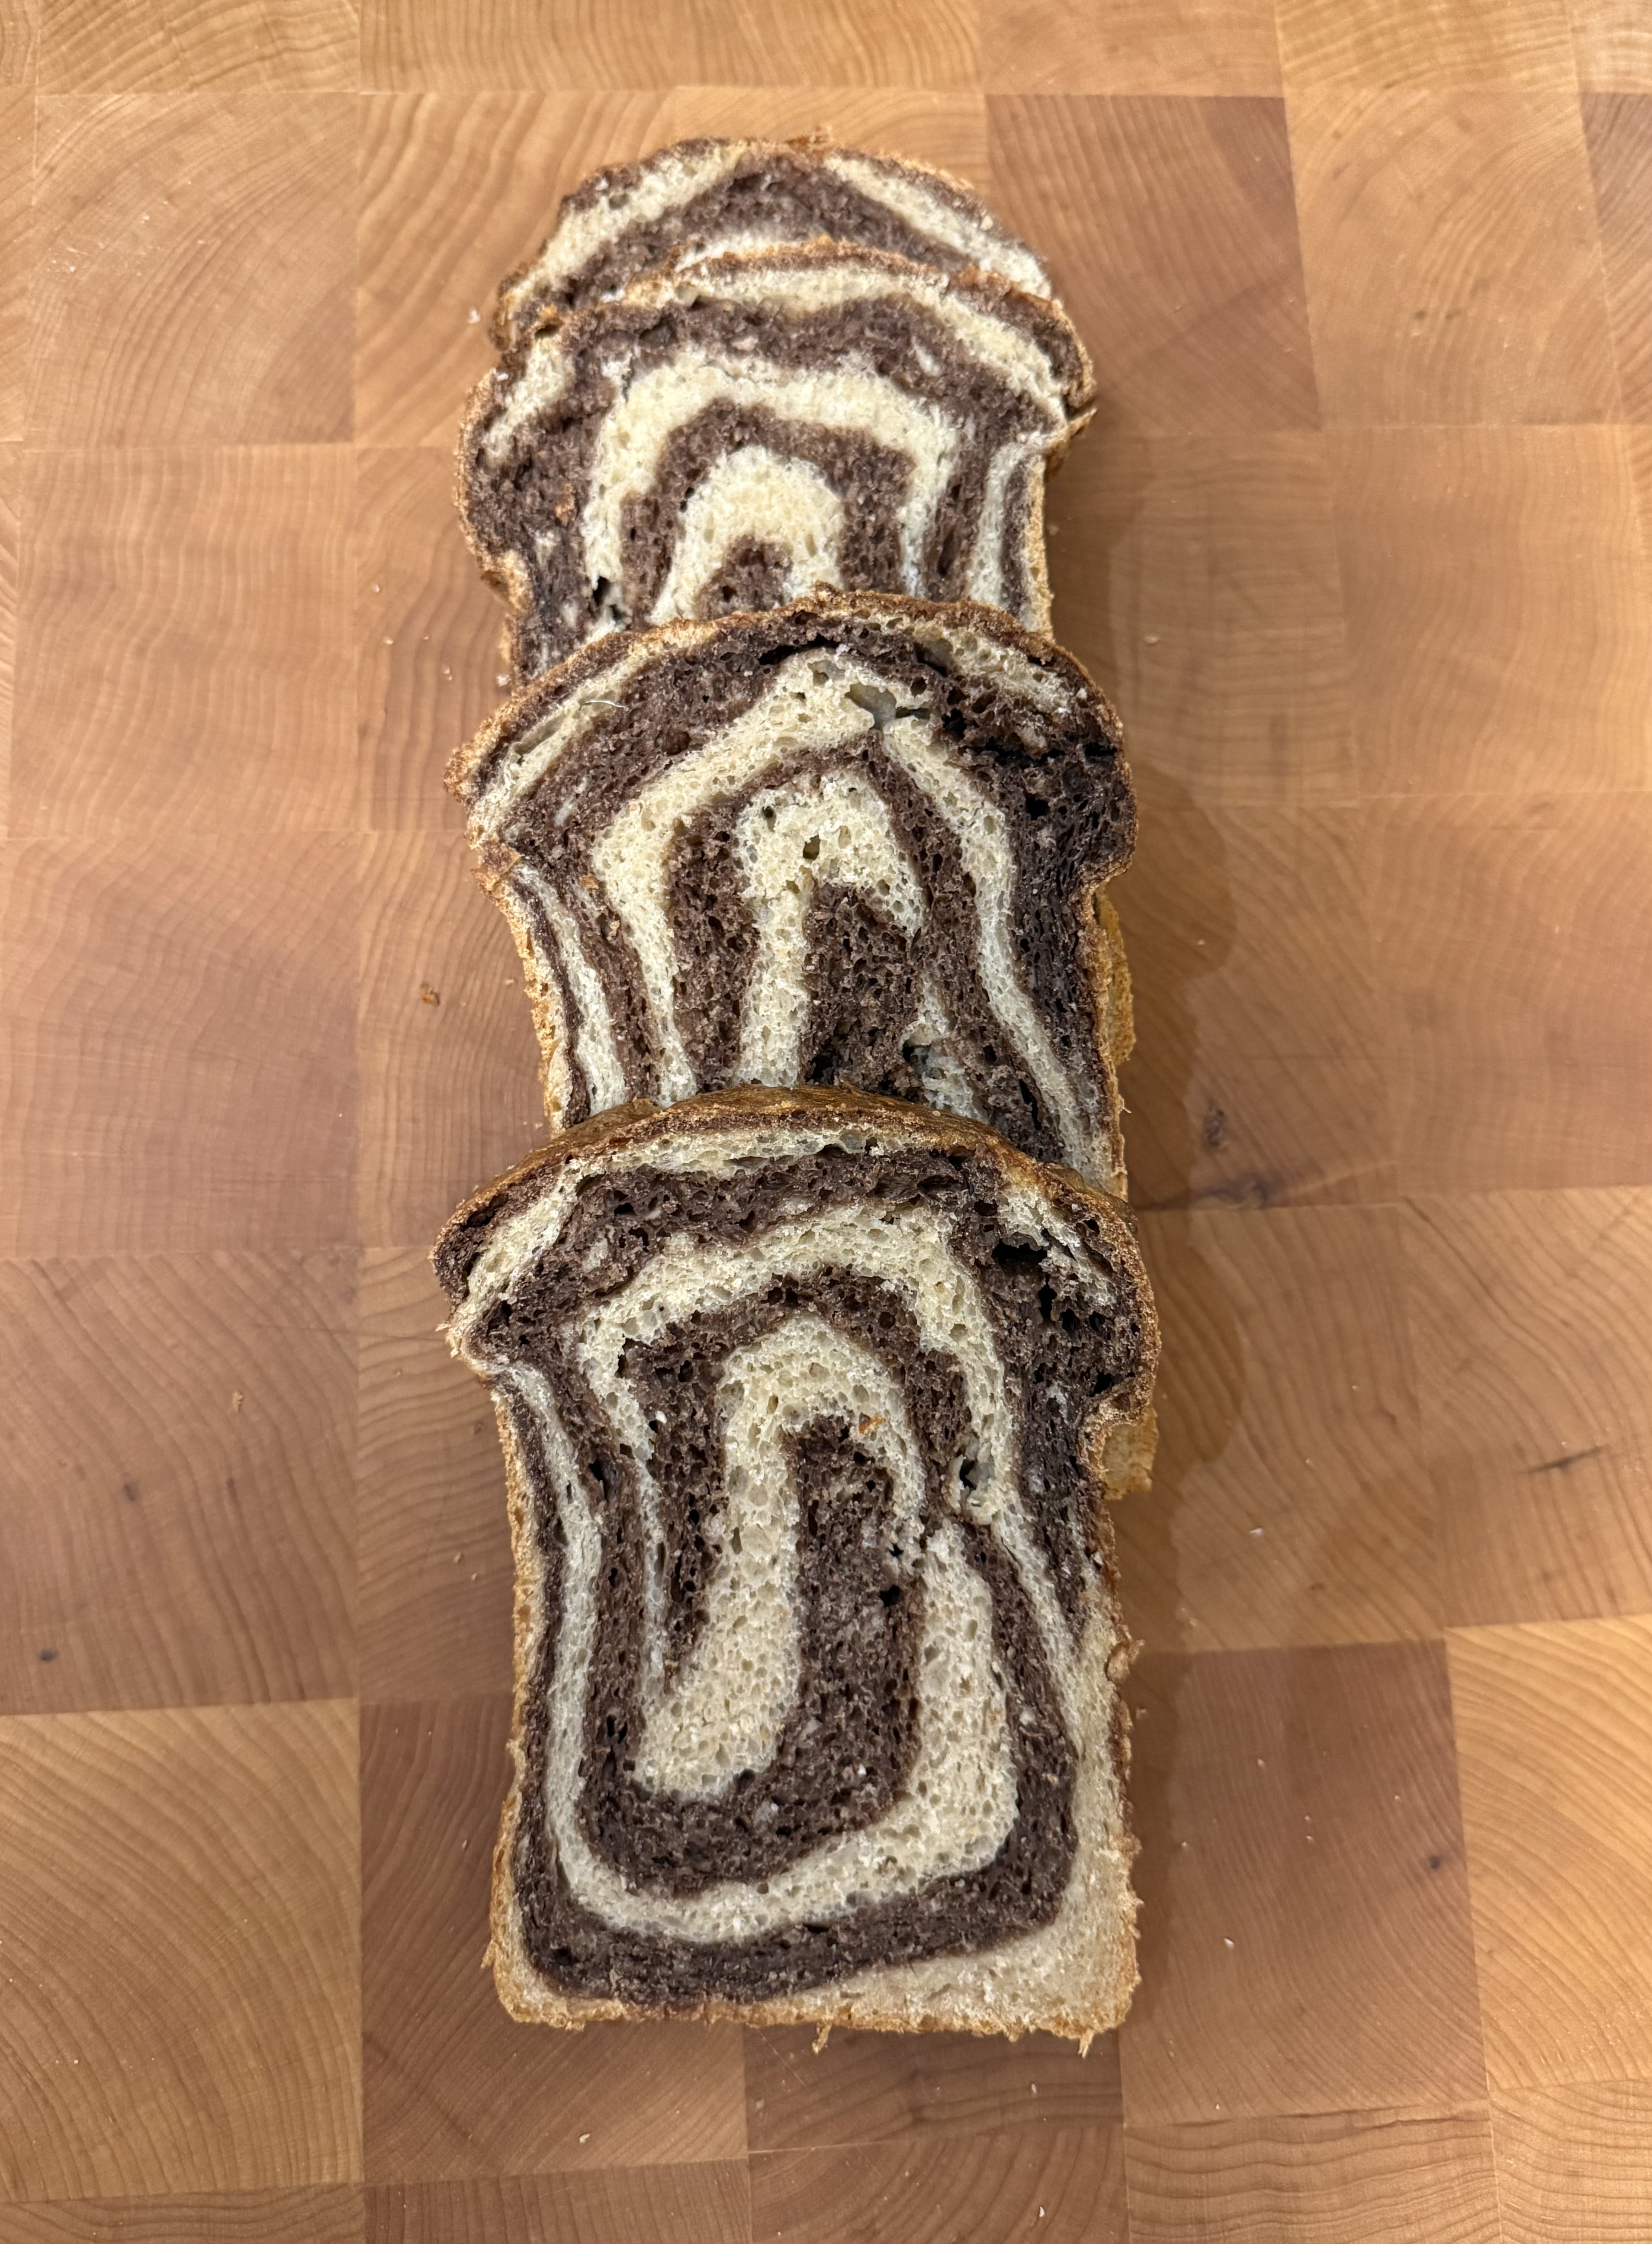
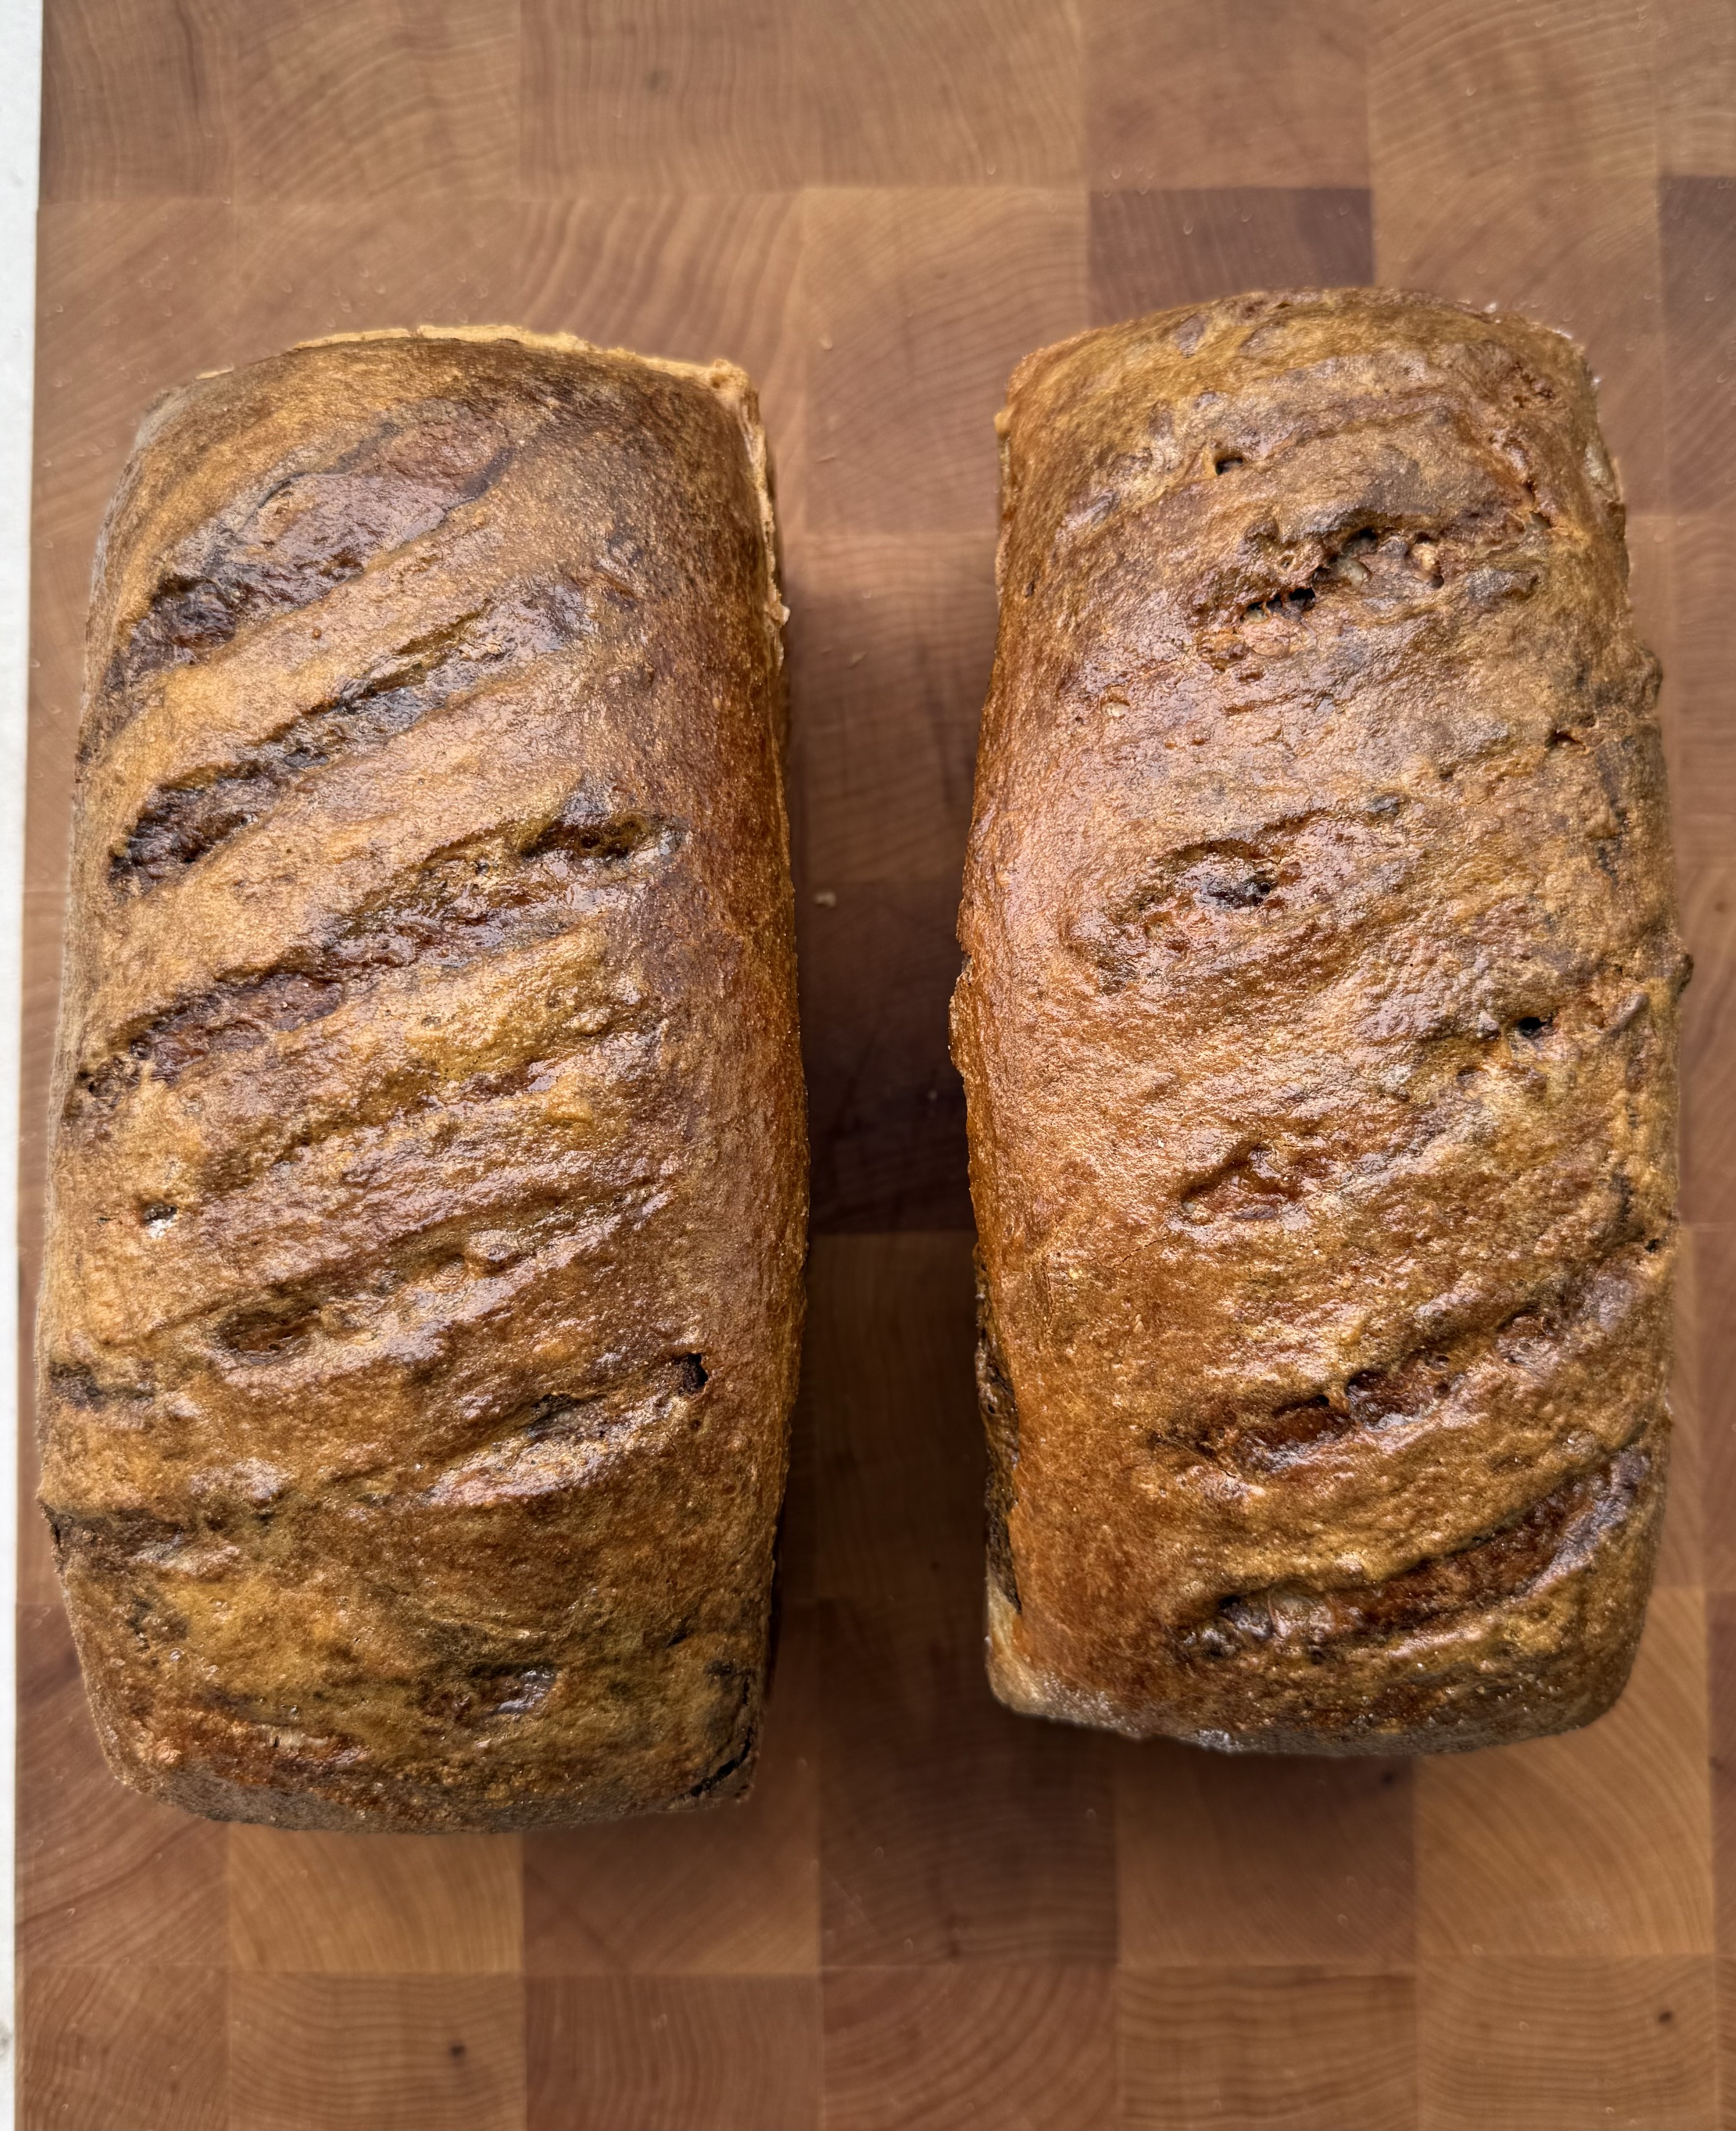
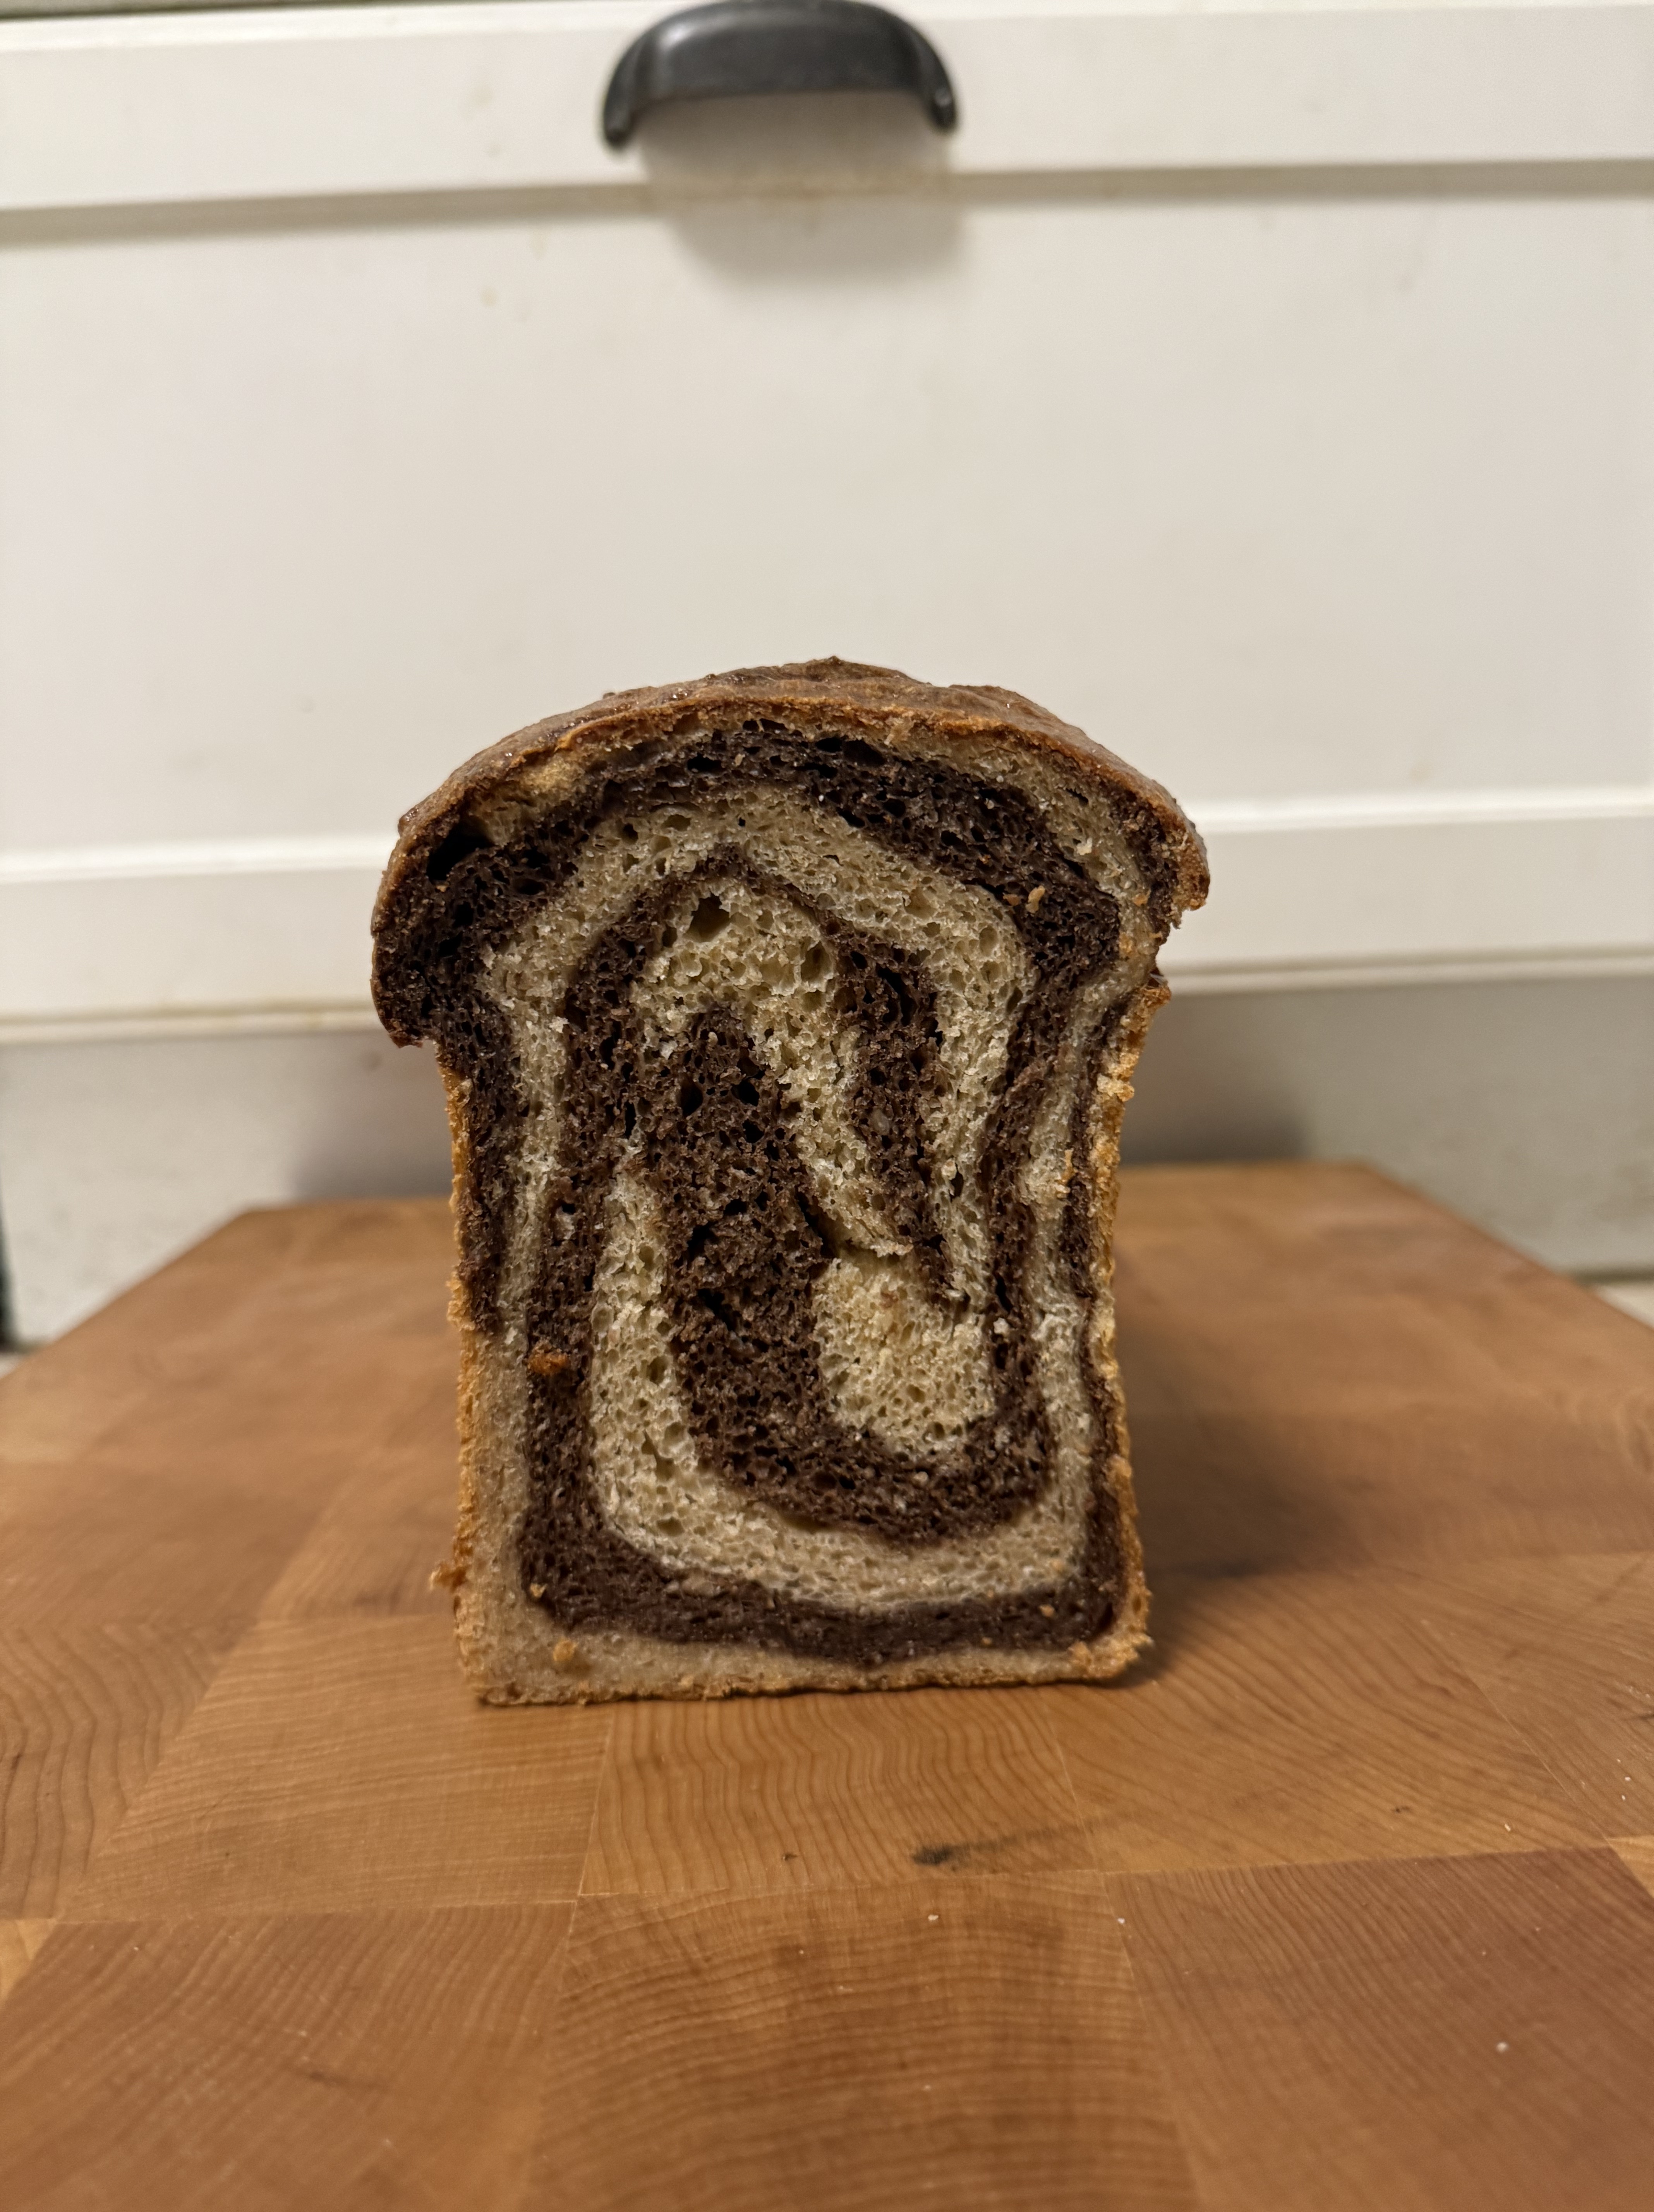
Taking inspiration from @autumn.kitchen “accordion bread” and many creative Hokkaido milk bread loaves by @bread_md. I chose to challenge myself and create a recipe that bridges creativity and technique.
Being that the “accordion bread” process was confusing to me in how its steps differed from the process I’ve followed in the past. I went back to my older @bread_md inspired recipes and created what I felt was a doable version 1.0 of a”marbled” Hokkaido milk bread recipe. A recipe which took into account my whole grain ethos, Autumn’s ability to balance appearance and crumb texture, and Benny’s (Bread MD) easy to follow process and techniques.
Key Process Notes: I…1) Split the dough in half after mixing all of the ingredients in. 2) Added cocoa powder and some extra water to the now “dark half” 3) Let both dough ferment as usual with 3 sets of folds each. 4) Divided both doughs in two and gently rolled out one dark and one light at a time. 5) Overlapped the doughs so that half of each was now showing. 6) Overlapped the outer halves. 7) Checked to make sure that the outside of the shaped loaf would be the lighter dough. 8) Rolled up the dough/s, lightly sealed the ends, and put each loaf in its respective loaf pan. 9) Proofed the shaped loaves for an hour at room temperature then put them in the refrigerator. The next morning I took them out and allowed them to finish proofing. 10) Baked them at 180C with fan until they reached 195F (90.5C) internal.
Tangzhong (I create mine the night before dough prep day at a 1:5 flour to milk ratio) : Tangzhong (credit: The Perfect Loaf), also called yukone in Japan, is an Asian technique that calls for pre-cooking a portion of the raw flour in a recipe with a liquid (usually water or milk) until it forms a paste. Then, this paste can be added to dough, resulting in bread that’s tenderer, more fluffy, and lasts longer before staling.When the flour is cooked to approximately 150°F (65°C), the starches gelatinize as the liquid is absorbed into the starch, which swells as the mixture becomes more viscous and gel-like. This gelatinization is similar to how the exterior of a bagel gelatinizes during boiling. When you do this, the process irreversibly turns the mixture into a sticky starch paste that’s then added to the dough during mixing.
Catching up: Over the past 6 months I’ve baked sourdough pretty much every week. In doing so I’ve settled into a routine that has allowed me to always have nourishing whole grain forward sourdough bread available for my family at all time. Most weeks I bake 4 loaves split into 2 recipes, one sandwich bread recipe and one crusty loaf recipe. However, I’ve recently swapped the crusty loaf recipe for sourdough focaccia a couple times. Lastly, as you’ll see in this video, I also make a sourdough pizza in my Ooni outdoor pizza oven when time allows.
Recipe formulation: When I first started my sourdough baking journey I relied on online baking calculators to make sure I was creating recipes that would actually translate into the flavor profiles etc that I was envisioning. However, over time experience has taught me to trust and apply my mastery of baker’s math, time tested baking and starter management processes, and culinary knowledge. Doing so in order to come up with recipes that most of the time come out quite close to my expected end result.
With sourdough baking being a constant learning process I’ve realized that it’s not always going to the be the case where I come up with recipes on the fly when feeding my starters and weighing out ingredients on Wednesday nights. In fact, I’ve recently gotten back into planning out recipes days in advance and doing research to find similar recipes to put my own twist on. This has allowed me to dial in my percentages and be more ready for adjusting recipes over time.
Using recipes as guides: Even after I find a recipe that I can see myself baking, I often do some additional research to in order to read up on and decide whether I want to include additional elements in my final recipe (formula). Doing so allows me to keep in mind that recipes are best when used as guides rather than a rigid set of ingredients and instructions. After all, one’s sourdough starter is a living culture, each flour has its own protein level and absorbency potential, and every kitchen (home) has its own temperature and humidity level. This being said, when adapting a recipe to factors such as one’s tastes, starter characteristics, and baking experience level. It is important to adjust ingredients and variables in a manner that does not compromise the basic techniques and/or ingredient percentages outlined in the recipe’s instructions and introductory paragraphs. For example, one can use their 100% hydration starter instead of a stiff starter. However, one should use the same percentage of starter and pay attention to how his or her bulk fermentation rate and dough temperature differ from those listed in the recipe being used.
My base sandwich loaf recipe: A glimpse into my recipe formulation and baking process/es
Key Factors: Lately I’ve been using 60% whole grain flours in this recipe to add more flavor and nutrition to my loaves. At this percentage there’s enough of a base of bread flour in order to still include a variety of whole grain flours and avoid a dense crumb texture. Next, after some trial and error I decided to stick to 10% each sugar and fat in order to get the crumb text I want no matter which flours I use and not have to include eggs. Lastly, for the purpose of getting to know my loaf pans and placate my own anxieties. I decided to start my recipe with 530-550g of flour to loaf. Doing so in order to ensure I end up with the size loaves that I prefer after taking into account dough loss throughout the dough preparation process (mixing through shaping).
Recipe Breakdown: While it’s important to scale up or down to your loaf pans I’ll share my recipe as 500g of flour per loaf for two loaves or 1000g total of flour.
758g water (78% including water in starter/levain)
100g Demerara sugar
100g olive oil
Process: Mix the flour, water, salt, and starter together. Then pour in the sugar and oil and mix in. Ferment according to your established process and then shape as you would batard (oblong) loaves . Eggwash: I brush on one layer of eggwash before scoring and then another layer after removing the steam pan. Put a pan of hot water under the loaves for the first 25 minutes. Bake at 375F for 45-50 minutes (because my oven is in celsius I bake at 185C with fan) or until the internal temperature of each loaf reach 200-205F (93-95C). Let cool in pan for 5 minutes and then transfer to a cool rack to fully cool before slicing. If stored well (I wrap my loaves in aluminum foil and then put them in a zip tock bag).
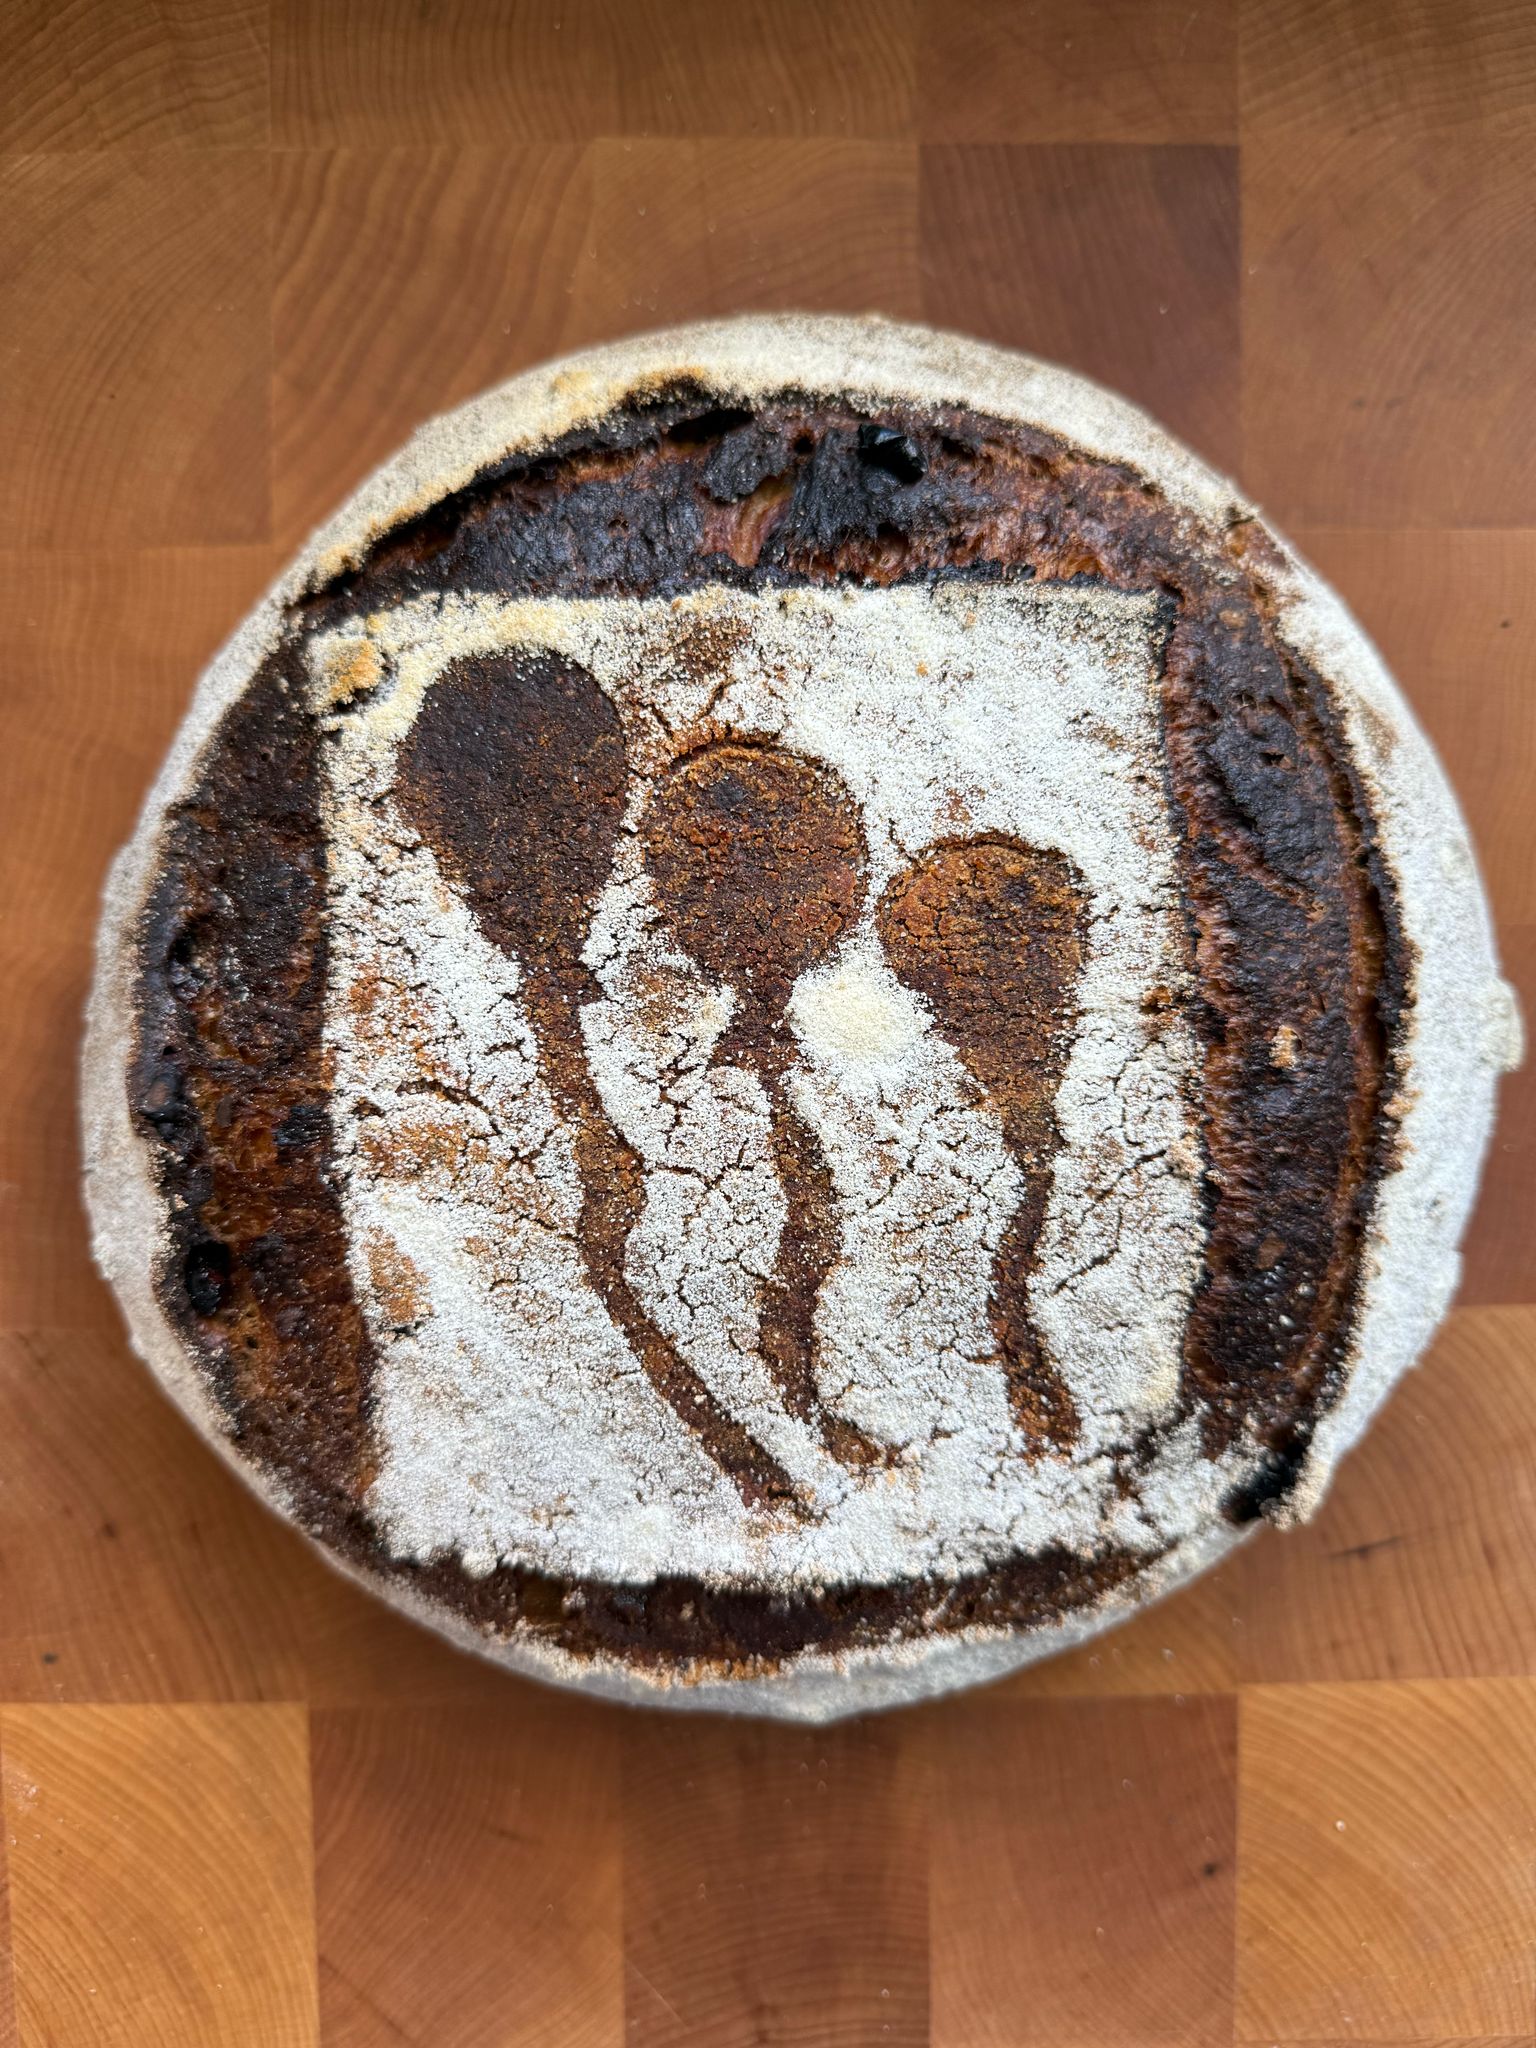
Texture and flavor at the forefront of loaves baked with both sorrow and healing in mind. Bibas family members Yarden, Shiri, Ariel, and Kfir have inspired and unified supporters of Israel since October 7, 2023. Unfortunately due to the Shiri and her sons being returned following their tragic deaths. They unified their loved ones and supporters in sorrow as well. To honor their memory, I revisited a recipe whose primary color (orange) matched their hair and return campaign color.
Choosing to prepare and bake a recipe that involves some trickier techniques allowed me to both temporarily take my mind of the difficult emotions I was processing and then share the experience with my family and friends. These loaves came out great on all fronts! In turn, I’m looking forward to continuing to utilize my sourdough baking as a source of mindful healing.
Like sourdough bread, may their memory nourish our souls and bodies.
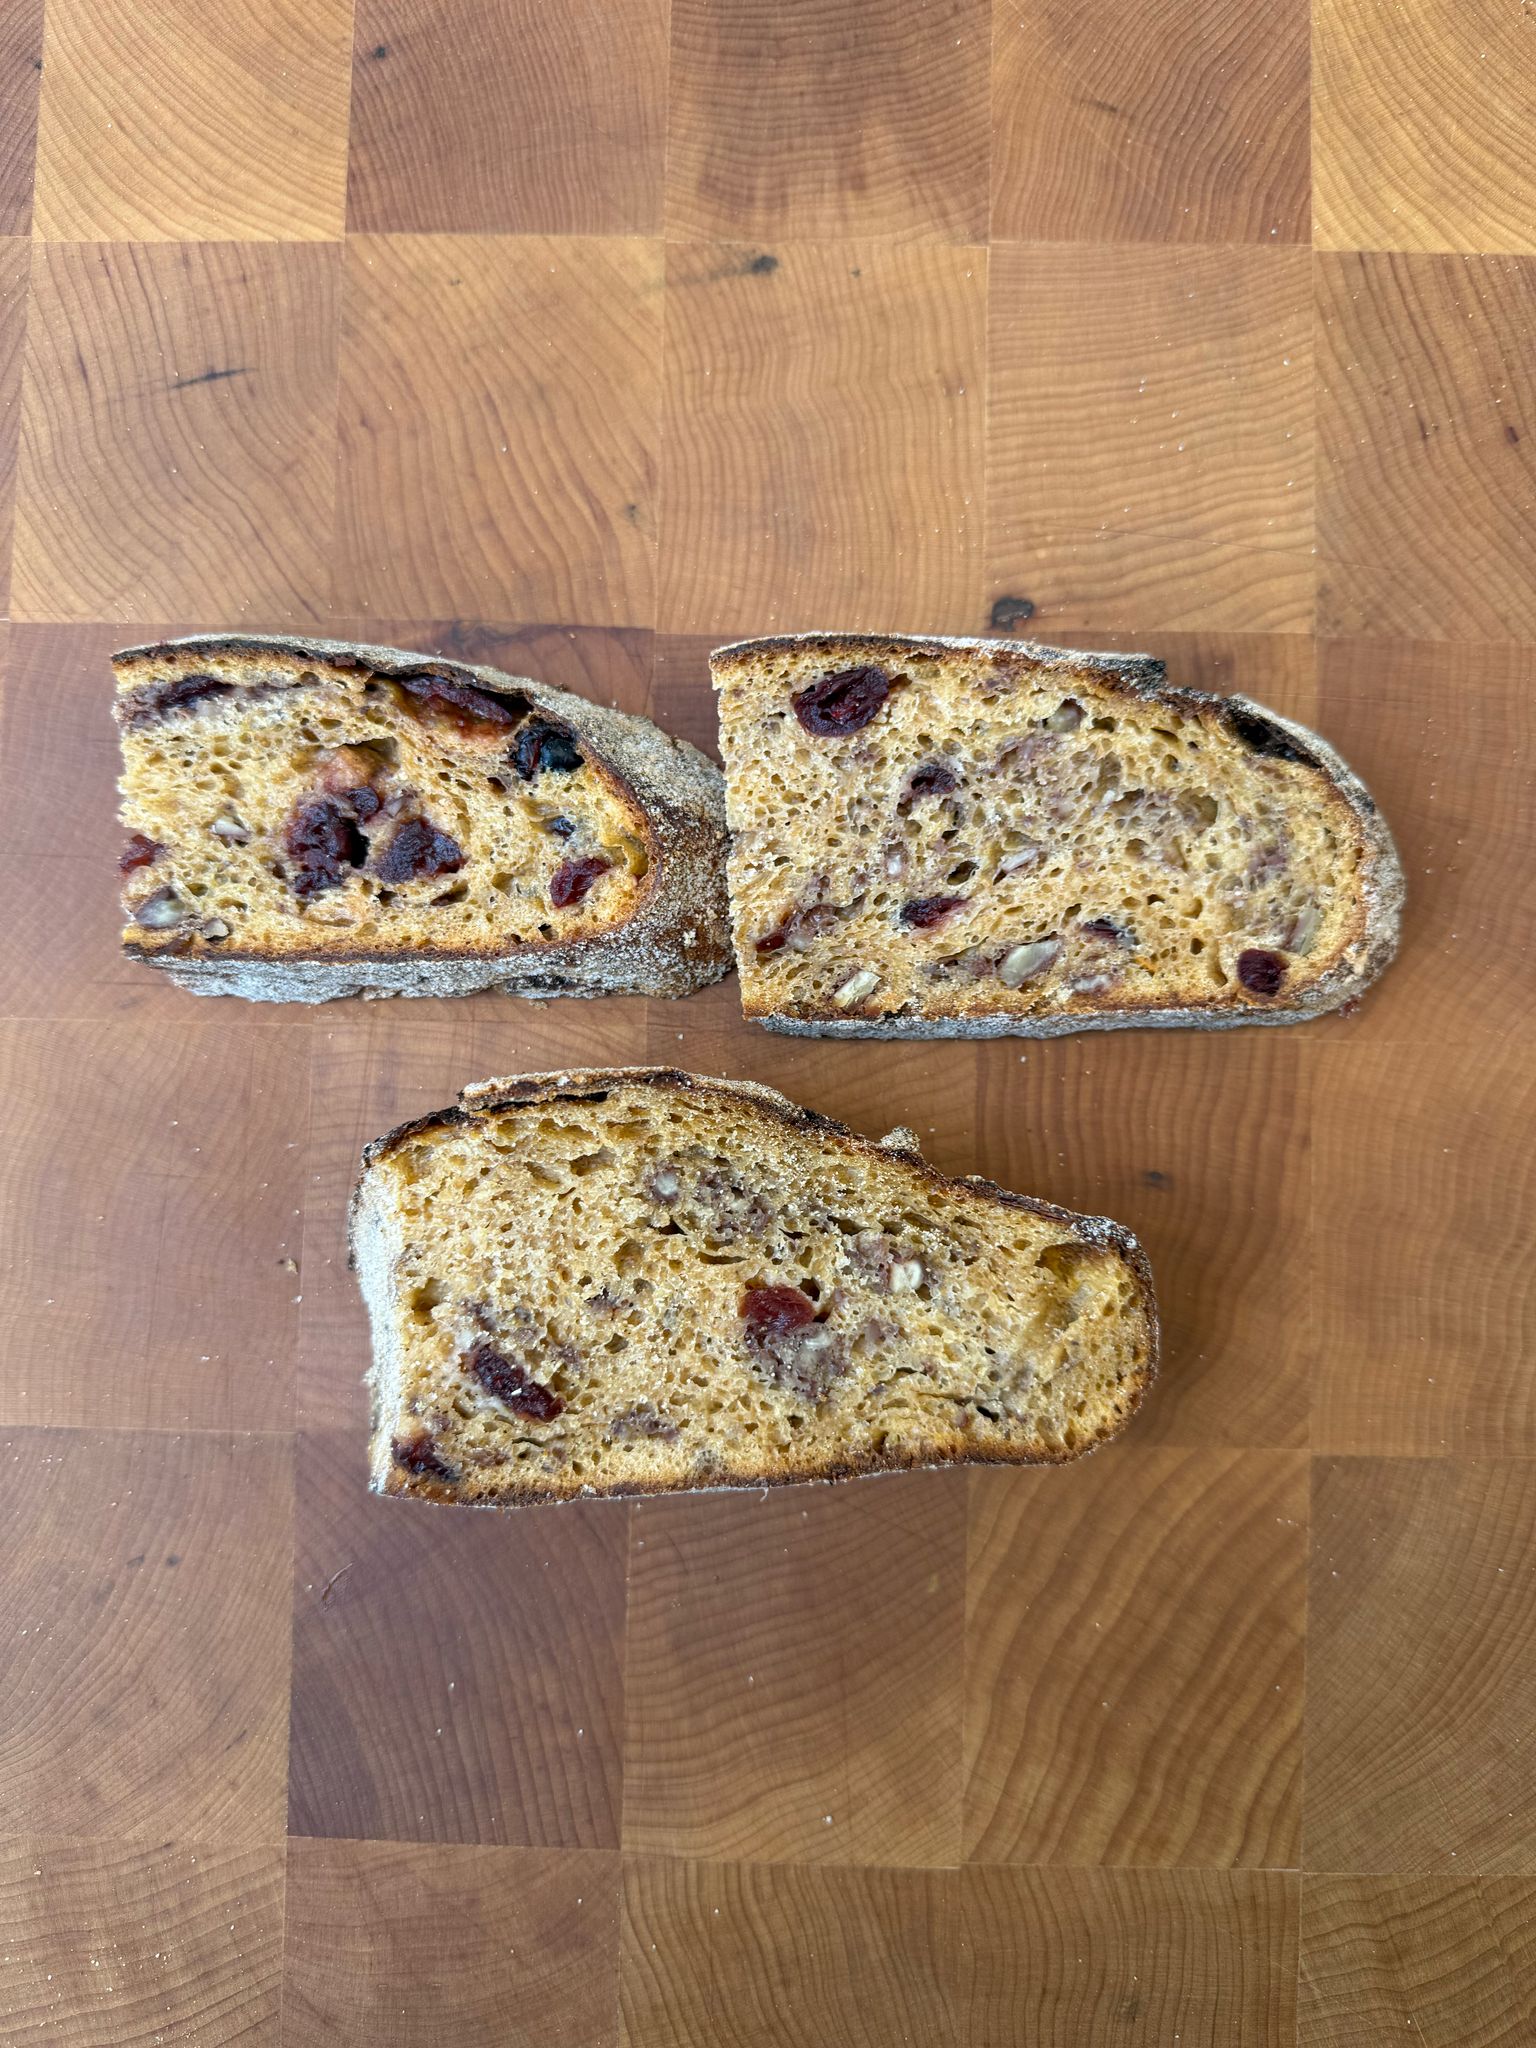
Recipe: 45% whole grain / 530g flour per loaf 265g Freshly Milled Wheat – 25% 110g Whole Manitoba – 10% 110g Whole Spelt – 10% 110g Manitoba – 10% 480g Bread Flour 45% 215g Starter 25g Salt 160g Maple Syrup 827g Water – 80% hydration -> 400g Sweet Potato puree? Substitute about half the water with puree and then add more water and a bit of puree in small amounts until flour is well hydrated. 120g each pecans and dried cranberries – incorporated during first set of folds.
Process:
The Night Before Dough Prep Day: In the afternoon, take your sourdough starter out of the refrigerator and feed it as usual. Then rinse off and cook two large sweet potatoes in the oven until soft. Once done, let them cool until you can safely removed their peels. Using water as needed, puree until smooth in a food processor or with an immersion blender. Finally, weight out flours and create your levain (starter for baking).
Dough Prep Day: In the morning, mix the flour, salt, water, puree, and starter. As stated above, start by substituting half of the water with puree and then add more water and small amounts of puree as needed to fully hydrate the flour. Next, add and incorporate the maple syrup…During the first of 3 sets of stretch and folds (each separated by 30 minutes) add the pecans (crushed) and dried cranberries. After finishing the 3rd set of folds allows the dough to bulk ferment. Once done, pre-shape, let rest for 25 minutes, then final shape into boules and or batards (round or oblong loaves). Lastly, transfer to bannetons, cover, and cold proof overnight.
Baking Day: Preheat oven with dutch oven inside to 250C (482F) with fan. After 30 minutes of preheating, remove your first proofed loaf from the refrigerator, dust the bottom with rice flour, transfer onto a piece of partchment paper, and score as desired. Bake covered for 25 minutes and then uncovered at 230C (446F) with fan for 18-20 minutes (until desired crust color is achieved. Fully cool on wire rack and enjoy!
Since purchasing an Aeropress this past March it has become my go-to daily brewer. After watching a bunch of instructional videos, I quickly developed a recipe and work flow that worked well for every coffee that I had on my “coffee station.” This short reel/video shows both.
Recipe:
22g Freshly ground coffee – a bit finer than pour over
200g Filter Water at about 195F (90C)
50-100g extra Filtered Water to bring final coffee to your preferred strength and body
Work Flow:
Filter water and bring to a boil
While water is heating up weigh out and grind coffee and put two Aeropress filters in the filter cap
Once water is just off boil wet the filters
Set up Aeropress in inverted position and pour in ground coffee
Shake Aeropress to level grounds
Pour in 200g of water and stir to hydrate ground (about 10 seconds)
Screw on filter cap and push out air that’s above the coffee slurry
Let coffee steep for 2 minutes
Flip Aeropress onto an awaiting mug and gentle press
Discard ground and filter (or rinse filter for later use)
As some of my closer friends and fellow fermentation enthusiasts know, my family and I moved from New Jersey all the way to Israel this past September. Shortly after our arrival a revived my two sourdough starters (aka Randolph and Mortimer) and resumed my baking. Additionally, I purchased an Ooni pizza oven and have been loving making sourdough pizzas in it for my family and our new local friends. This video is a recap of what I’ve baked so far, from my most recent loaf of Danish Rugbrod to my first loaves with locally sourced flour and DIY baking equipment.
While I can’t make any guarantees, I’d like to make time for sharing more of my baking and fermentations related experiences in the coming months. So stay tuned!
It’s been a while, almost nine months in fact, since I’ve conducted and posted an interview of a fellow baker. However, I’m proud to share that I’m back with an interview of the baker and author of my favorite bread book Living Bread aka Daniel Leader of New York’s Bread Alone bakery. Being that Living Bread inspired me to start this series, I made sure to gear a fair amount of my questions and comments towards what I learned and enjoyed most about the book (stories and recipes). Furthermore, I chose to expound upon lessons that I learned from the book and discuss topics often discussed within the sourdough baking community (see notes below). From growing and milling to baking; delving into Daniel’s 40 years of baking experience during this interview left me even more inspired to continue learning, sharing, and baking. I hope that you have a similar experience while listening to it. Happy Baking!
Episode Notes: The following topics were discussed during the course of this interview…
[0:00-1:15] Episode Intro: A passion for sourdough baking inspired by land stewardship and fellow bakers such as Living Bread’s author, Daniel Leader aka this episode’s featured baker.
[1:16-5:46] Daniel’s personal baking history aka “gaining a PhD in the back door school of baking.”
[5:47-6:25] The initial growth of Bread Alone bakery and building of its wood-fired ovens.
[6:26-8:48] The role of the oven in the modern commercial sourdough bakery: old world tradition vs. consistency and efficiency.
[8:49-11:49] Home and professional bakers milling their own flour: Does it make a significant difference in flavor? / How home milling fits into one’s regular consumption of whole foods.
[11:50-16:10] Two wheat farming related experiences that stand out to Daniel, one of which is written about in Living Bread and the other which will be written about in his upcoming book.
[16:11-17:04] Where Bread Alone currently sources its flour from.
[17:05-21:31] What makes a loaf of bread truly nutritious? / What is the impact of common commercial additives on on gluten sensitivity in the US?
[21:32-23:59] Having been exposed to so many types of bread during his travels, what does Daniel enjoy baking the most? / Are 100% whole grain breads an acquired taste?
[24:00-25:06] The translation of Living Bread into other languages, the awards and reviews it has received since its release, and what it has felt like to have his book be so revered and regularly utilized by so many bakers.
[25:07-26:02] What makes a bread baking book worth reading? / Stories, valuable information, and recipes vs. mainly recipes.
[26:03-27:05] A Slow Rise. The book that Daniel is currently working on. Bread Alone’s yesterday, today, and future. Plus bread and pastry recipes coupled with memorable bread related experiences from over the years i.e. “a greatest hits of his 40 years of baking.”
[27:06-29:20] Roller milling vs stone milling: Examining the benefits of both methods for optimal flour flavor, color, nutrition, and dough performance using Daniel’s experiences in the US and abroad as examples of quality not being compromised by scale.
[29:21-32:40] What should go into a home baker’s decision of what type of starter to maintain? / Tips for maintaining a healthy starter (temperature, using a hydration as tool, keeping it simple).
[32:41-33:29 Keeping it simple and baking the same recipe repeatedly in order to develop one’s personal baking process and ensure its reliability.
[33:30-35:20] Electric mixing vs hand mixing of dough. Daniel’s perspective changing as a result of following the growth of sourdough baking over the current pandemic.
[35:21-36:40] Maintaining a passion for all things bread baking and its impact on one’s quality of life.
[36:41-39:40] Daniel’s definitions of “living bread” and “living food” and how they’ve evolved over time. / The people behind the bread and the significance of bread in society throughout history.
[39:41-41:48] Who/what are Daniel’s sources of baking inspiration nowadays: People, places, and specific breads.
[41:49-46:54] The landscape of American sourdough baking vs that of countries such as France and Germany / Paths paved by bakers without any formal baking training.
Since I started milling whole grains at home this past September, certain heirloom red wheat varieties have stood out to me in terms of their dough performance and flavor. In turn, upon the success of my previous baking experiment which focused on grains grown in California, I asked myself the following question. What role will terroir play in terms of dough performance and flavor profile when testing a specific heirloom wheat varietal that has been grown in a variety of US states (four in this case)?
Next, while I could have conducted this experiment alone and shared my subjective results. I chose to once again call upon my friend and fellow bread writer Melissa Johnson . By running her own parallel experiment, we could produce more comprehensive results.
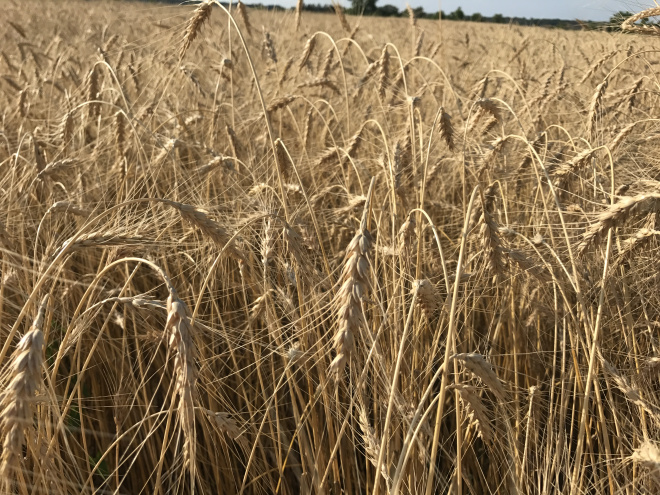
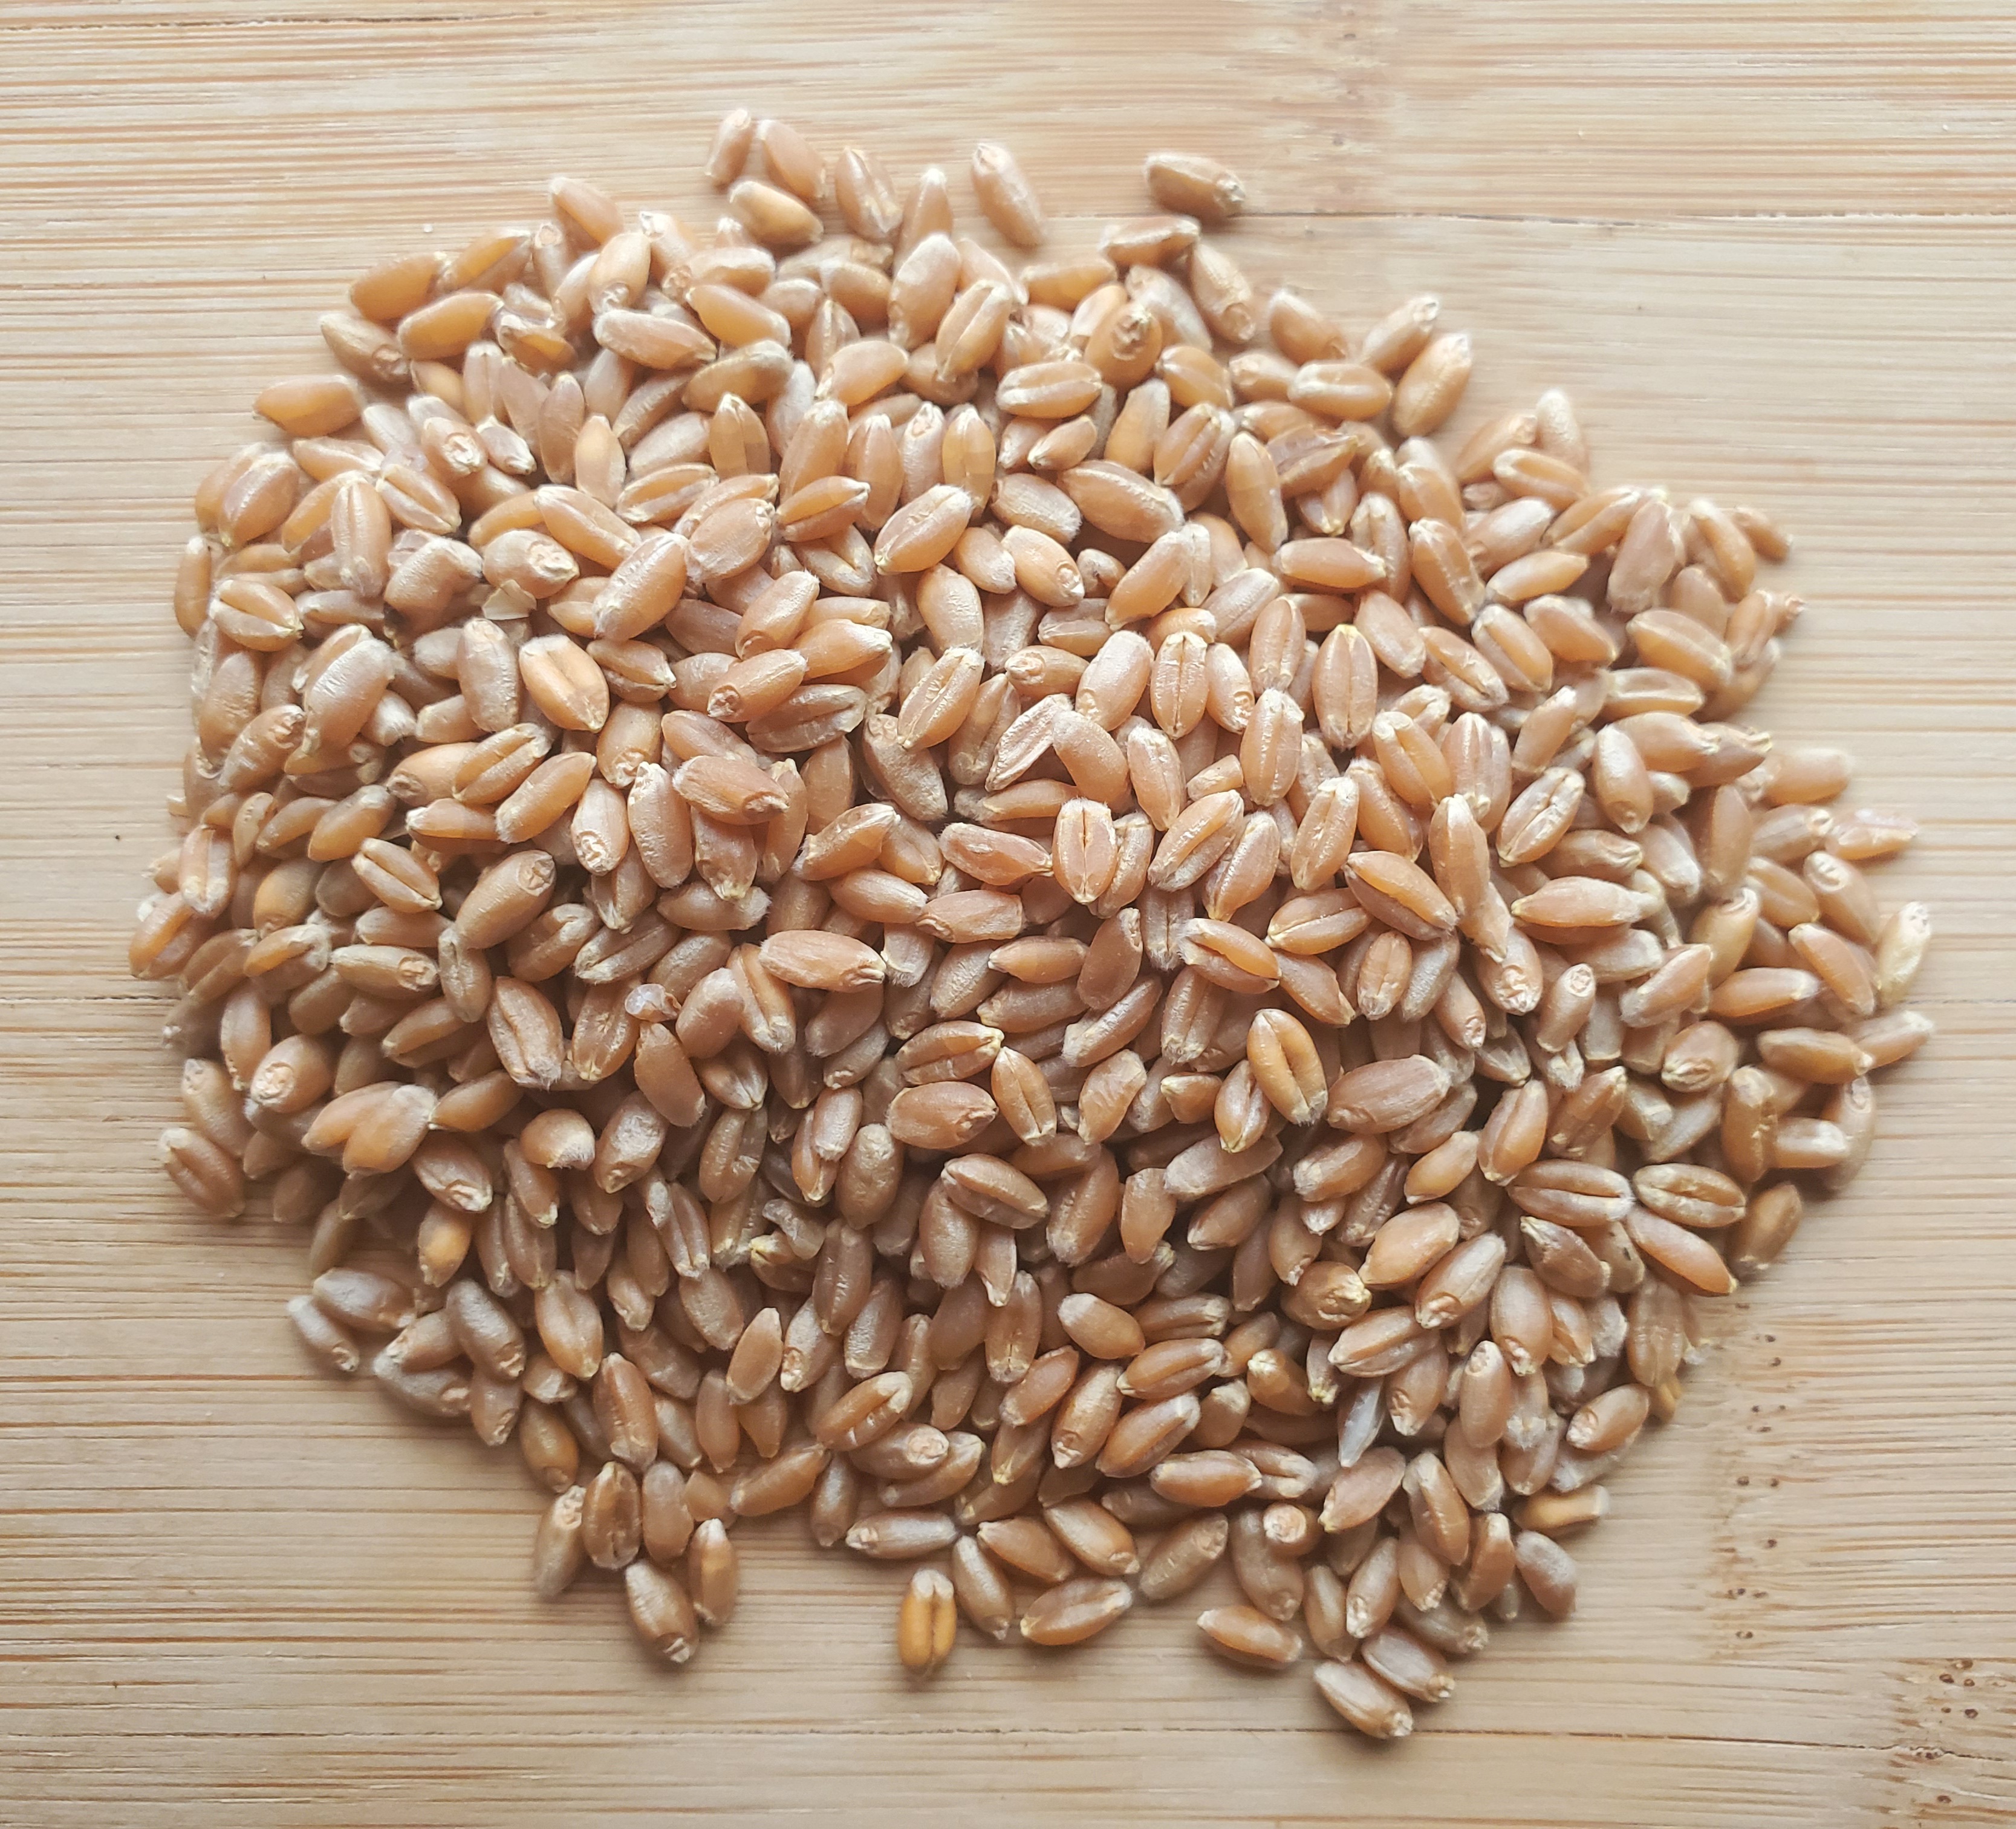
Wheat Varietal: Turkey Red
Photo Credit: Penner Farms
Turkey Red Wheat, once the dominant variety of hard red winter wheat planted throughout the central U.S., is back in production.
“Turkey” variety hard red winter wheat was introduced to Kansas in 1873, carried by Mennonite immigrants from Crimea in the Ukraine, fleeing Russian forced military service. In the mid-1880s, grainsman Bernard Warkentin imported some 10,000 bushels of Turkey seed from the Ukraine, the first commercially available to the general public. That 10,000 bushels (600,000 pounds) would plant some 150 square miles (10,000 acres). By the beginning of the twentieth century, hard red winter wheat, virtually all of it Turkey, was planted on some five million acres in Kansas alone. In the meantime, it had become the primary wheat variety throughout the plains from the Texas panhandle to South Dakota. Without “Turkey” wheat there would be no “Breadbasket.”
Like many traditional crop varieties, by modern times the old variety of Turkey Red had all but vanished. Fortunately, a few enterprising Midwest farmers have kept the old seed stock in production. (breadtopia.com).
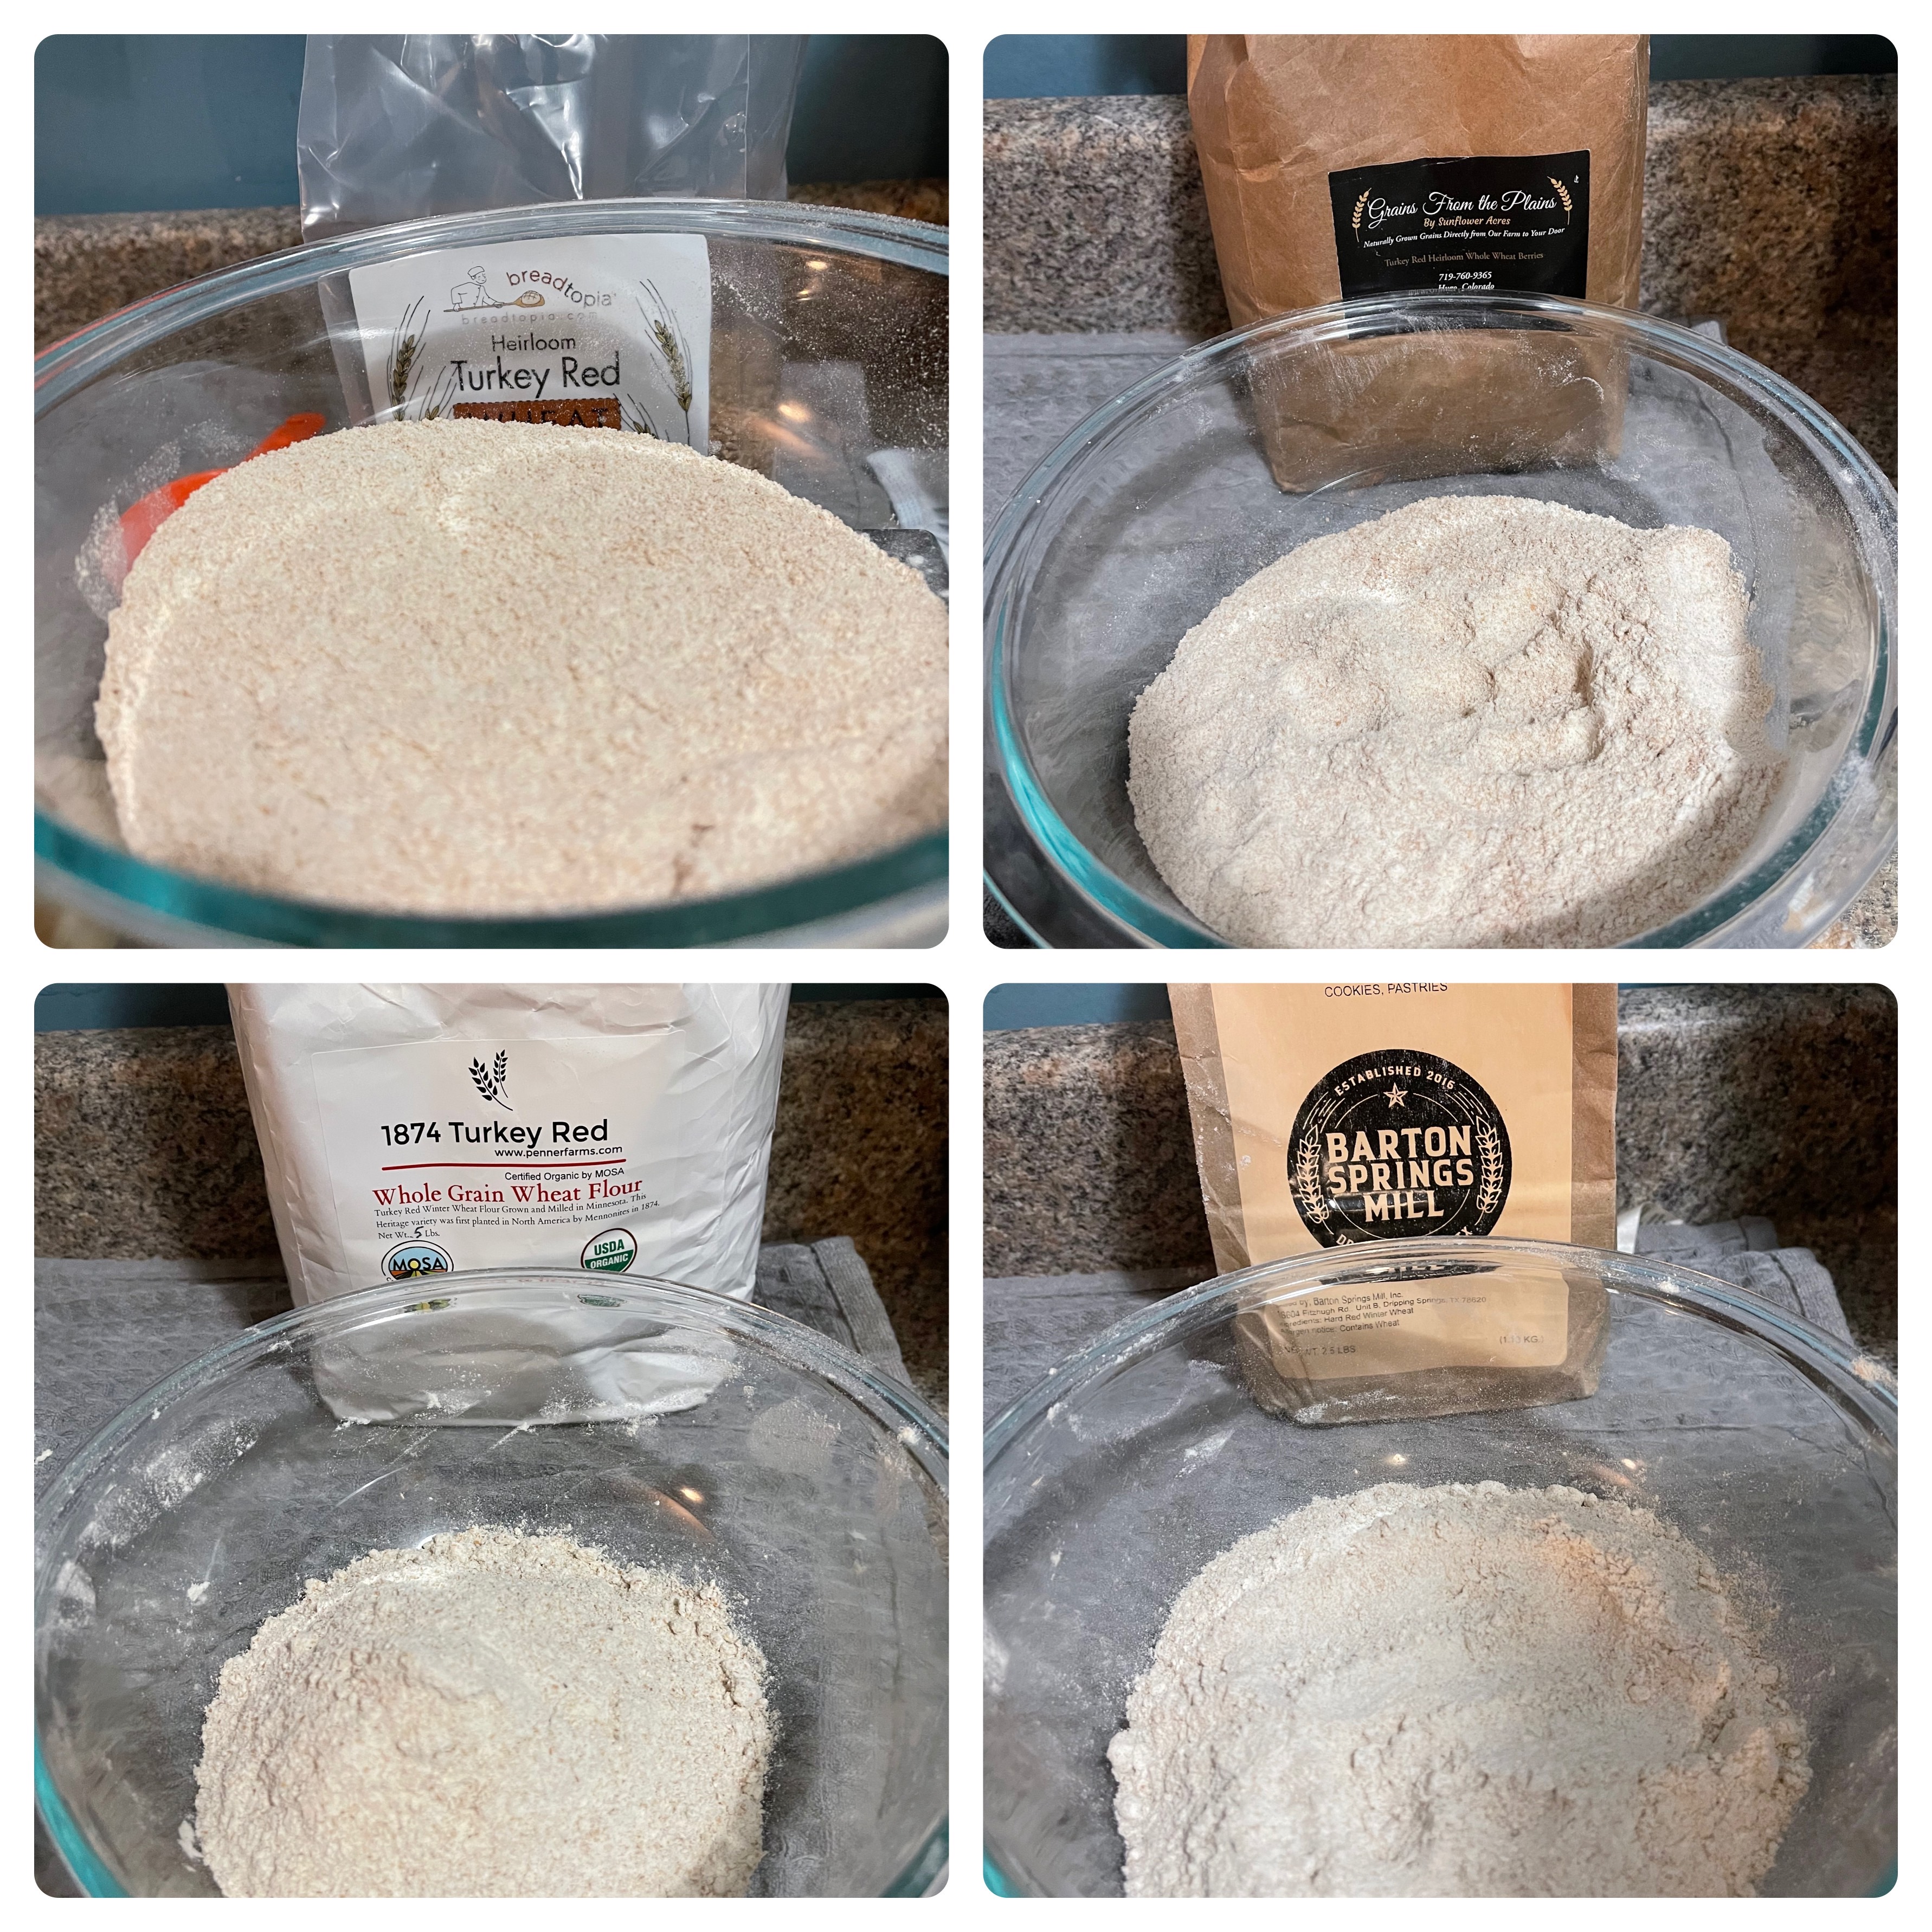
Grain Sources:
A) Luhrs Certified Seed, Nebraska (Breadtopia): Organic Turkey Red berries (seed)
B) Sunflower Acres, Colorado (Grains from the Plains): Turkey Red berries
C) Pleasant Valley Ranch, Oklahoma (Barton Springs Mill – Texas): Whole grain flour
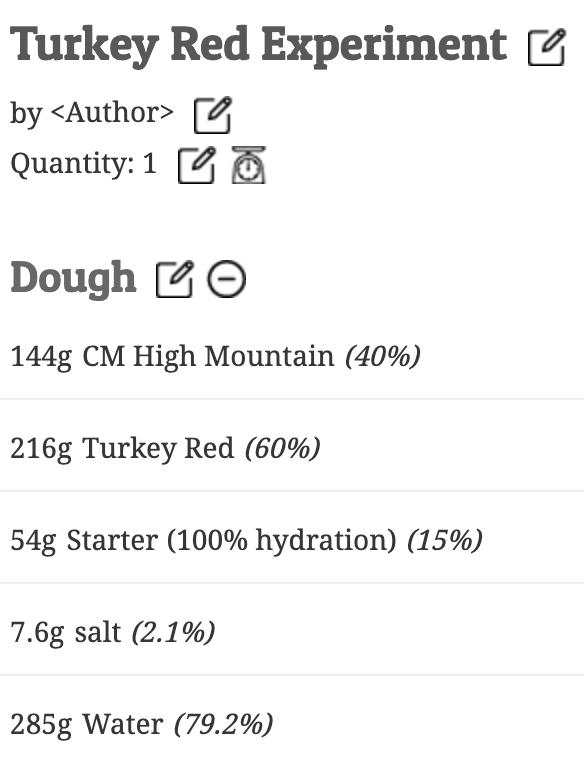
Recipe: Once again, Melissa and I decided to make our ‘test loaves’ smaller than our average 500g/loaf loaves. However, we raised their weight from 330g to 360g of flour per loaf, with sixty-percent of the flour being one of the four samples of Turkey Red varietals (2 were freshly milled and 2 were commercially milled) and forty-percent being Central Milling Organic High Mountain (high-protein bread flour). Yet another change to our previous experiment’s recipe was each dough was fermented with the same 100% Organic High Mountain flour levain (1:2:2 ratio / 15% inoculation). Lastly, in terms of dough hydration Melissa and I agreed on 80% (salt content was 2% (fine sea salt).
Melissa’s Loaves
Process: While each of us followed our time tested sourdough loaf preparation processes, we kept the following parameters consistent: A) Milling the wheat berries the night before. B) A 45 (or longer) minute autolyse to get a feel for each flours absorption rate C) Coil folds D) Batard shape E) An overnight cold proof F) The same baking vessel (the Challenger Bread Pan). I should note that due to time constraints, I baked the 2 loaves with commercially milled Turkey Red flour in my Lodge combo cooker.
In terms of baking, Melissa preheated her oven to 500F (260C) for 30 minutes and then lowered it to 475F (230C) after loading the dough into her Challenger bread pan. She baked each loaf for 20 minutes with the lid on (covered) and 15-20 minutes with the lid under the base (uncovered) at 450F. I preheated my oven with the bread pan to 490F (254.4C) and baked covered for 20 minutes and then uncovered (lid under base) for 15 minutes at 450F (230C).
Results:
Crumb of Melissa’s loaves
Breadtopia (Nebraska):
Dough Feel: This dough was somewhat sticky, but was not too hard to mix. After its autolyse it was smooth and extensible.
Fermentation: Barry: Being that I had freshly milled the Turkey Red portion of this dough the night before, I found that this dough fermented a bit faster than the two doughs containing pre-milled flour i.e. closer to 5.5 than 5.75 hours. Melissa: While not originaly intended bulk fermentation took 7 hours (to double in size / see below).
Shaping: Barry: This was followed by a 20 minute bench rest, and about an 8 minute rest at room temperature following final shaping in batards / prior to being put into my refrigerator to proof overnight. I personally found that all of the doughs in this experiment were somewhat sticky following bulk fermentation. However, using a bench scraper and wet/floured hands made them fairly manageable. Melissa: Because of the extensive fermentation, the pre-shape and bench rest were skipped. “I shaped the doughs very aggressively and refrigerated them immediately until the next morning.” Refrigerated final proof: 15.5 hours
Appearance: Barry: Breatopia’s Turkey Red loaf achieved great ovenspring, a well caramelized crispy crust, and had an attactive deep red color around edge and lighter red closer to ear (where sprung) and moderately even crumb. Melissa: Had the third best oven spring with a moderately open crumb.
Flavor/Texture: Melissa and her husband Chris: “All the breads were delicious and chewy with a nice crust. We struggled to pick out (noticeable) differences in flavor between them.” Barry: Moderate to high pleasant sourness, lightly herbal/spicy whole grain aroma and taste, “would be great for toast and an every day loaf. Especially for those who like more tang”. Soft (somewhat fluffy) texture.
Crumb of Melissa’s loaves
Grains from the Plains (Colorado):
Dough Feel: This was the thirstiest and stickiest of the four doughs. However, I found that by the second set of stretch an folds it became easier to work with.
Fermentation: Barry: As with the previous dough, I tried my best to make sure that this dough’s bulk fermentation was just as long as its predecessor (5.5 hours). Melissa: Matured the fastest and was double in size in 6 hours. As mentioned above, doubling of the dough was not her original intention, but once this dough went that far, she made sure to let the others doubled too.
Shaping: Barry: See above. Melissa: See above…Refridgerated final proof: 16.5 hours. Both of us baked our freshly milled flour loaves first.
Appearance: Barry: Almost as good oven spring as the Breadtopia loaf, well caramelized crispy crust, similar deep red color around the edges of the loaf that transitioned to a lighter shade of red closer to the ear. Moderately even crumb. Melissa: Had the least oven spring and second most open crumb.
Flavor/Texture: Melissa and her husband Chris: See above. Barry: This loaf had low level of sourness and complex herbal/spicy whole grain aroma and taste (great for sandwiches). It’s texture was soft (somewhat fluffy) like the Breadtopia loaf, but it was a touch more moist.
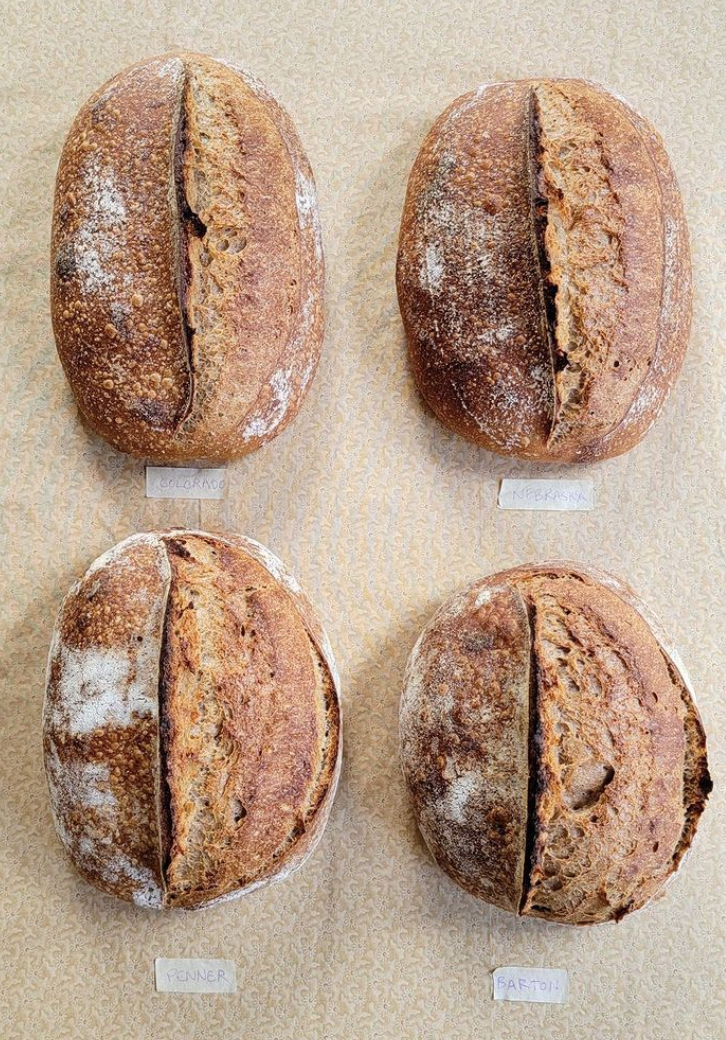
Barry’s loaves: Top left: Breadtopia / Top Right: Grains from the Plans / Bottom Left: Barton Springs / Bottom Right: Penner Farms
Barton Springs (Oklahoma grown)
Dough Feel: Most fine textured flour of the four. Like its predecessors this dough was sticky at first, but smoother after its autolyse.
Fermentation: As eluded to above 5.5 hours (plus or minus 15 minutes) was the average bulk fermentation time for all four of my doughs. Melissa: Bulk fermentation took 7 hours 20 minutes.
Shaping: Barry: Compared to the previous doughs which included freshly milled flour. To me this dough felt a bit more airy and light at shaping. Melissa: Seemed to have the most elastic dough feel for shaping. Refrigerated final proof: 16.7 hours
Appearance: Barry: For me this loave’s over was the best when compared to its fellow pre-milled Turkey Red flour loaf. It has a lighter red color than the freshly milled flour loaves and once again had moderately even crumb. Melissa: had the most oven spring and the most open crumb.
Flavor/Texture: Melissa and her husband Chris: See above. Barry: Low but noticeable sour aroma and taste, similar flavor to Grains from the Plains, but not as prominent. This flavor profile would be good for a versatile sourdough loaf and use in making grilled cheese.
Penner Farms (Minnesota):
Dough Feel: This dough was the easiest to mix and had good extensibility.
Fermentation: As eluded to above 5.5 hours (plus or minus 15 minutes) was the average bulk fermentation time for all four dough. This was followed by a 20 minute bench rest, and about an 8 minute rest at room temperature following final shaping in batards / prior to being put into my refrigerator to proof overnight. Melissa: Bulk fermentation took 7 hours 10 min.
Shaping: Barry: Compared to the previous doughs, this dough felt somewhere in between the Barton Springs and Breadtopia doughs in its level of lightness, texture, and structure. Melissa: Felt that this dough was on the slack side during shaping. Refrigerated final proof: 16.8 hours
Appearance: Barry: My loaf achieved good, but not great oven spring and had moderate red color. Melissa: Had the second best oven spring with a moderately open crumb similar to the Breadtopia/Nebraska loaf.
Flavor/Texture: Melissa and her husband Chris: See above. Barry: Lingering sourness and subtle yet very similar flavor to the other loaves. I found the crumb texture to be notably soft yet still toothsome.
Conclusions
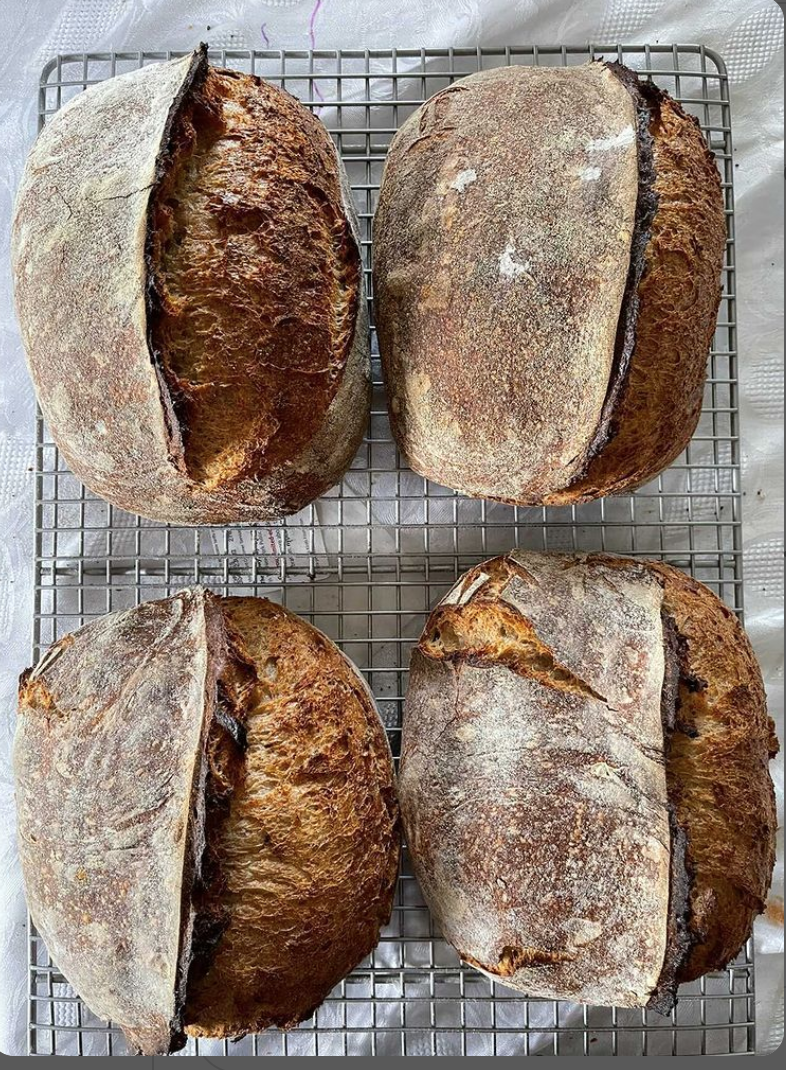
Crumb of Barry’s loaves: Left: Commercial/Pre-miled flours Right: Freshly Milled
This heirloom wheat experiment was a valuable learning experience for the following three reasons. Firstly, it served as an opportunity to get our first glimpse at the roll of terrior in heirloom wheat. Secondly, differences in open spring between our loaves highlighted differences in our sourdough starters, bulk fermentation management, and baking practices. Thirdly, as in the previous experiment, we waited to discuss tasting notes and baking outcomes until we had both cut into and tasted our loaves. Doing so helped us develop a fuller understanding of both Turkey Red’s baking properties and flavor profile and what makes our individual baking practices unique.
Future plans: Being that the effects of baking with two freshly milled and two pre-milled flours were apparent both during dough preparation and in the finished loaves. I personally feel like I have more work to do in terms of getting to know how terroir effects Turkey Red. In turn, when I decide to run this experiment again I’ll make sure to use only freshly home-milled flour, keep a closer eye on how each individual dough is bulk fermenting, and make sure that cold proofing temperature is not a factor that effects oven spring (I suspect it make have contributed to the differences in oven spring between Melissa and my loaves). On a more optimistic note, being that Turkey Red comprised 60% of the flour used in this experiment, I’m definitely looking forward to baking with it as higher and lower percentages in future sourdough loaves.
Thank you to Melissa Johnson for joining me in this experiment.
If you have not already done so, check out my interview of Melissa byclicking here.
Since I started milling whole grains at home this past September, articles, videos, and podcast episodes about grain cultivation and baking with whole grains have been on my radar. In turn, after listening to a Sourdough Podcast episode featuring Claudia Carter of the California Wheat Commission. I immediately reached out to her via Instagram to propose a sourdough baking experiment featuring California wheat varietals. When she first emailed me descriptions of the three modern wheat varietals* that she would be sending me I was at first concerned about whether the ‘weaker’ ones would be suitable for sourdough loaves. However, Claudia reassured me that as long as I mixed them with a higher protein flour they’d perform well.
Next, while I had done small experiments in the past in order to refine my sourdough loaf recipes. This was my first time conducting an experiment where I’d be comparing three different wheat varietals side by side. Therefore, I asked my fellow local bread writer Melissa Johnson to run her own parallel experiment in order to produce both reliable and valid results.
Wheat Varietals:
WB9229 – Hard Red Spring wheat – bred and developed by WestBred, a unit of Monsanto Company. WB9229 was selected for resistance to stripe rust and high protein using a modified bulk breeding method. WB9229 is adapted to the wheat growing areas of the Central Valleys of California. The primary use will be for to make raised loaf bread. WB9229 is resistant to the current field races of stripe rust in California. (more information)
Summit 515 – Hard Red Spring wheat – Summit 515 is a hard red spring wheat. It was developed by Syngenta Cereals (formerly Resource Seeds, Inc.) and released in 2011. Stripe rust resistance genes Yr5 and Yr15 were introduced by four backcross generations into the susceptible cultivar Summit and then combined using marker assisted selection at UC Davis (project supported by Research Seeds Inc.). Research Seed Inc. selected the best lines among BC4F2 lines homozygous for the two genes. This cultivar is very similar to the original Summit but is resistant to prevalent races of the stripe rust pathogen present in California. It has medium early maturity and good straw strength. It is resistant to stripe rust and leaf rust, moderately susceptible to BYD, and susceptible to Septoria tritici leaf blotch and powdery mildew. It was evaluated as Entry 1658 in the UC Regional Cereal Testing program from 2010-present for. With mellow gluten strength it is best for breads which need to be more extensible such as flat breads, tortillas, or sweet breads. (more information)
Patwin 515 HP – Hard White Spring wheat – developed by the University of California wheat breeding program and tested in Regional Yield trials as experimental line UC1743. showed outstanding bread making quality in evaluations performed by the quality Laboratory at the California Wheat Commission in 2013 and 2016 and by the milling industry at the California Wheat Collaborator Program in 2013. Patwin-515 HP carries the GPC-B1 gene for high grain protein content. Across 15 experiments, it showed an average grain protein content of 13.8%, which was significantly higher than the original Patwin-515 (12.7%). It is also good also for some baked desserts. (more information)
Experiment Parameters:
Recipe: As ‘test loaves’ we decided to use 330g of flour per loaf rather than our average 500g with half of the flour being one of the three CA wheat varietals (freshly milled) and half being Central Milling High Mountain (high-protein bread flour). Next, each dough was fermented with it’s own levain (1:2:2 ratio / 15% inoculation) which once again contained an even split of its respective two flours. In terms of dough hydration Melissa and I agreed on 75% (though mine ended up a hair under 77%). Lastly, salt content was 2% (fine sea salt).
Mid-bake in my Challenger Breadware Bread Pan
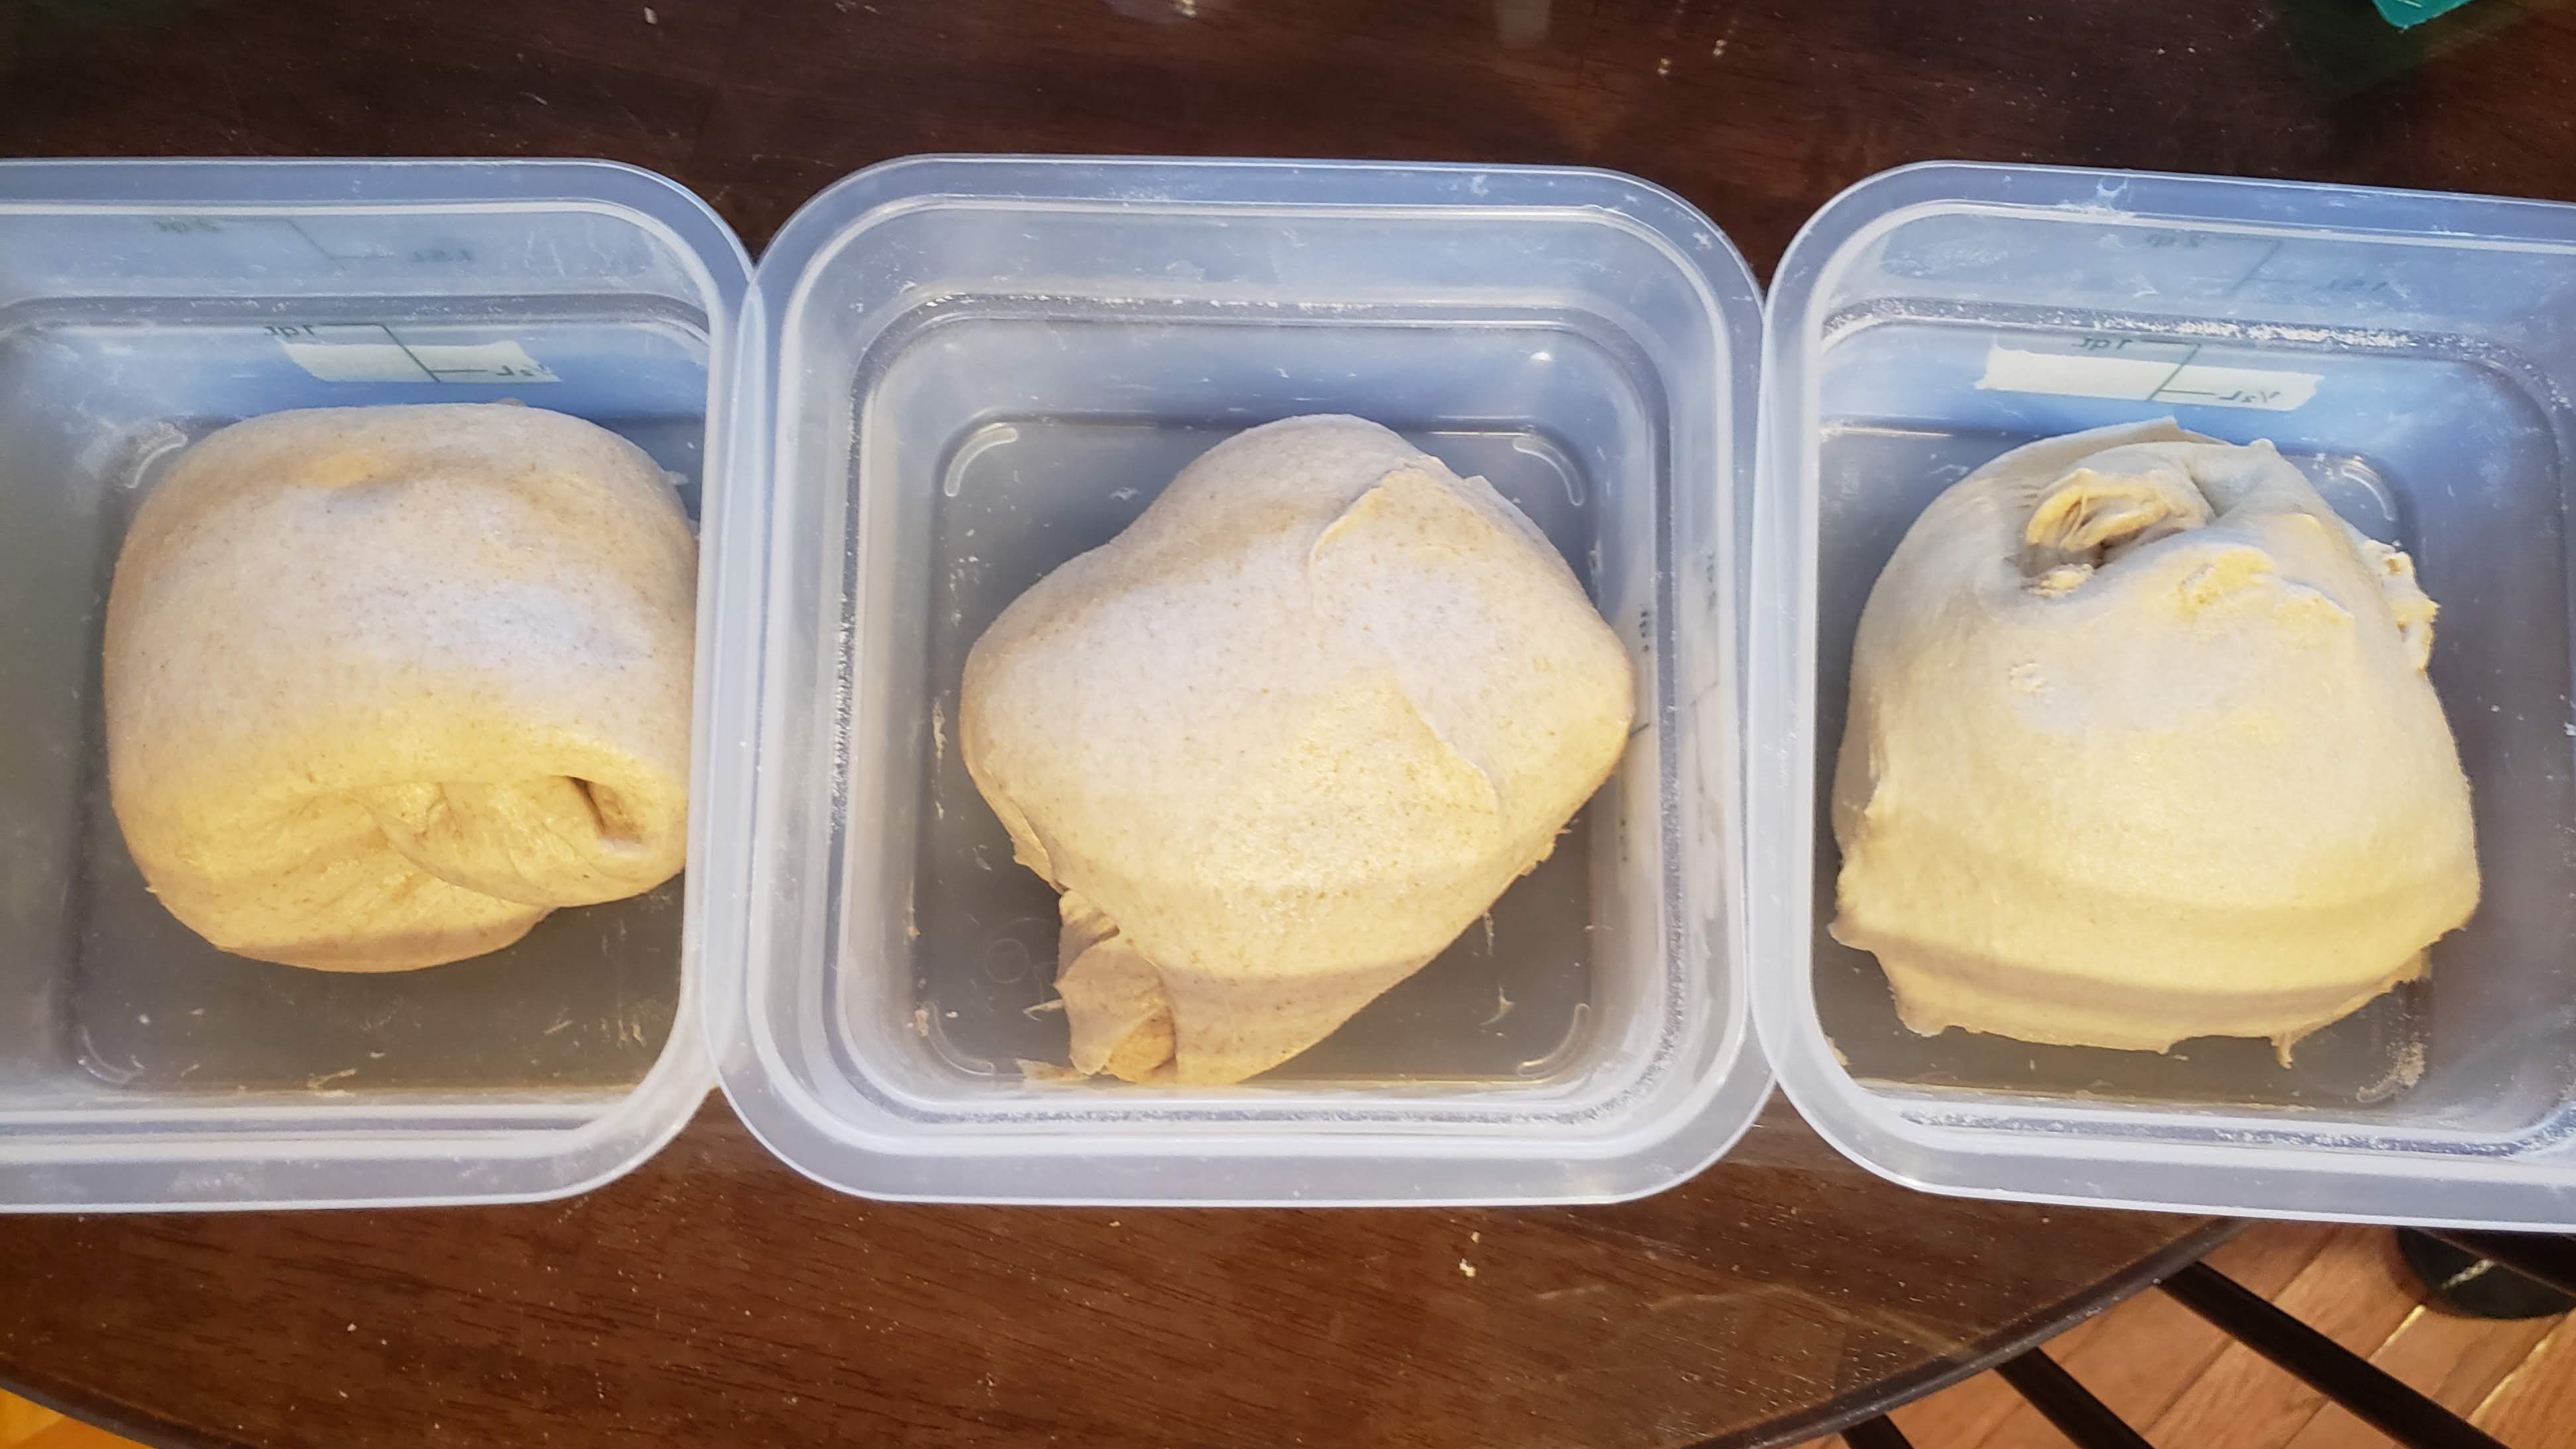
Process: While each of us followed our time tested sourdough loaf preparation processes, we kept the following parameters consistent: A) A 30 minute autolyse to get a feel for each flours absorption rate B) Coil folds C) Batard shape D) An overnight cold proof E) The same baking vessel (the Challenger Bread Pan). I should note that while we both used our proofers, we used them for different portions of bulk fermention. Melissa used her’s during bulk fermentation and for an overnight retard and to help fermentation finish when she saw it was lagging. This led to her doing a 2 hour final proof at room temperature following my 20 minutes in the freezer to firm up and cool down her unbaked loaves. In my case, I decided to use my brod and taylor proofer for the last 90 minutes of bulk fermentation in order to ensure that they’d all be ready to pre-shape in the order that I was following (WB 9229, Summit 515, Patwin 515 HP). Interestingly, they were all fermenting around 75F (just under 24C) on their own prior to my putting them into my proofer which was set at 77F (25C).
In terms of baking, Melissa preheated her oven to 500F (260C) and then lowered it to 450F (230C) after loading the dough into her Challenger bread pan. She baked each loaf for 15 minutes with the lid on (covered) and and 15 minutes with the lid under the base (uncovered). Because I only have one Challenger bread pan I had to bake one loaf at a time. I preheated my oven with the bread pan to 490F (254.4C) and baked covered for 20 minutes and then uncovered (lid under base) for 15 minutes at 450F (230C).
Results:
WB9229
Dough Feel: As a hard red spring wheat this varietal had the tightest and most cohesive dough feel (texture) for both of us.
Fermentation: As the strongest of the three varietals, WB9229 fermented at a rate similar to other 50% whole grain doughs in that we were able to after our average bulk fermentation time it would be ready to pre-shape.
Shaping: As a result of keeping the hydration percentage the same for all three loaves this dough was drier feeling than the others. So while it was elastic and not too difficult to shape; it felt like it would have been more extensible if it had a bit more water in it.
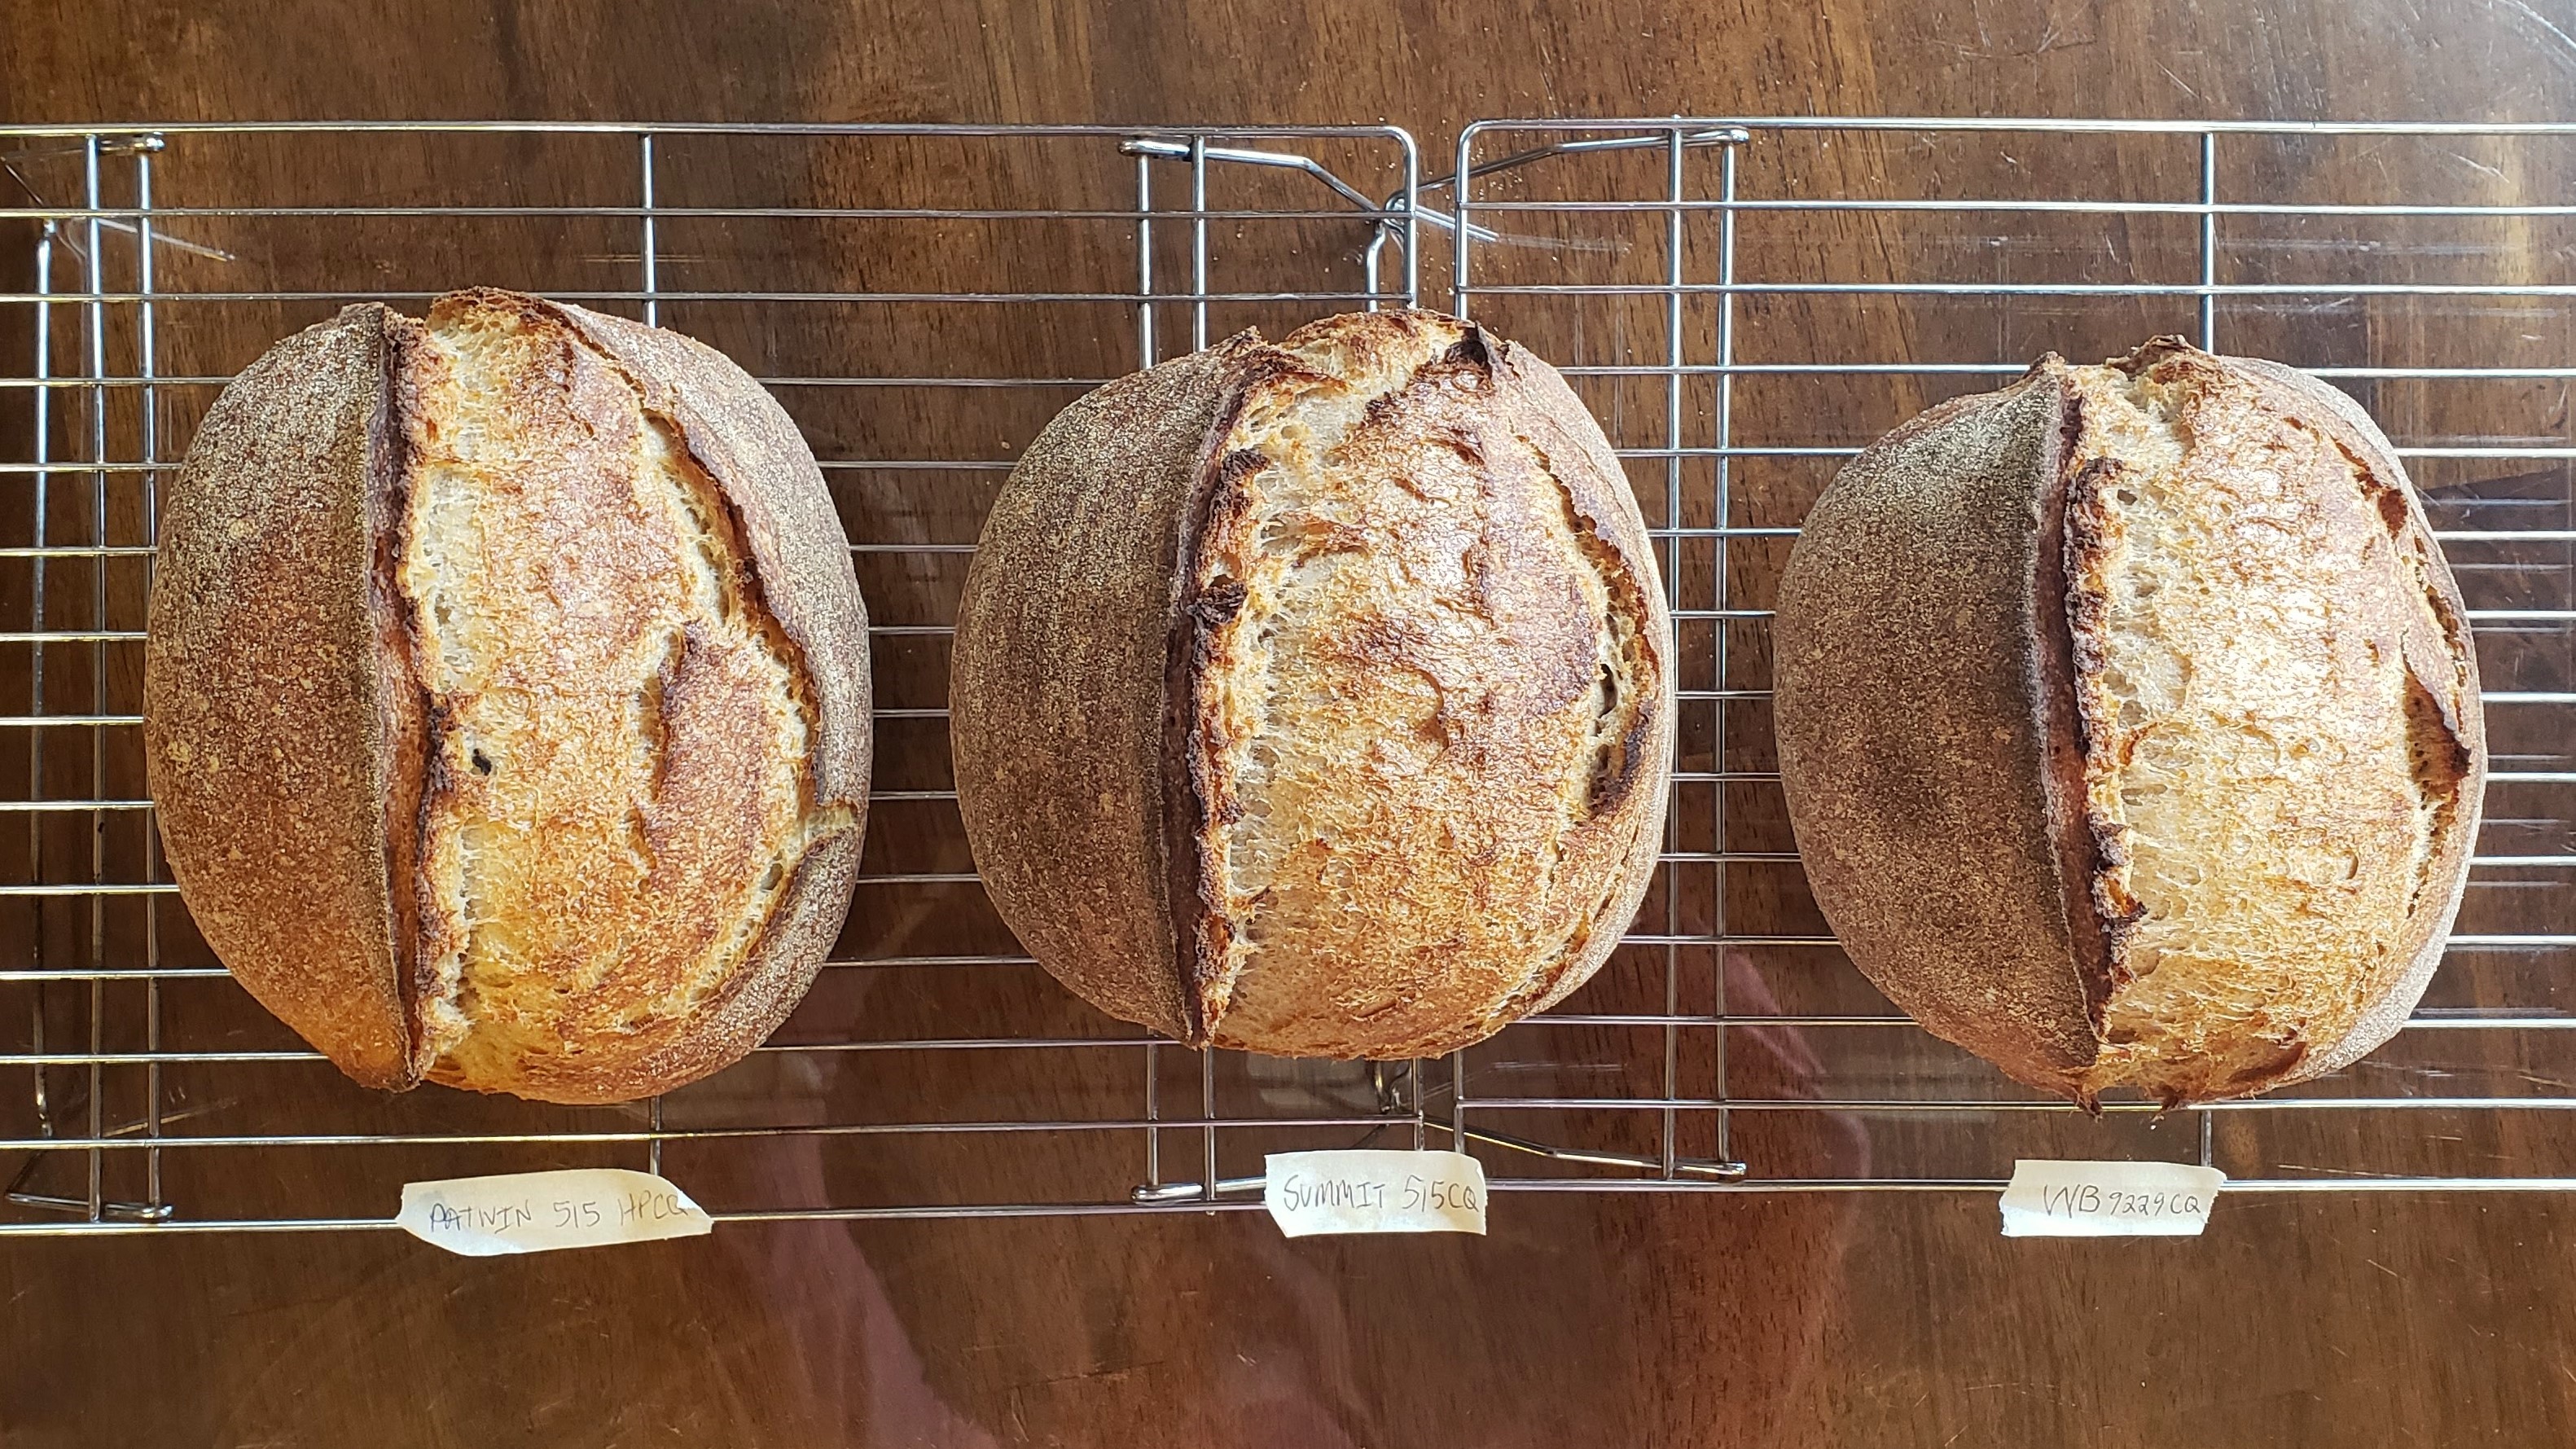
Appearance: WB9229 achieved the most oven-spring for both of us. Also, its light brown crumb was slightly less open than Summit’s, but we both agreed that with higher hydration it would achieve even more oven-spring and open crumb. Of note, my first slices had some wild crumb which evened out further into my loaf.
Flavor/Texture: Melissa and her husband Chris: WB had a lot of grain flavor and moderate sourness. The contrast between crust crispiness and crumb chew was good. Barry: Soft toothsome texture and a great nutty whole grain flavor which reminded me a bit of red fife.
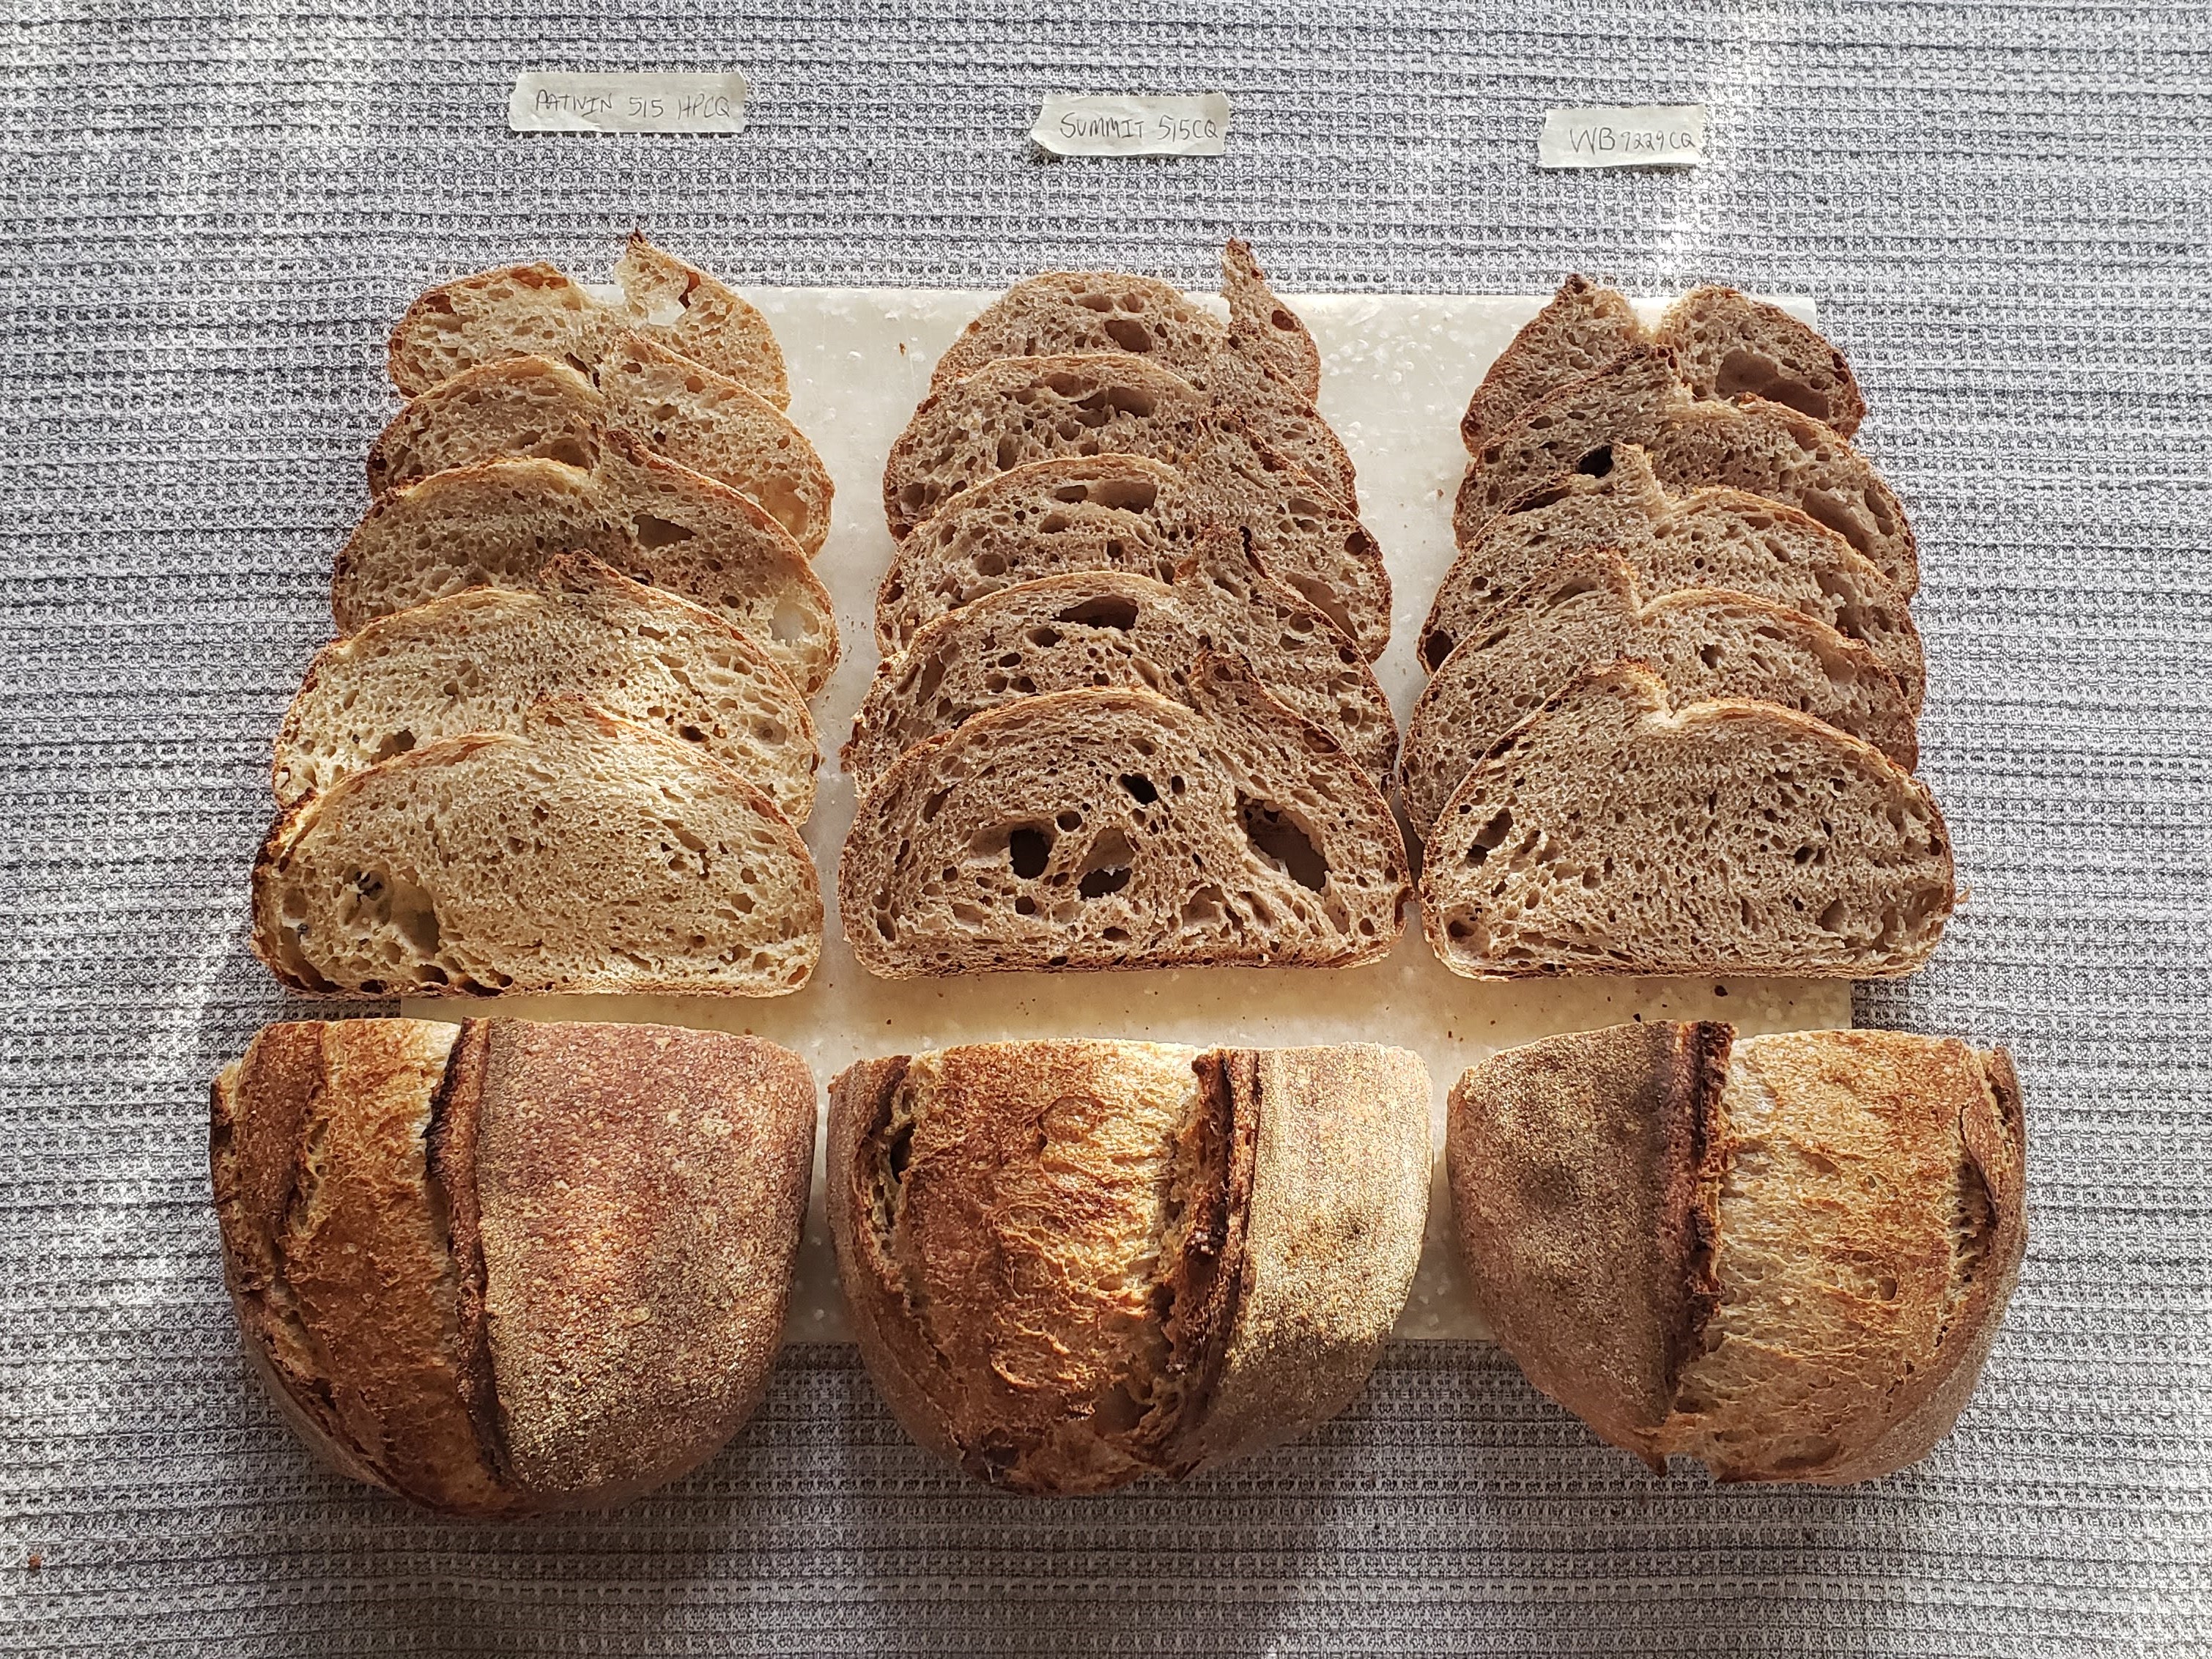
L-R WB 9229, Summit 515, Patwin 515 HP
Summit 515
Dough Feel: Compared to Patwin 515 HP Melissa felt that this dough was a little tighter and a little less sticky. In my experience it was definitely the smoothest and easiest to mix and coil fold.
Fermentation: We both found that WB 9229 and this varietal fermented at a similar rate. As the second dough that I mixed, I tried my best to make sure that this dough’s bulk fermentation was just as long as its predecessor (5.5 hours).
Shaping: Despite being a touch sticky after bulk fermentation, I found that Summit 515 HP was just as easy to shape as WB 9229. Melissa described this dough as Summit was “moderately elastic” during shaping.
Appearance: Both of our loaves achieved great oven-spring. The crumb was the most open of the three for Melissa who also commented that it had “some large holes indicating the gluten didn’t hold up to the pressure of expansion.” I felt that my crumb was somewhere in between the other two varietals interms of openness and lighter in color than WB 9229. Lastly, the crust of Summit loaves was the darkest in color, but the color differences weren’t drastic for me. Especially between the WB 9229 and Summit (see photo above for my loaves – L-R WB9229, Summit 515, Patwin 515 HP).
Flavor/Texture: Melissa and her husband Chris: Summit’s bran flavor was strong and the sourness was very mild. The chew was okay but there was some less than smooth texture. Barry: Fluffier/lighter textured crumb. A nice wheat aroma and flavor, but less bold than WB 9229. Similar to a good 100% white flour forward sourough loaf with some mild whole grain/herbaceous notes.
L-R Patwin 515 HP, WB 9229, and Summit 515
Patwin 515 HP
Dough Feel: Patwin felt the loosest and stickiest, likely due to its having the weakest gluten and lowest protein content.
Fermentation: Patwin fermented the fastest, which for Melissa “could have been its position in the proofer” or the wetter dough feel that we both experienced. However, I should note that once I put all three bowls of dough in my proofer so that they’d all be fermenting at the same temperation, I was no longer concerned about one of them fermenting faster than the others.
Shaping: Despite it fermenting the fastest I personally stuck to the order that I set when I mixed my doughs and shaped my Patwin 515 HP dough last. As the stickiest of the doughs it took a bit of extra flour on my hands to final shape. Melissa noted that she needed to stitch her shaped dough after transfering it to its banneton (proofing basket) in order for it to hold its surface tension. I also stitched my dough, but I always do so when shaping it into a batard (oblong) loaf (see photo above).
Appearance: Patwin 515 HP achieved good oven-spring, but it was the least of the three loaves (these parameters). Patwin’s crumb had the lightest color due to it being a white wheat and was a pale yellow. I personally may have baked my Patwin loaf a few minutes longer than Melissa i.e. my crust was noticeably darker (see her loaves below).
Flavor/Texture: Melissa and her husband Chris: Patwin had less of a (whole) grain flavor and a moderate sourness. The chewiness was good, and the overall texture seemed “smooth.” Barry: Softest texture of the three with a noticeable grain sweetness in the crumb and crust.
Conclusions
This modern wheat experiment* was a great learning experience for the following three unique reasons. Firstly, it served as an opportunity to bake with three of California’s most commonly grown heirloom wheat varietals. Secondly, turning it into a collaboration helped me gain a deeper appreciation for both the friends that I’ve made through sourdough baking and using the sourdough process to get the most out of heirloom gains. Thirdly, waiting to discuss tasting notes till we had both cut into and tasted our loaves made learning that we picked up on the same differences in texture and flavor even greater. Taking this a step further, when I discussed my tasting notes with Claudia shortly thereafter, she was elated to hear that Melissa and I had picked up on the textures and flavors that she has when testing these wheat varietals with her team.
Future plans: I personally am looking forward to baking with all of three of these wheat varietals again and zeroing in on their ideal functions, hydration percentages, and ability to complement and/or enhance the textures and flavors of other heirloom grains (wheat and otherwise). With WB 9229 having the most whole grain flavor, I could see myself testing it within my “base recipe” which contains 60-65% high gluten flour (or bread flour), 20-25% whole grain wheat, and 10-15% rye. Summit 515’s oven-spring capability and flavor may complement ancient grains and other mild tasting wheat varietals. Lastly, as a white wheat, I can see myself using Patwin 515 HP mostly to add a fluffy texture to loaves that already have gluten strength from higher protein grains (flours).
If you have not already done so, check out my podcast interview of Claudia Carter by clicking here.
Happy Baking!
*Future experiments will involve heirloom grains and therefore I decided to include the term ‘heirloom’ in the name of this series.
Greetings fellow bakers. I’d like to welcome you to my latest Meet the Baker Behind the Loaves series podcast interview. Beyond the inspirational quote that kicks off this podcast episode I’d like to share the following quote with you.
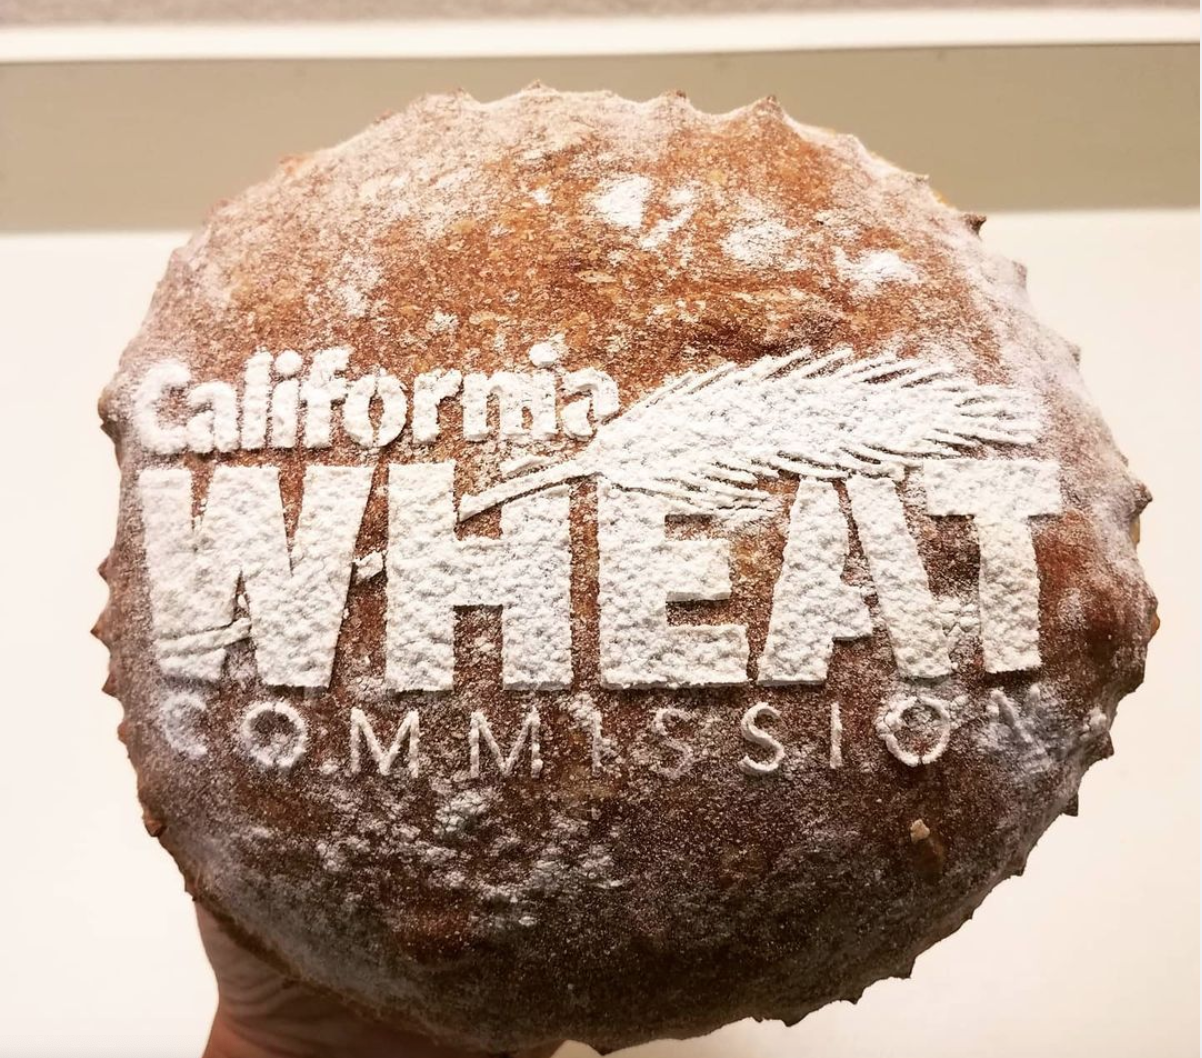
Photo Credit: @californiawheat (Instagram)
“It is our goal to support research that improves California wheat quality and marketability, and to develop and maintain domestic and international markets for California wheat.” (source).
With so much discussion about maintaining the financial viability of growing heirloom and ancient grains and the health benefits of baking and eating whole grain sourdough bread. Meeting passionate individuals like Claudia Carter, California Wheat Commission’s executive director, reassures me that these topics will only continue to become even more prioritized in discussions amongst those outside the sourdough baking community such as key decision makers and community leaders.
So without further ado, please join me in getting to know the baker behind the loaves, Claudia Carter, mother, whole grain advocate, and dedicated team leader.
The following topics were discussed during the course of this interview(podcast episode):
0:00-1:53 – Inspirational quote / Episode Intro
1:54-2:43 – Greetings and Recent challenges that California’s farmers have been facing (e.g. drought)
2:44-9:10 – Claudia’s food science journey, what sparked her interest in studying cereal science, and the evolution of her passion for whole grain baking since joining the California Wheat Commission.
9:11-22:29 The educating and promotion of a healthy and nutritious diet in children: How Claudia presents the importance of eating whole grains to schools and those involved in making decisions about school lunch programs. Including topics such as the whole grain element of school lunches, the history of refined and enriched flours, and the implications of the physical differences between modern commodity and heirloom/ancient grain wheat stalks (the grain revolution).
22:30-27:25 The unique history of cultivating and milling high quality grains in California and Keeping the growing of heirloom grains in California financially viable.
27:26-32:42 – How the California Wheat Commission helps facilitate relationships between with men and women at every link in the chain from the farmers all the way to the bakers and How the demand for specific wheat varieties is created through research, regular communication, and the unique level control that local grain elevators possess.
32:43-35:45 – Two of Claudia’s farmer relationships that to her exemplify the mission and efforts of the California Wheat Commission: Fritz Durst (Tule Farms: growing grain as part of an organic soil health program) and Paul Muller (Full Belly Farm: CSA – selling a diverse array of grains and produce directly to consumers). Both of them bring their grains to the CWC for analysis and feedback.
35:46-39:19 – Current research projects being conducts by both the CWC and UC Davis: 1) Finding varieties of Triticale (wheat and rye hybrid) that are suitable for bread baking. 2) Researching and testing new and old wheat varieties and then making them available to farmers year to year.
39:20-41:07 Wheat varieties that have stood out to Claudia recently: Einkorn and Rouge de Bordeaux (introduced to her by Grist and Toll).
41:08-43:49 The characteristics and sources of the California Wheat varieties that Claudia sent me to bake with: WB 9229, Summit and Patwin.*** Click here to view their baking experiment article***
43:40-46:24 – Claudia’s whole grain home baking: Pasta, carrot cake, tortillas, and more.
46:25-54:56 – Factors impacting the prevalence of gluten intolerance in the US and The benefits of long fermentation and eating local whole grains.
54:57-1:02 – “Living bread” and “Living food” – A) Producers and consumers honoring the food that we grow and eat. B) Working together to make whole grains and healthy foods in general affordable to the masses. C) One family at a time choosing to switch to whole grains. D) Exposing kids to whole grains and organic produce from a young age (at home and school).
Greeting fellow bakers, Barry from The Brewed Palate here. I’d like to welcome you to my latest Meet the Baker Behind the Loaves series podcast interview. Though I have interviewed a number of mill founders/owners, I recently realized that I had yet to interview inspirational individuals at the very beginning of the grain train (or grain chain). My choice of who to interview came as a matter of rather fortunate consequence. During a recent online search for sources Turkey Red wheat berries I came upon the Grains From the Plains website, the online store for Sunflower Acres, a Colorado Farm run by fourth generation farmer Kevin Poss and his wife Laura. After reading its about page I reached out to Kevin via Instagram and we began planning a date and time for a podcast interview. Though it took a few weeks to finalize the details, I had received my order of their grains the Friday prior and was therefore extra excited to get to know more about Sunflower Acres, Grains from the Plains, and Kevin and Laura themselves.
So without further ado, please join me in getting to know the bakers behind the loaves or should I say farmers behind the grains, Kevin and Laura Poss.
The following topics were discussed during the course of this interview(podcast episode):
0:00-1:28 – Inspiring quote / Episode Intro
1:29-3:09 – How Kevin and Laura met and the history of Sunflower Acres.
3:10-3:53 – Kevin’s day to day farming activities.
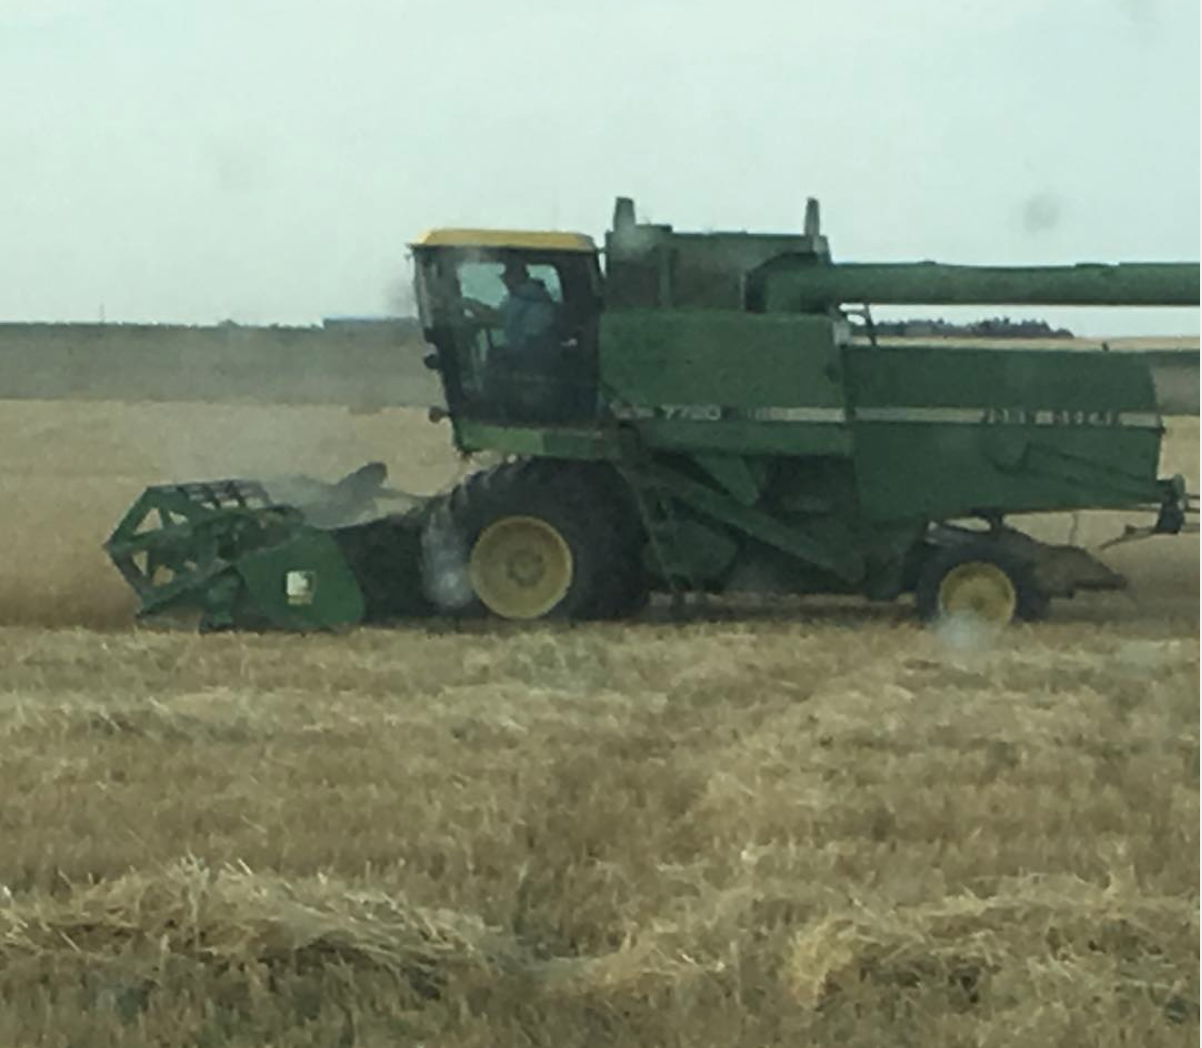
3:54-5:57 – Challenge of growing grains in the plains of Colorado and what planting and harvesting seasons looking like on the fields of Sunflower Acres.
5:58-9:03 -Presently growing and soon to be planted wheat varieties and How Kevin and Laura came upon them.
9:04-12:20 – Kevin and Laura’s motivation behind selling a portion of their grains directly to consumers via the Grains from the Plains website rather than what Kevin and his family had done in the past i.e. selling all of their grain to the local grain elevator (co-op).
12:21-14:06 – Notable relationships that they’ve made with local professional bread bakers who have used their grains.
14:07-16:30 – Ups and downs of trying to be approved as an organic farm and the challenges of growing heirloom (non-GMO) corn in their area.
16:31-17:52 Kevin and Laura’s goal to eventually mill their own grains on-site and Their ability to trace their grains once they leave the farm.
17:53-20:40 – Laura’s homebaking with her children and How milling grains at home helps open up avenues of experimentation.
20:41-22:19 – Taking pride in being able to raise their kids on 100% local meat, produce (such as Ahava farms), and grains.
22:20-24:31 – Laura’s day to day activites on the farm: supervising farm chores, packing online orders, managing finances, and homeschooling.
24:31-26:16 – What do the terms “living bread” and “living food” mean to Kevin and Laura? – Question inspired by Daniel Leader’s book Living Bread.
26:17-30:22 – A) How to follow Grains from the Plains and Sunflower Acres on social media…How simple it is to make connections within the “grain chain” B) Dedication to bringing back farming milling practices of the past (e.g. those at Castle Valley Mill) C) Kevin and Laura’s putting things in place for their kids to eventually take over the farm.
30:23-end – Once again thanking them for their time and Episode Outro.
To follow Kevin and Laura’s farming activities and purchase their grains visit grainsfromtheplains.com and follow their social media pages which are @grainsfromtheplans on Instagram and @sunfloweracres on Facebook. To contact them directly send an email to grainsfromtheplains@gmail …For my interviews like this click the series link in the right sidebar.