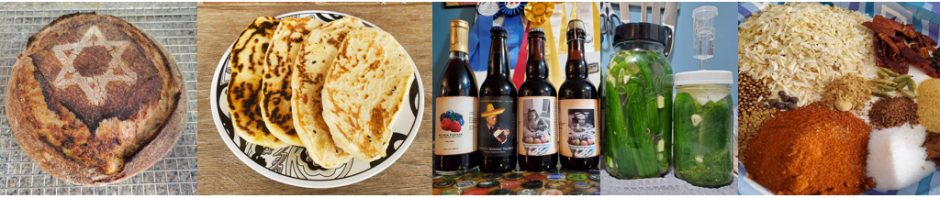
Soon after moving to New Jersey from New York City I joined the award winning WHALES homebrew club and was eager to get to know the New Jersey homebrewing scene. So when I found out about the Motown Mash homebrew competition, I quickly chose four of my beers to enter into my first NJ based competition. Judging was completed and results were announced on Saturday October 22nd and in the end my Innkeeper English barleywine took both gold in the Strong British Beer category and second place in the Best in Show round and my First Fruits Quadrupel took gold in the Belgian Dark Strong Ales category.
In the days following Motown Mash while discussing the results with the WHALES club officers, I presented my idea of giving a presentation on brewing high gravity (“big”) beers at the club’s November meeting and they enthusiastically gave me their permission to do so.
In preparation for my presentation I put together a handout which I split into two parts. The first being a list of general tips and strategies for homebrewing high gravity beers and the second being an in depth look into how I brewed both Innkeeper and First Fruits. Below I’ve included the handout and the audio from my presentation, which went better than I expected.
Brewing High Gravity (“Big”) Beers
Key Points:
-
- Careful Recipe Formulation – When using commercial examples and clone recipes in order to create your recipe and envision your ideal finished product pay close attention to the percentage of each specialty malt/grain in your recipe in order to make sure that you can take variables such as your average mash efficiency, mash pH, constraints of your brewing equipment, the intensity of the flavors that each malt/grain will contribute, wort color, and wort fermentability into account. Examples: 1) Using too much roasted malts can lead to astringency and acrid roastiness. 2) Using too much crystal/caramel malts can lead to an overly sweet beer even if you hit your target final gravity.
- Managing the mash (larger grain bill): Factors to account for include 1) Size of your mash tun (substitute some of your base malt with malt extract or evenly split grain bill into 2 mashes* (*may work better if you scale your recipe down to half your target batch size using your brewing software to make sure you can hit your target pre-boil gravity) 2) Keep DME on hand to adjust pre-boil gravity as needed. Speaking from experience, even if you’ve already lowered your target brew house efficiency when creating your recipe in Beer Smith etc. your mash may not go as smoothly as you hope it will. So keep at least 2 lbs of DME on hand. 3) Keep your grain/water ratio low (1.25-1.5qt) so that you’ll have enough water to sparge as much sugar out of your grist as possible. 4) My mash/sparge process – Heat up mash tun with strike water, dough in, dial in pH with salts/minerals, saccharification rest (75 minutes), vorlauf, collect first runnings, add mash out water to bring temp up to 168F, 10-15 minutes rest (quasi batch sparge), vorlauf, collect second runnings, fly sparge once there is 1 inch of wort over grain bed until collect boil volume. 5) Mash temperature – while you may want a full bodied barleywine or imperial stout your wort needs to have high fermentability in order for the yeast to attenuate down to your target OG. Therefore, I’d recommend mashing between 148F and 152F and adding flaked oats and or barley to beers that you want to be full bodied. Note: Caramel/crystal malts can also help with body, but should still be used in moderation.
- Boil off rate – Of course it’s good to be familiar with all aspects of your brewing equipment, but when brewing higher gravity beers making sure you calculate your target pre-boil volume based on your average boil rate is even more important. Doing so will increase your chances of reaching your target original gravity exponentially.
- Yeast starters – I’ve found it easier to make a 2-5-3L starter with 2 Wyeast smack packs (stir plate for 18-24 hours) rather than stepping up my starters. Due to the larger size of high gravity beer starters making them in advance will give you time to cold crash and decant some of your starter wort/beer in order to avoid diluting your wort and or not having enough head space in your fermentation vessel.
- Fermentation Management – 1) Aerate well prior to pitching your yeast starter. Some say to aerate (or add pure oxygen) again on day 2 or 3 to encourage yeast reproduction during active fermentation. 2) Start in the lower end of the temperature range for your chosen yeast strain to prevent too much blow off during the first 2-3 days of primary fermentation then raise slowly as fermentation shows first signs of settling into its active rhythm (producing lots of CO2 without a ton of blow off foam). 3) Raising the fermentation temp at the right time will increase your chances of reaching your target FG (especially with Belgian beers). 4) Though I’ve never done it, adding extra yeast nutrient towards the end of the boil or with your second sugar addition may help keep your yeast happy. 5) For my higher gravity beers I usually do a 3 week primary fermentation followed by 1 month of conditioning in the keg or in bottles. 5) FermcapS is your friend – use it to prevent coming home to a fermentation mess. 6) Sugar adjuncts – when brewing high gravity Belgian ales I split my candi sugar additions between the last 10 minutes of the boil and day 3 of fermentation to encourage attenuation / yeast reproduction.
- Priming Sugar – While some may choose to bottle from the keg in order to prevent bottled bombs due to the higher than average FG of big beers (e.g. barleywines and imperial stouts). If you choose to bottle condition less is more i.e. use less than is recommended based on the amount that is recommended for the beer style that you are bottling or volumes of CO2 you’re aiming for. Note: Belgian beers like tripels and quadrupels are an exception due to their lower FG and tendency to be bottled in bottles than can withstand the extra CO2 pressure of bottling conditioning (bottle re-fermentation).
- Aging Time – 1) The melanoidins, hops, alcohol content, and residual sugars will help in your malt forward “big” beers age well. However, just as with craft brewed beers that fall under this category homebrews can fall victim to oxidation when the seal created during bottling begins to break down or loosen. Therefore, I’d recommend sealing your bottles with bottle sealing wax or one of the cheaper alternatives many homebrewers use (e.g. paraffin wax or glue sticks melted with crayons) in order to minimize oxidation rates. 2) Make sure to keep the beers that you are aging in a cool space which maintains a fairly constant temperature range. Note: A beer’s rate of oxidation doubles for every 10 degrees Celsius above freezing. Therefore, keeping your beers as close to 32F or at least at cellar temperature (50-60F) will allow them to age without you having to worry about them succumbing to the effects of too much oxidation. 3) However, every beer is eventually going to hit its prime and its flavors may become one note and more mild. As such, in my opinion the 2 year mark should be your cut off point for deciding whether your beer/s will benefit from further aging or not. 4) Oak aging – While I won’t go into depth here I’ll note that in terms of length of time for aging chips impart their flavors within a week while cubes and spirals can take 3-5 weeks to impart their flavors. In turn, after a week of aging on oak (any format) you should taste your beer to make sure it’s not being taken over by oak/wood flavors.
My Notable “Big” Beers and Their Recipes
 English Barleywines – While both of the barleywines that I’ve brewed since I started brewing more consistently in 2013 have won ribbons in homebrewing competitions, their brew days, fermentations, and bottle conditioning did not go as smoothly as I would have liked. However, through experiences their ups and downs I’ve learned a lot about brewing English barleywines.
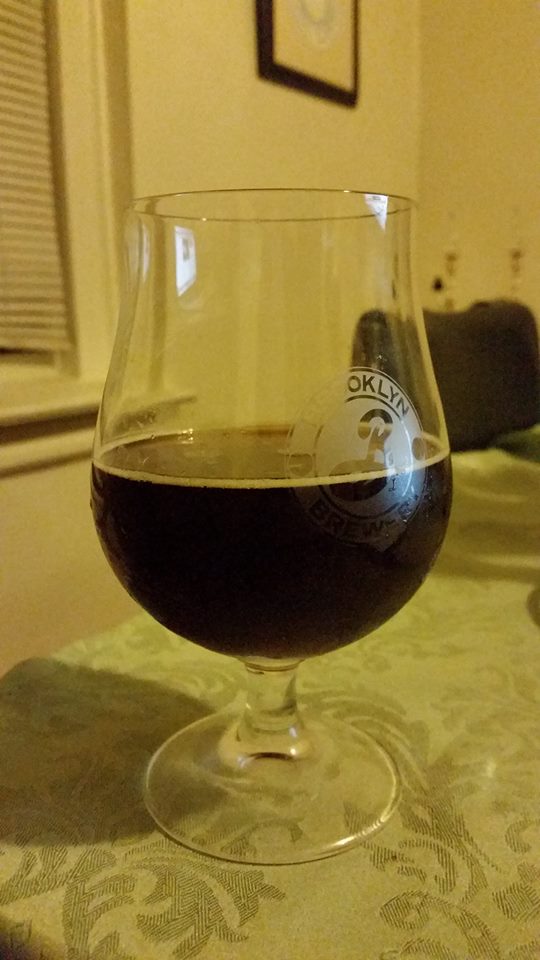
Key Factors: 1) Deciding whether to use caramel/crystal and other specialty malts to add malt complexity vs using only maris otter and either a decoction or extended boil. 2) Use an English yeast strain with a higher than average attenuation rate. For example, while I used Wyeast 1968 (67-71%) in my second barleywine (the one being poured at this meeting). I could have used Wyeast 1098 (73-75%). 3) As noted above, while oxidation may benefit this style, your barleywine will most likely age better if you wax seal your bottles.
Innkeeper Barleywine: What I did, what didn’t go as planned, and what I would do differently next time.
 What I did: A) As you’ll see in my recipe, I decided to use caramel/crystal and 2 other speciality malts to build my barleywine’s rich malt complexity. B) To put my own twist on a traditional English Barleywine I chose to use American hops. C) Instead of using a yeast strain with a higher attenuation rate I used one that I’d heard accentuates malt character. D) Mashed (single infusion) at 154F instead of mashing in the 150-152F range. E) 3 week primary fermentation followed by secondary fermentation / aging in bottles. F) Bottle conditioned the finished beer instead of bottling from a keg.
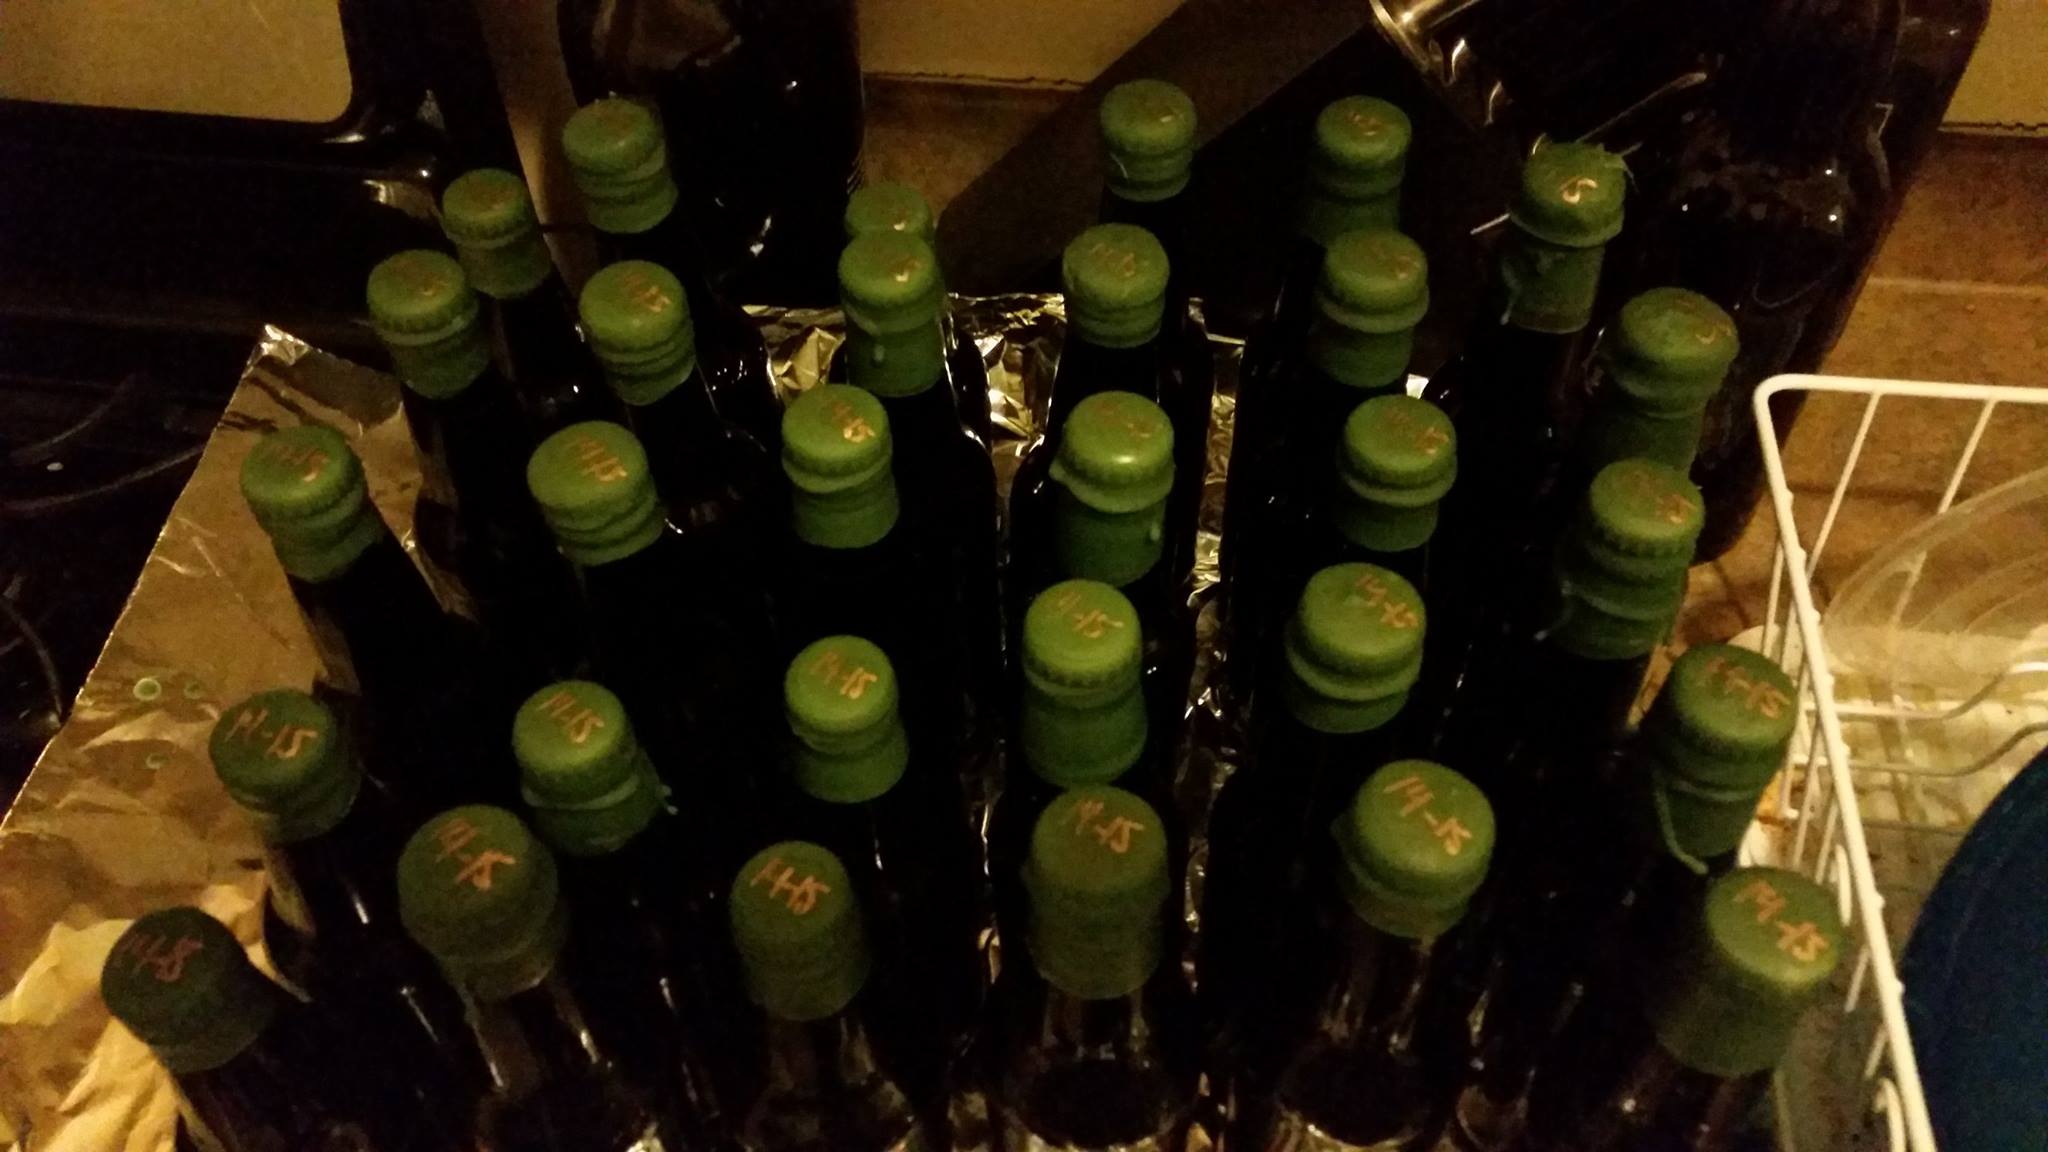
What didn’t go as planned: A) I missed my target pre-boil gravity and therefore added 1.25 lbs of DME B) Despite doing so my boil off rate was not high enough (or I collected too much wort) and I missed my target original gravity by 7 points C) I meant to use Chinook for bittering, but accidently used Centennial. D) Due to my overestimating how much beer was in my bottling bucket I used too much priming sugar and the beer over carbonated and developed some oxidative off flavors. In order to do my best to “save” the beer I put the rest of the bottles into my fridge for a couple weeks to stop the beers from further carbonating. I then wax sealed them for aging.
What I would do differently next time: A) In order to balanced out the beer’s malt character I may take out the Vienna malt and replace it with more Maris Otter pale malt or DME and also use a bit less caramel/crystal 80L. B) Rather than mashing at 154F I’ll mash in the 150-152F range. C) Make sure to lower my target brewhouse efficiency and adjust my grain bill accordingly. D) Make sure to collect just enough wort i.e. 7.10 gallons as per my boil kettle’s boil off rate and the 90 minute boil. E) While the yeast(/beer) attenuated down further than my target FG I may use a more highly attenuative yeast in order to increase my chances of achieving a complex yet not too sweet finish malt character. F) If I decide to bottle condition again I’ll make sure to use less in order to avoid over carbonation. 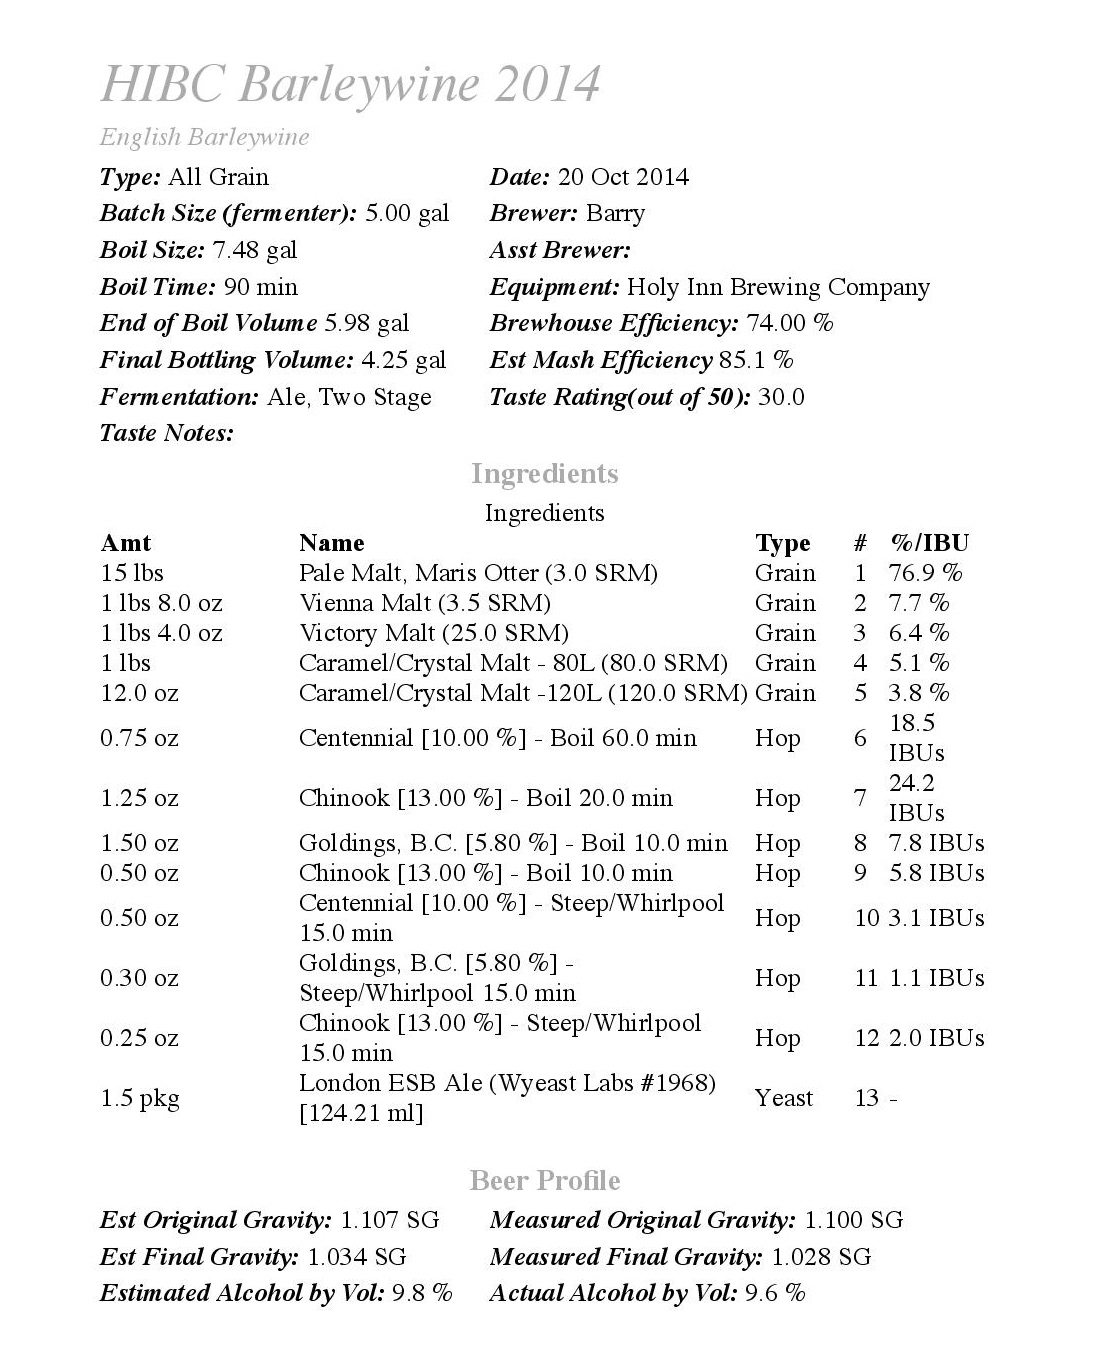
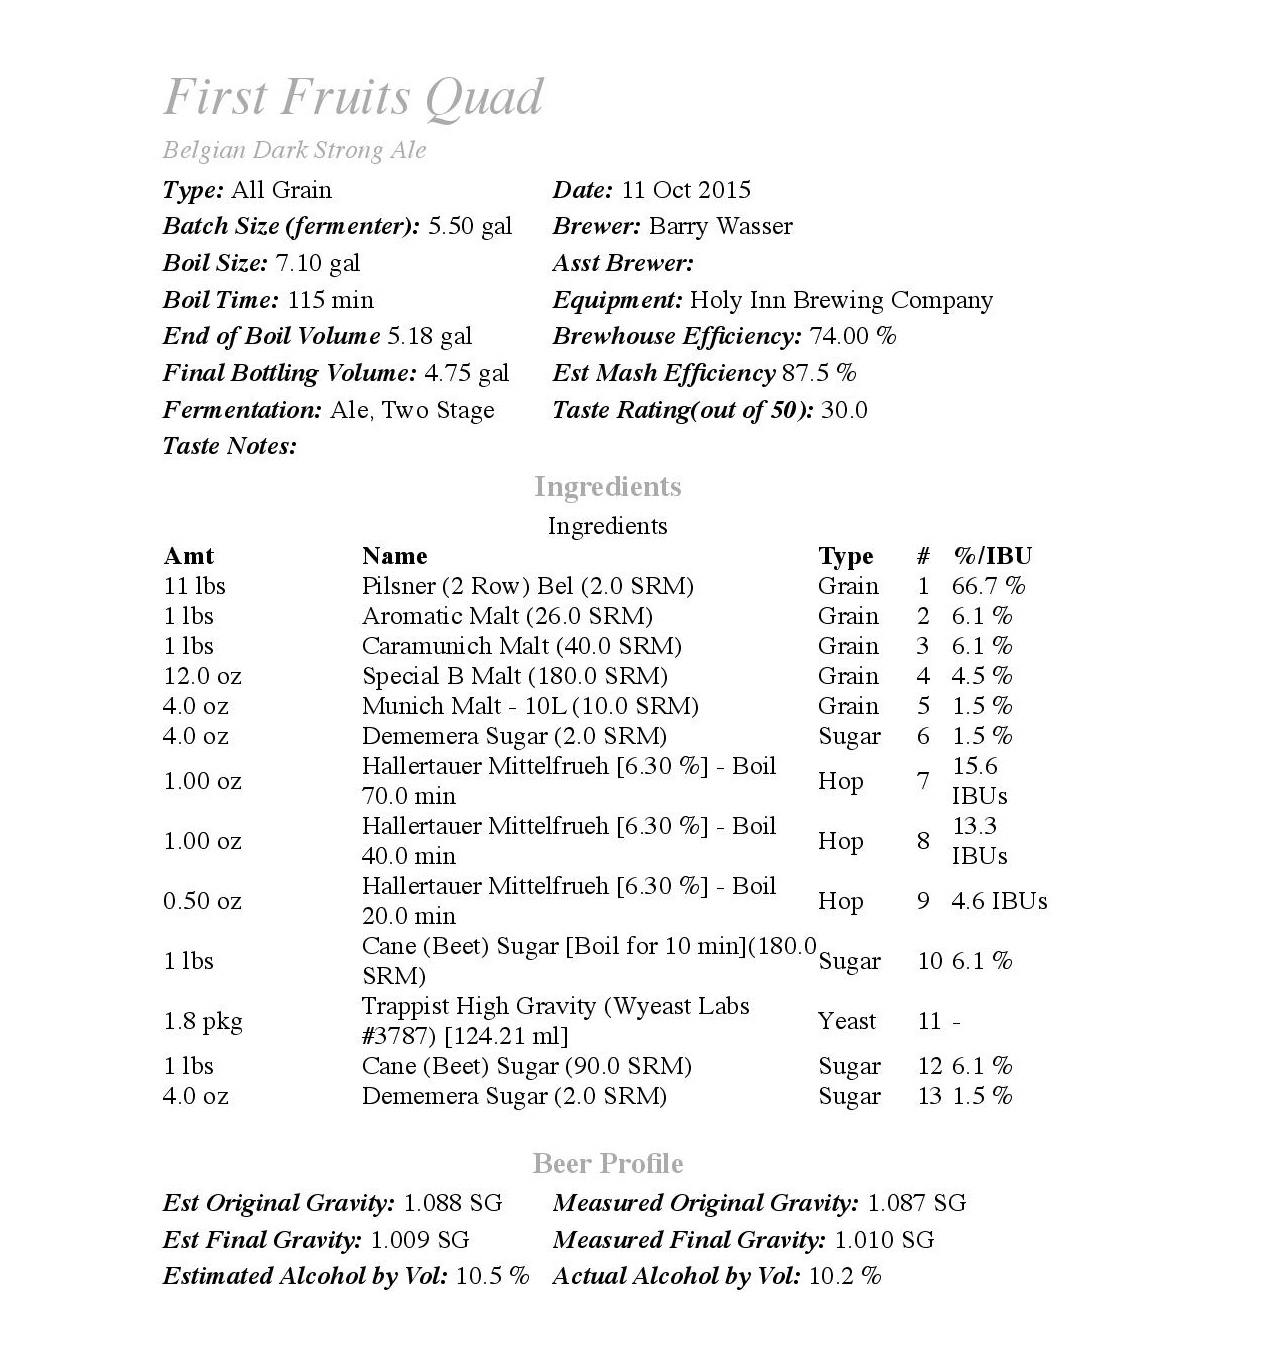
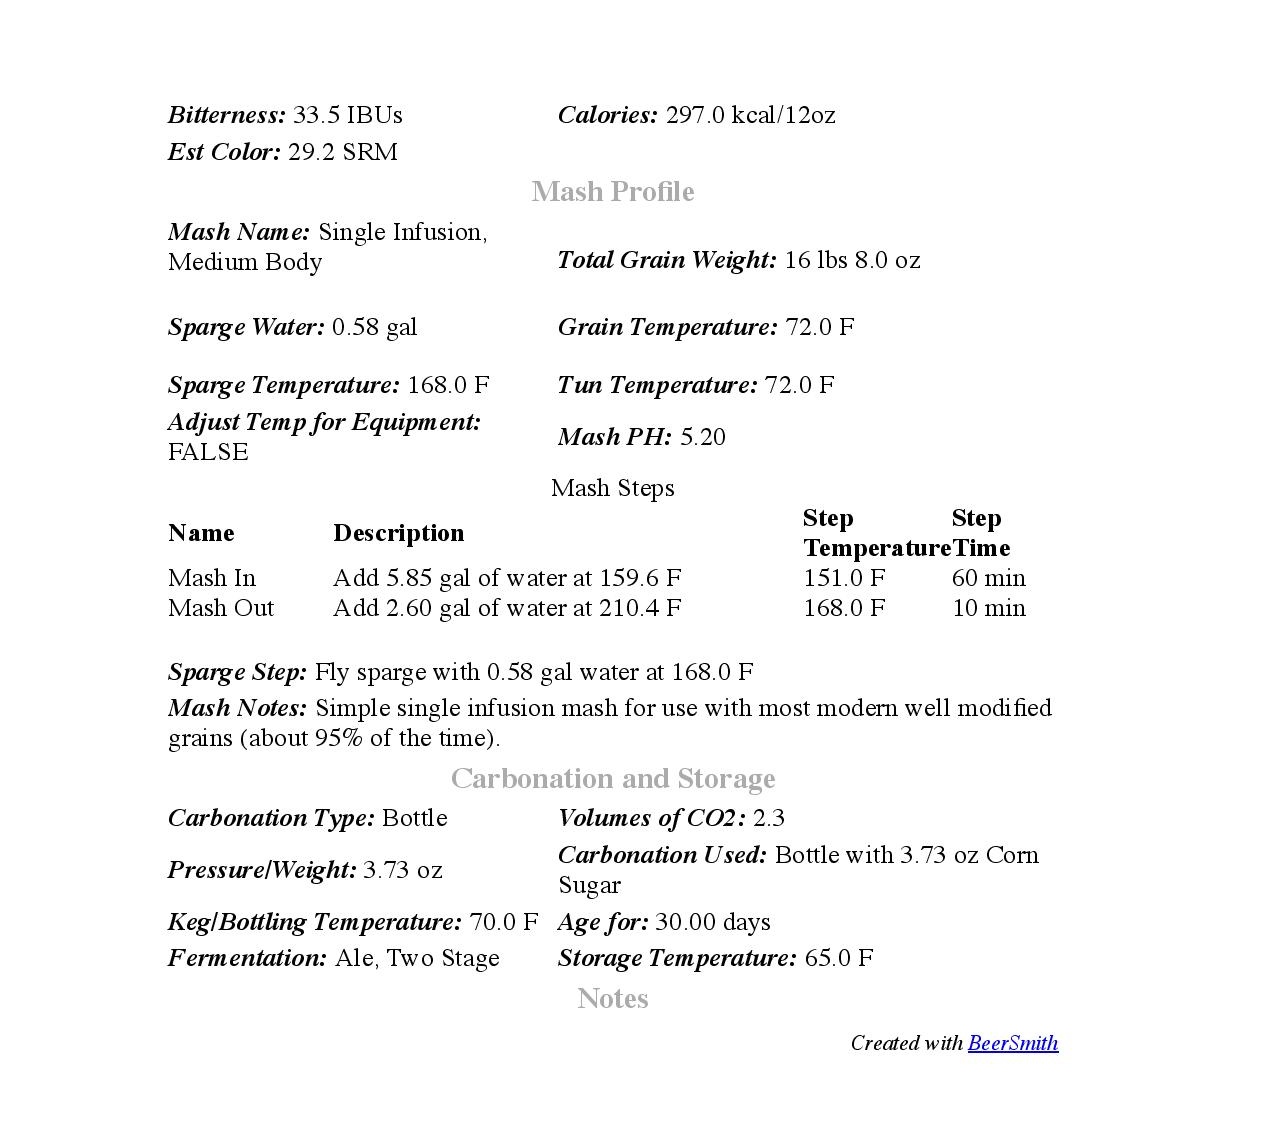
 Belgian Quadrupel – Out of all of the “big” beers that I’ve brewed over the past few years, the brewing/fermenting/bottling of my quadrupel went the smoothest. Brewed as the first vintage of the quadrupel that I plan to brew each year to celebrate my wife’s and my firstborn daughter, I used clone recipes of a number of Trappist and abbey quadrupels to create my recipe. With each brew day and finished beer being a learning experience, the following is what I learned from brewing my first quadrupel.
 Key Factors: 1) Deciding whether to use dark candi sugar as the primary contributor of the dark fruit and other flavors and aromas that are commonly found in quadrupels and Belgian strong dark ales or to blend the dark candi sugar with specialty malts such as Special B and Caramunich to create them along with a well rounded complexity. 2) Use noble hops like Hallertau and Tettnang to complement yeast phenols. 3) Choose a yeast strain that will likely produce the flavors and aromas that you’re looking for. Most Belgian yeast strains can handle high gravity wort. 4) Mash low (148-150F) to create a highly fermentable wort. 5) In order to create a balance of both phenols (spiciness) and fruity esters you can either do a ferulic acid rest at the start of your mash and then ferment high from the start or ferment in your yeast strain’s lower temperature end range to start and then slowly ramp up the fermentation temperature. 5) In order to encourage an active first few days of fermentation I’d recommended pitching at 68F and fermenting between 68F and 71F for the first few days i.e. when most of the yeast’s attenuation of the wort is done and then slowly raising the fermentation temperature to the 73-75F range (or higher if desired) to encourage more attenuation and the formation of fruity esters.
First Fruits Quadrupel: What I did, what didn’t go as planned, and what I would do differently next time.
What I did: A) I chose to use both dark candi sugar and specialty malts (see recipe below) to create a balanced complexity of the flavors and aromas that I hoped would be present in the finished beer. B) I used only Hallertau Mittelfruh hops and my go to Belgian yeast, Wyeast 3787 Trappist High Gravity. C) In order to create a complex candi sugar character I used a combination of D90 syrup, D180 syrup, and demerara sugar. D) Then in order to encourage the yeast to not put all of its focus on the simple sugars during the initial days of fermentation I chose to add the D180 and half of my demerara sugar with 10 minutes left in the boil and then add the D90 and the remaining half of the demerara sugar on the morning of day 4 of fermentation (raised the fermentation temp afterwards). E) The highest I took the fermentation temperature was 74F during the beer’s 3 week primary fermentation. F) Waited a month after bottling (used thicker Belgian bottles) before opening a bottle because high gravity beers tend to take longer to carbonate.
 What didn’t go as planned: A) After 1 week of fermentation I eagerly took a gravity sample and it read 1.020. Luckily a fellow homebrewer told me that sometimes Wyeast 3787 takes its time when attenuating down its last 10 points and I in turn raised the fermentation temperature, roused the yeast, and waited another week before taking another sample. As my homebrewing compadre predicted my 2 week gravity sample read 1.011. B) While the beer turned out tasting and smelling really good; good enough to win gold in the Motown Mash competition, I would have liked there to be more fruity esters and spicy phenols present in the aroma and taste. C) Due to my use of Aromatic malt along with other specialty malts the beer finishes a bit sweet despite it’s 1.010 FG and is has a somewhat fuller body than some of the Trappist quadrupels that I’ve tried.
What I would do differently next time: A) I’ll use less Aromatic and Caramunich malts and add more of the simple sugars in order to encourage faster attenuation and a less full and sweet body. B) I’ll mash at 149F to create a more fermentable wort C) I’ll raise the fermentation temp higher and sooner to encourage the production of more fruity esters. D) I’ll most likely do a ferulic acid rest instead of starting the fermentation in my chosen yeast strain’s lower temperature range in order to encourage the production of spicy phenols. E) I may switch to a yeast strain that has a higher potential for producing noticeable phenols and fruity esters.


Congratulations, Barry!