Being that one of my goals for The Brewed Palate is to share my homebrewing experiences with you, and a lot of those experiences involve me brewing new recipes and using techniques and processes for the first time. I’ve decided to post an update video and detailed blog post for each of my beers at some point between brew day and the beer being ready to drink…As the above title and video state, this post’s focus is to share how I managed the fermentation of my first pilsner aka Lion’s Roar Pilsner, a Bohemian Pilsner inspired by Firestone Walker Brewing Company’s Pivo Pils. Click here to view this beer’s brew day video.
Mash: While many brewers choose to do a decoction mash for lagers, I chose to do a step mash and add aromatic malt and some other speciality malts to achieve the style appropriate melanoidin character and body. While my steps (122, 145, 152, 165) did not go as smoothly as I would have liked, I was able to recover and hit my target pre-boil gravity (1.045).
Original Gravity: After a 90 minute boil I went just over my target OG of 1.056 with a gravity of 1.057 (or 1.058, see brew day video for refractometer reading).
Start of Fermentation: After chilling the wort down from 65 to 49 overnight I pitched my cold crashed and decanted starter (2.5L w/ 2 smack packs of Wyeast 2124). After a few hours I could see some bubbling in my bubbling jar, but by the next morning it had not sped up by that much. So I asked a friend who I knew had recently brewed a pilsner about fermentation temperature and he told me the he fermented his at 52F. In turn, I raised mine to a temperature range of 50.9 to 52.7F (10.5-11.5C) and after a few more hours it sped up significantly and I decided to count that day as day 1 of fermentation.
Diacetyl Rest and Cooling down to lagering temperature: After 9 days of strong fermentation I started raising the temperature on my controller on the morning of day 10 as the rate of 3-4 degrees F every 12 hours. By the morning of day 12 the temperature has reached my target range of 62 to 64F (17-18C) and kept it there for days 12 and 13. On the morning of day 14 I took a gravity sample (see the above video) and saw that the beer had attenuated down to 1.013, two points below my target FG of 1.015. I then decided to start the process of cooling it down to lagering temperature and lowered the temperature to 57-59F. However, I was still concerned about when the best time would be to dry hop the beer. So again I went to Facebook to ask some fellow homebrewers and a couple professional brewers about the ideal time to dry hop a lager. While the homebrewers weren’t 100% sure about the ideal time, both professional brewers advised me to dry hop after primary fermentation was over and only keep the hops in contact with the beer for a week. As a result I added the dry hops (1.25oz of Saphir hops) that night and kept the fermentation temperature the same for 4 days. Then over 2.5 days I lowered the temperature to a range of about 35 to 37F (2.3-3.3C) at the rate of 5 degrees F every 12 hours as I planned to keg the beer and begin the lagering process on the last day of the week of dry hopping.
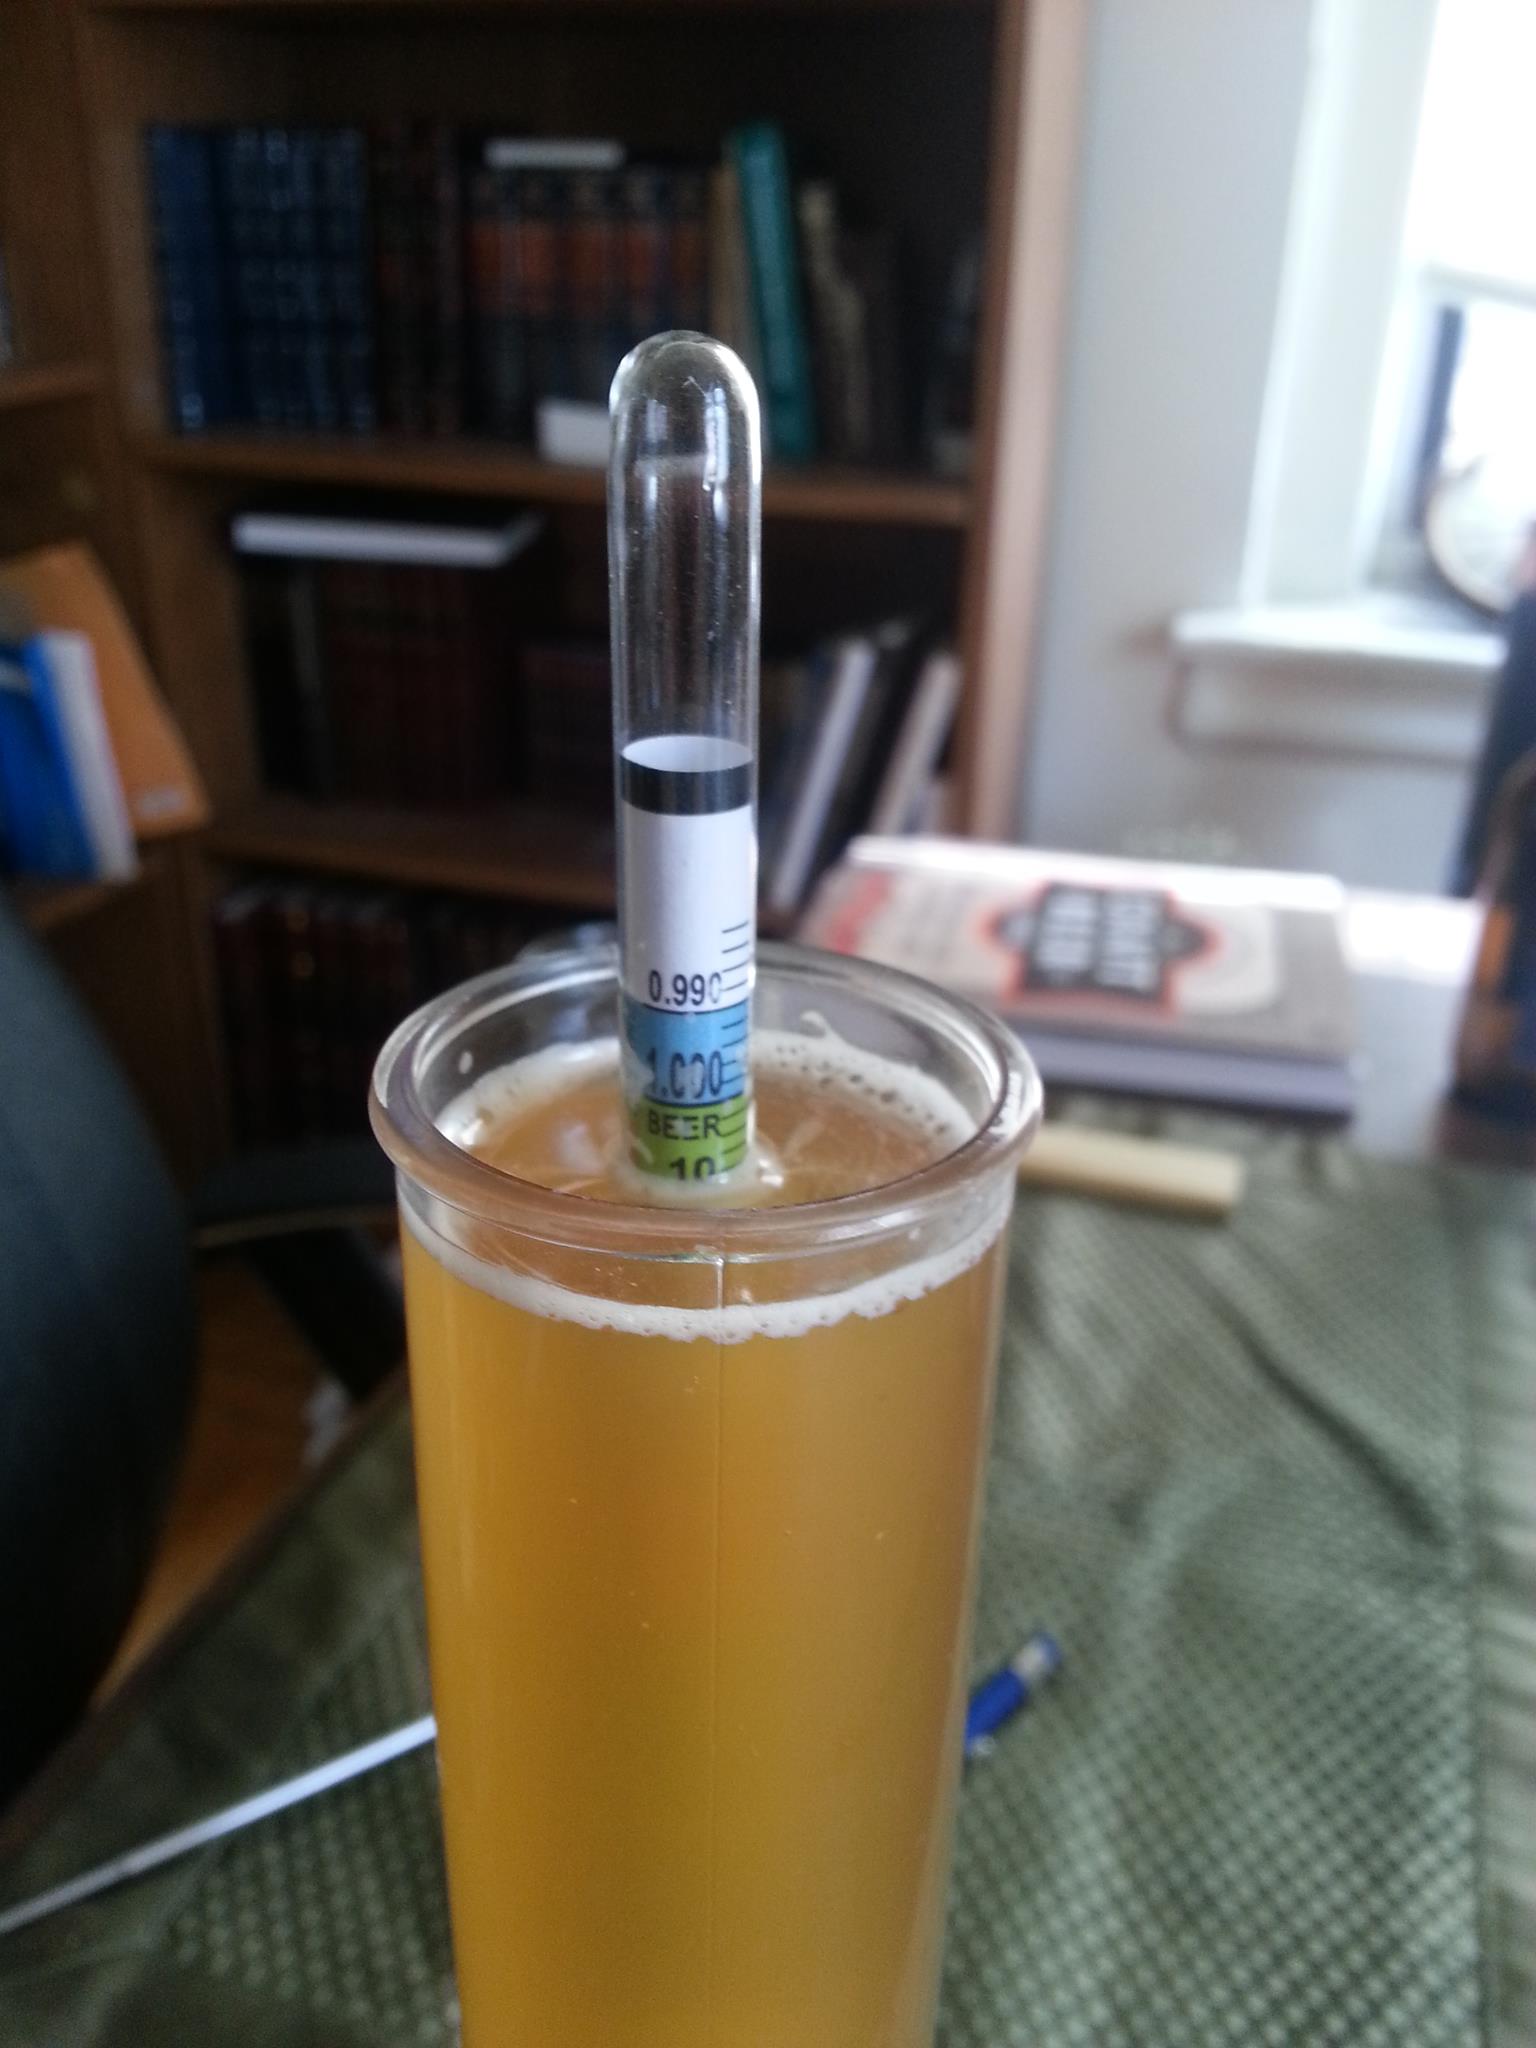 Second gravity sample and Beginning the lagering stage: On day 6 of the week of dry hopping I decided to take another gravity sample to check if the beer had attenuated further down. To my surprise it had attenuated down to 1.010 and brought its ABV up to 6.2%. But after thinking over my processes I realized that keeping the beer at 57 to 59F for 4 days most likely encouraged further fermentation to take place. Also, I should note that while a gravity of 1.010 could be considered dry for a pilsner, the body, flavor, and mouthfeel of the beer were balanced and not any drier than Pivo Pils (5.3% ABV) itself when I tasted the sample. The next day I sanitized and chilled my 2nd keg, transferred the beer into it, and sealed it with CO2. My plan is to lager Lion’s Roar Pilsner for 4 to 5 weeks at 38 to 40F (the temperature of my keezer) and then carbonate and serve it.
If this plan changes I’ll be sure to document whatever changes I make in a blog post. I’ll be posting Homebrew Wednesday 36 (my weekly update video) over the weekend and it includes footage of me kegging this beer. Overall, I’m quite pleased with how my first pilsner is progressing through its fermentation and maturation process and am looking forward to sharing my tasting notes with you once it’s ready to drink. If you have any questions about my process etc. feel free to comment on this post or send me an email. Cheers!


Pingback: Homebrew Wednesday 49: #Doublefisted_Updates |