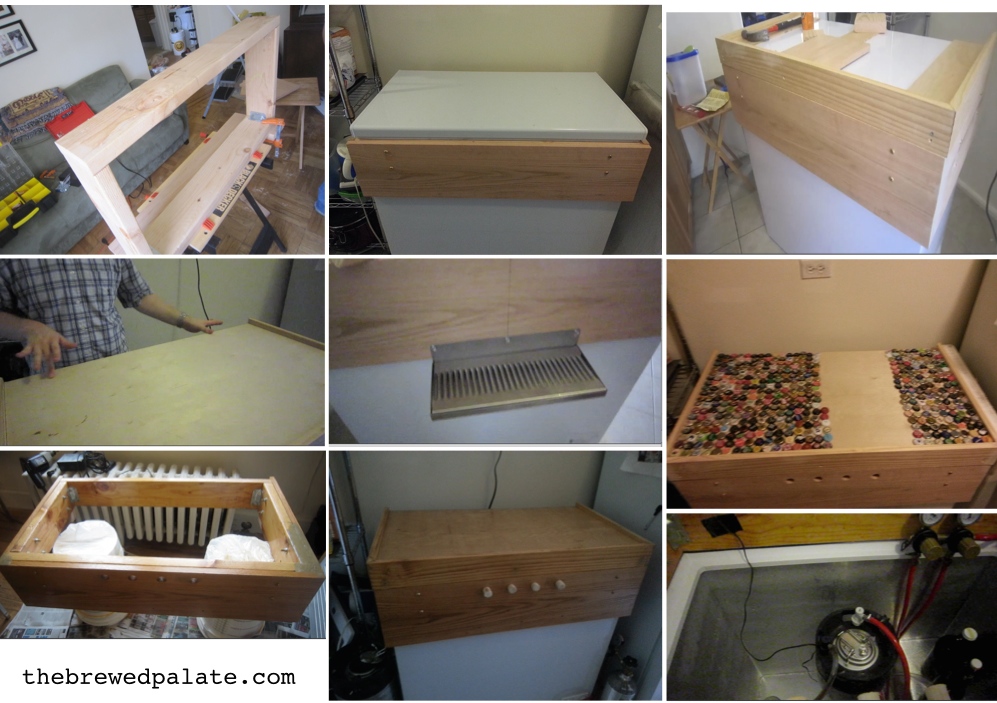
Over the past 3 weeks I’ve been hard at work building my new keezer. With the help of two fellow homebrewers, lots of research, and some personal initiative I was able to get it done much quicker than I anticipated. Though I must admit there were some bumps along the way in terms some of the cosmetic touch ups that were made along the way and my amateur DIY skills ; overall I’m happy with the way my new keezer functions and looks. Before I get started with documenting my building process here on thebrewedpalate.com I should point out two key pieces of information. The first is that although a lot of my aesthetics choices were my own; my initial design and building process were both taken from a video/article that I found on billybrew.com (note: his video/article is in a step by step format) . The second is that I’ve split the build into 5 stages or “days” so that it’ll be easier to follow. Below you’ll see a picture that you can click to watch that “day”‘s video and also read a text version of what I accomplished each “day” and what obstacles I faced at each stage of the build. I hope you find this post useful in building and or expanding your own keezer or kegerator.
Parts List (prices not listed due to their variation between stores and websites):
Collar and Lid
- Freezer: GE FCM7SUWW (from Home Depot)
- Temperature Controller: I built an STC-1000 controller, but there are other options that are easier yet more expensive.
- 10 ft. 2″ x 6″ pine (inner collar)
- 8 ft 1″ x 10″ red oak (outer collar) – Note: you can use 1″ x 8″
- 8 ft 1″ x 4″ red oak or another hard wood (not sure what type mine is) – lid border
- 37″ W x 20.5″ birch wood sheet (lid cover)
- 3 1/8″ thick by 20.5″ long in ply wood (spacers for birch)
- Wood Glue (1 bottle)
- Wood Stain of your Choice (1 jar)
- Minwax Semi-Gloss Spar Varnish (1 8oz can)
- Minwax Pre-Stain Wood Conditioner (1 jar)
- Sponge Rubber Weatherstrip
- 1/4″-20 x 3″ Brass Bolts (12 total)
- Washers (12 total)
- Nuts (12 total)
- Gusset Angle Brackets (4 total)
- 1.25″ Wood Screws (8 total)
- 1.5″ Wood Screws (16 total)
- 2 brass handles for lid (must screw in from the front)
See below for the keg / CO2 system parts list
Day One: Building and attaching the inner and outer collars
 A week or so after the chest freezer was delivered I rented a Zipcar and went to Home Depot to purchase all the materials that I’d need for the collar. I spent the money on the car rental so that when my friend Henrik (a fellow member of the New York City Homebrewers Guild) came over with his tools a couple days later I’d be ready to get rolling with the build. Upon his arrival we took measurements, cut the wood for the inner collar, assembled it with the gusset angle brackets and 1.25″ wood screws, and made sure it fit flush on top of the freezer. After deciding not to mess with a miter saw that I borrowed my friend Stephen (see Day 2), we took measurements for the outer collar, cut the oak, and attached it to the inner collar using the bolts, nuts, and washers. Once that was done we realized that our not-so-straight cuts of the red oak resulted in the collar fitting back on the freezer a bit more snug than we hoped and that I’d have to sand the front corners of the outer collar to even out its 3 pieces out ( two sides and front). Henrik recommended that I use wood filler once I was finished sanding to fill in the space between the boards, but doing so backfired because it kept cracking whenever I moved or drilled into the collar and wasn’t to easy to sand before I stained the collar (day 4). Overall, day one was a success and I was happy to get off to a good start.
Day 2: Covering the freezer lid with wood
 Over the following weekend I sanded the collar to even out the un-even corners of the outer collar. Then on Monday Stephen came over with his tools and a 7ft long piece of hard wood to make the border for the lid. After reattaching and measuring the lid we decided that we’d use his miter saw to cut the border wood at 45 degree angles and then attach the 3 resulting pieces to the lid with my leftover wood screws. In order to do so we first used a wide drill bit to create divots for counter sinking the screws and drilled pilot holes to make sure that the screws would go through both the wood and freezer lid. We then screwed the wood onto the lid and made sure that the lid opened with the attached wood on it. We also sanded the corners and filled them and the screw divots in with wood filler. Before he left Stephen and I glued down 3 1/8″ thick pieces on top of the lid in order to ensure that the birch wood (which I purchased later that day) would go over the lid’s plastic edges…After a quick late lunch I went to a local hardware store and bought the birch wood sheet because it was smoother and better looking than regular ply wood. My initial plan for the birch was to use bolts to attach it to the lid, but upon returning home and test fitting it on the lid I realized that it didn’t need bolts and that I could get away with gluing it down. So that’s what I did….
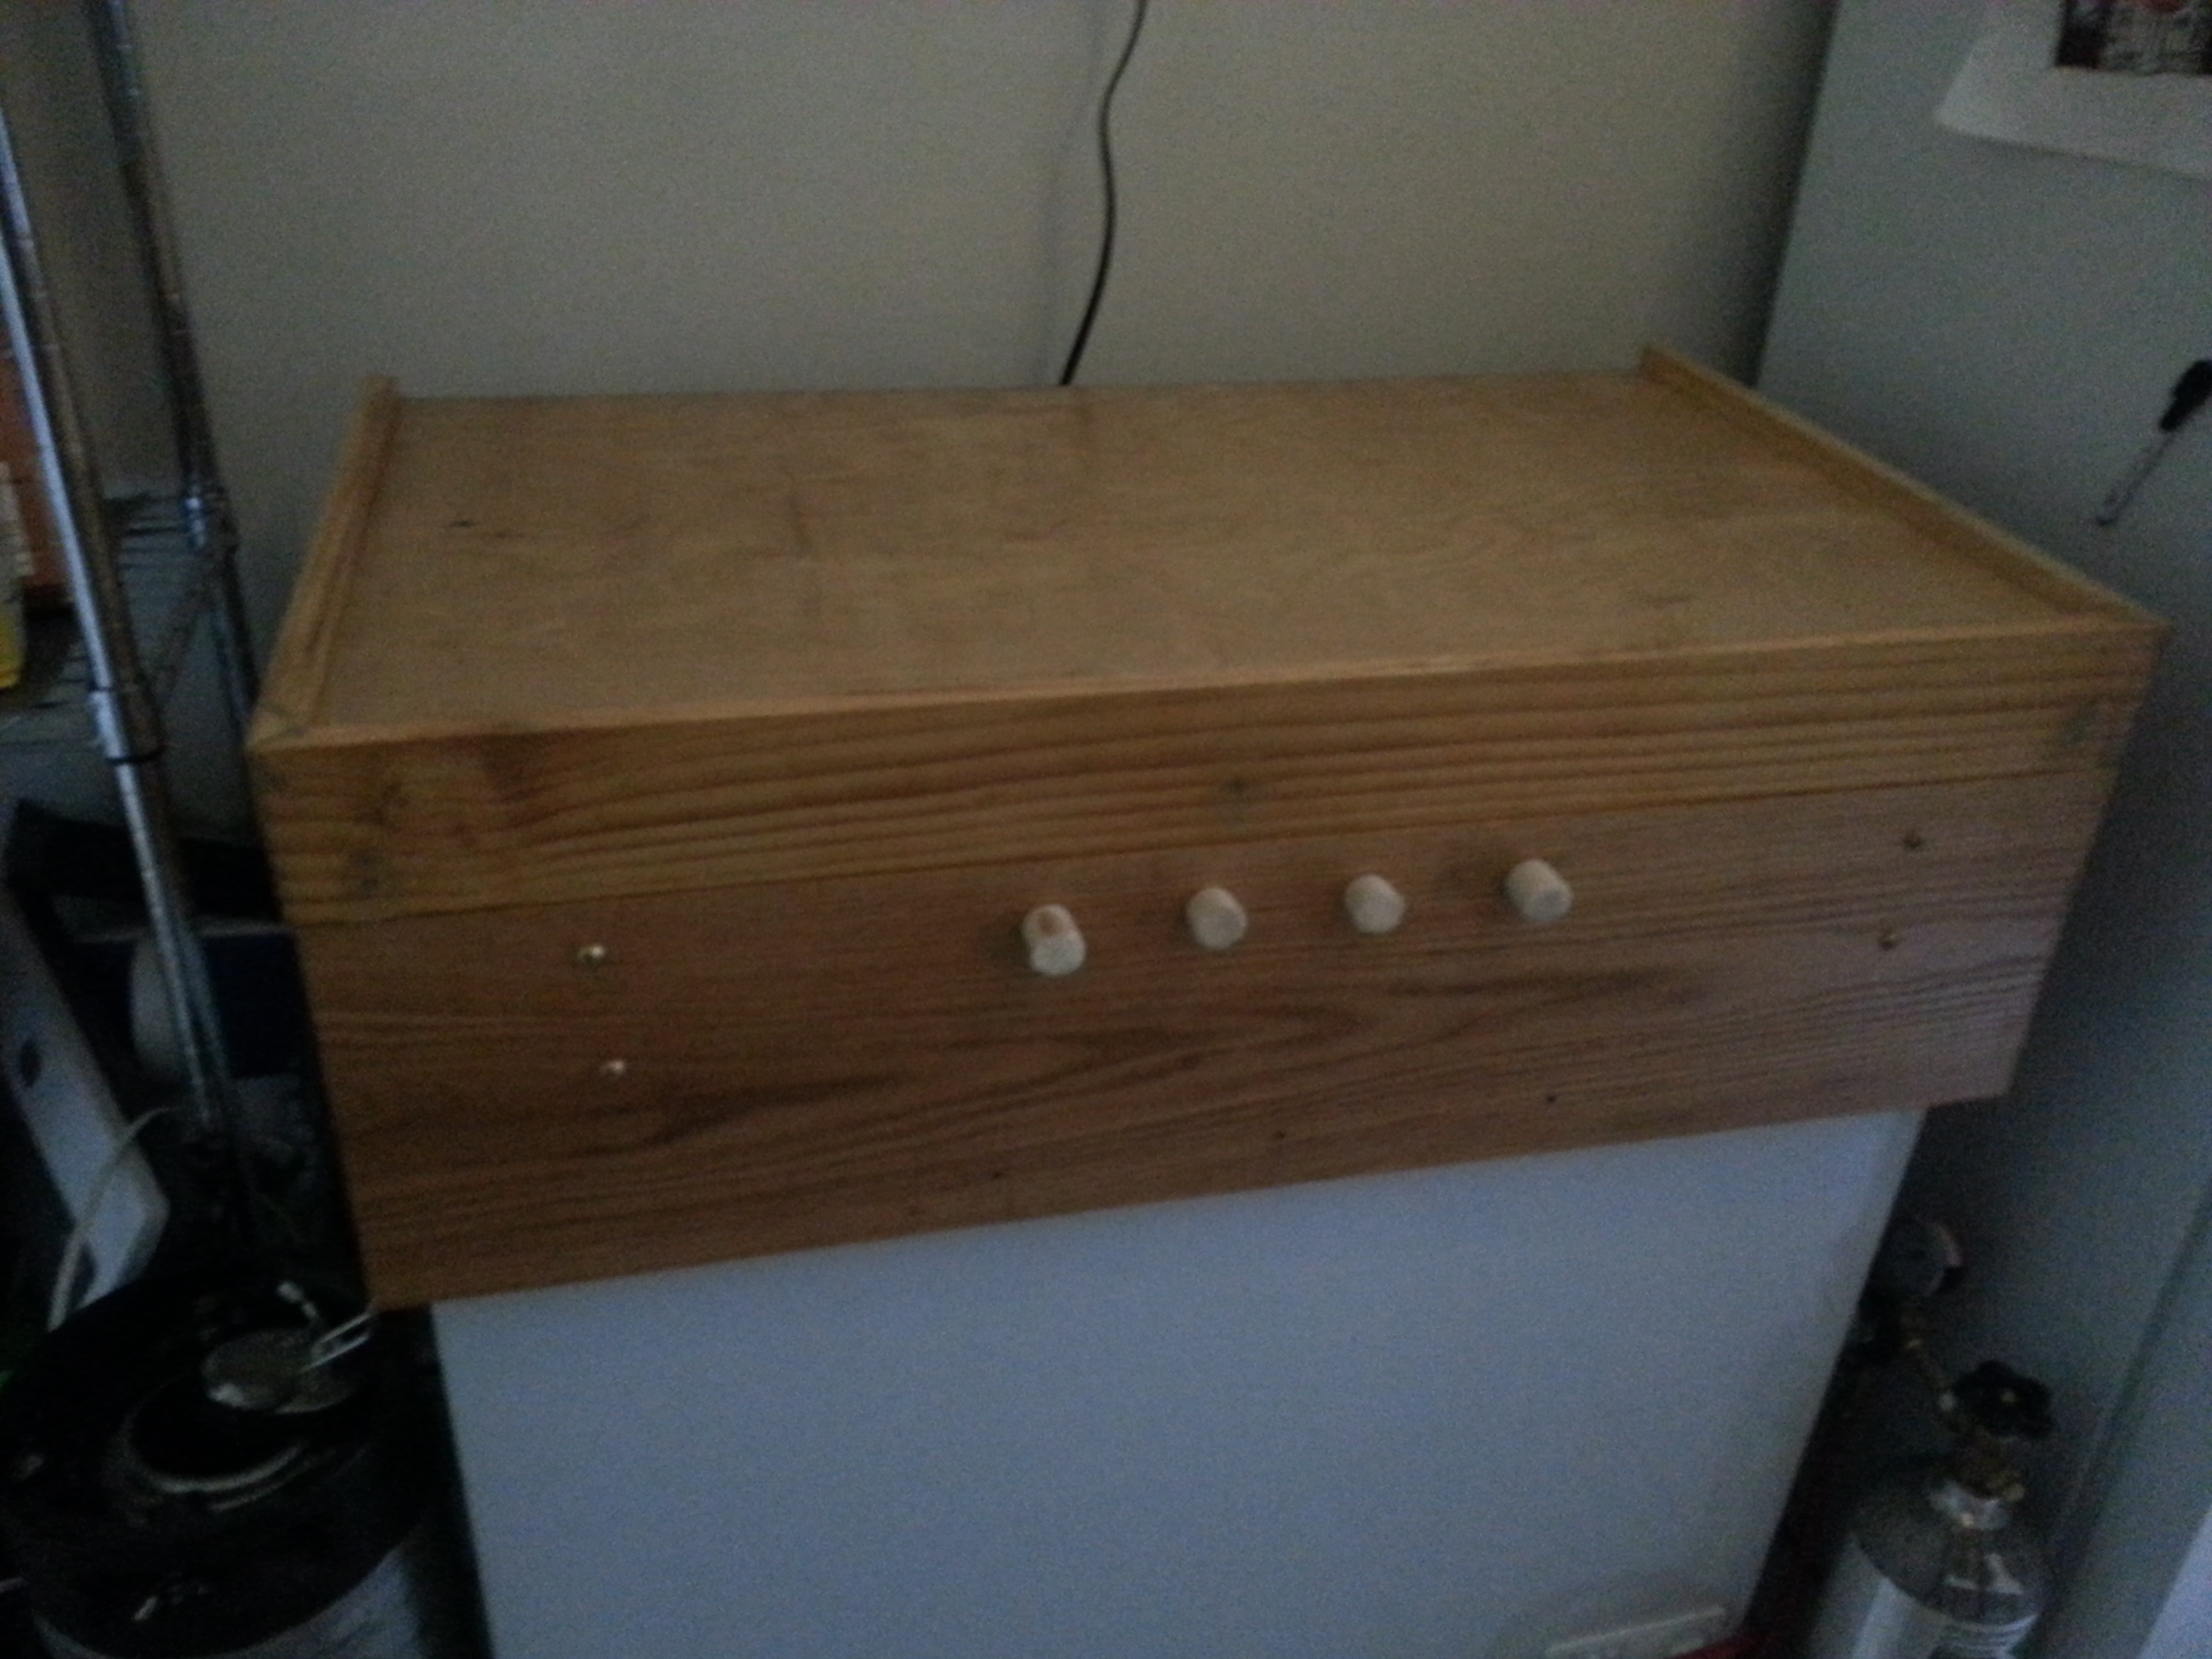
Day 3: Drilling the hole for the future taps / faucets
 It was on this day that I broke one of the cardinal rules of keezer building. I measured the faucet holes based on the width of the 14″ drip tray the I bought from Northern Brewer. This limited me to drilling my 4 holes 3″ to 3.5″ apart, instead of the recommended 4″ gap between faucets. However, I’m not too bummed because I’m confident that when I do buy the Perlick faucets that I’m saving up for I’ll be able to either buy or build my own tap handles that’ll fit within my space constraints…Once I finished marking up all my measurements, I drilled pilot holes for the 15/16 holes that I subsequently drilled with my newly purchased spade bit. Due to my lack of experience using a spade bit the holes didn’t come out as good as I hoped they would, but I’m confident that I’ll be able to fix them as needed once it comes time to put faucets shanks through them. The day ended with me cleaning up from drilling the holes,using wood filler to fill in the area/s around the holes where wood splinters off on the inside of the collar, and laying out my collection of bottle caps on the lid to check my progress towards being able to start my beer cap bar top.
Day Four: Finishing up the collar and lid
 While I was eager to stain the collar and get it back on the freezer, there were a few things that still need to be done before I could do so. First, I had to drill two additional holes, one of the temperature controller probe and one for my CO2 line. Then I filled in and sanded the entire collar as needed. It was during this step that the “curse of the wood filler” returned when I used it to help level out the front right corner that I over-sanded between days one and two. Though I was able to level it out, it wasn’t as level as I would have liked and I wasn’t able to sand it down to the point that it wouldn’t affect the aesthetics of the keezer. However, in the end I swallowed my pride and moved on with the build. It was then time to move into my living / dining room and stain the collar and lid. In order to do so I supported with the collar on 2 of my fermenter buckets and covered the floor with free daily newspapers and used a 3 stage approach to get the color I wanted. First I applied wood conditioner to both the collar and lid, then over the coarse of 2 days I applied 2 coats of stain (Ipswich Pine) to the outer collar, 3 coats to the inner collar, and 3 coats to the lid. To seal the stain in and protect the wood, I applied 2 coats of Minwax Semi-Gloss polyurethane to both the lid border and top and bottom of the collar. Note: I didn’t use polyurethane on the top of the lid because its chemicals are known to react negatively with the clear epoxy that I plan to use for the beer cap bar top…Once the collar was dry I cut and applied rubber-foam weather stripping to the bottom of the inner collar and put the collar back onto the freezer body and called it a day.
Keg / CO2 system Parts List (prices not listed due to their variation between stores and websites): links to the websites that I purchased products from are listed below.
CO2 Side:
- 5 lb CO2 tank (new or used) – I swapped my new tank for a used one.
- Dual gauge primary regulator
- 4-Way CO2 Manifold or Secondary CO2 Regulator Manifold
- Red vinyl gas tubing (5/16″ ID, 9/16″ OD) – 5 feet per gas line
- Gas ball lock connectors
- Flare nut and barb (1/4″ to 5/16″) (optional)
- Hose clamps 1/4″ or 1/2″ – 2 per gas line
Beer Side:
- 5 gallon Cornelius keg/s – I’ve bought 2 so far.
- 2.5 or 3 gallon Cornelius keg – I eventually want to buy one or two for small batches.
- Perlick faucets (optional) – I decided to start with picnic taps to save some money.
- Clear vinyl beer line (3/16″ ID, 7/16″ OD) – 5 feet per beer line.
- 1/4″ swivel nut (for faucets only)
- 1/4″ barb (for faucets only)
- Faucet shank (4″) (for faucets only)
- Tap handles (for faucets only)
- Hose clamps – 2 per beer line.
- Drip Tray
Day 5: Final assembly and pouring my first kegged homebrew
 The last steps of the collar / lid building process were centered around sealing all the remaining gaps with clear silicone caulking. So with the collar already back on the freezer body, I applied the silicone caulk to the gaps between the inner and outer collar and the corners of the inner collar. All the while making sure to skim off all of the extras. I should note that despite doing so I skill found some extra silicone that needed to be removed after it had already dried…Once the collar’s silicone was mostly dry I reattached the lid and repeated the same caulking process for the gaps between its border and top cover and left the lid open so both it and the collar could dry completely. After swapping out my new 5 lb CO2 for a full used one at Bitter and Esters (my local homebrew shop) I assembled and configured the CO2 (gas) system for my keezer (see video) and plugged up the faucet holes with pieces a 1″ wooden dowel that I had cut at a local hardware store…It was then time for me to wait for my friend Sean to inform me that he had kegged our oatmeal brown ale and that I could meet him at Bitter and Esters to pick up my filled keg. That day came on Sunday, August 17th when I met up with Sean and took my keg home and immediately put it in my keezer and set the CO2 to 20 PSI so it could start carbonating. I kept it at that pressure for about 27 hours and then raised it to 30 PSI so that it would have a better chance of being ready to bring to my homebrew club’s (New York City Homebrewers Guild) August meeting the next evening…For more of this story (pouring my first pint and growler), click the above picture and watch the linked video.
In an upcoming series of videos I’ll be documenting my beer cap bar top project and any further additions / improvements that I make to the keezer itself.
Please feel free to comment below or email me with any questions and comments that you have regarding my keezer build and keezer / kegerator building in general.
Keezer products purchased from:
Home Depot Keg Connection Beverage Factory Northern Brewer Cornykeg.com
 On Wednesday September 17, 2014 I headed downtown to yet another special brewery feature event at Blind Tiger Ale House, this time welcoming Almanac Beer Co. to New York City. Upon arriving Katherine, Blind Tiger’s manager still was sure certain if any of the Almanac brewers would be attending this event. However, after sampling some great Almanac sours I was informed that one of them was on his way. That brewer was co-founder / brewmaster Jesse Friedman. After introducing myself I asked him if he’d be willing to step outside for an interview once he grabbed a beer and got settled and he happily agreed to do so…For those who have access to and or have already tried and enjoyed Almanac’s wide range of beers, this interview will give you some great background information about the brewers themselves, their beers, and future plans. If you like sour and or barrel aged beers this video / podcast is also for you (even if you don’t have access to Almanac Beer Co.’s beers). Cheers!